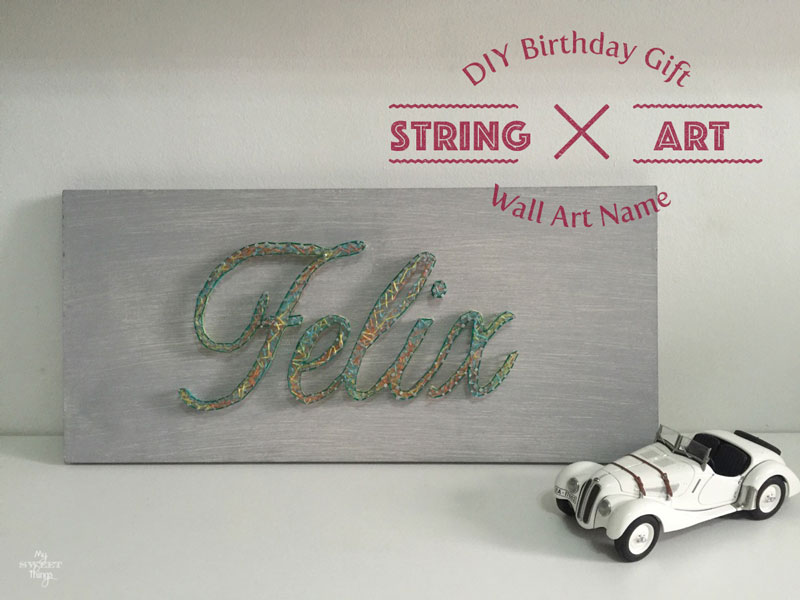
Last week we were invited to a birthday party and we always try to make a DIY birthday gift ourselves. I know, it’s easy to just buy something but we love to give something you can’t buy at any shop, and that it is done with all of our love for that person.
As we still had plenty of scrap wood from our last trip to our favorite “dumpster” we decided to use some. A few days ago I tidied up my craft room and found I had zillions of head nails, most of them came from my mother in law house together with some other treasures, like this old pictures. So it was time to declutter and make something cool for the girls’ friend! And is there something cooler that a string wall art?
We started with this plain and boring piece of wood.
Miss A painted it in some shade of gray and white
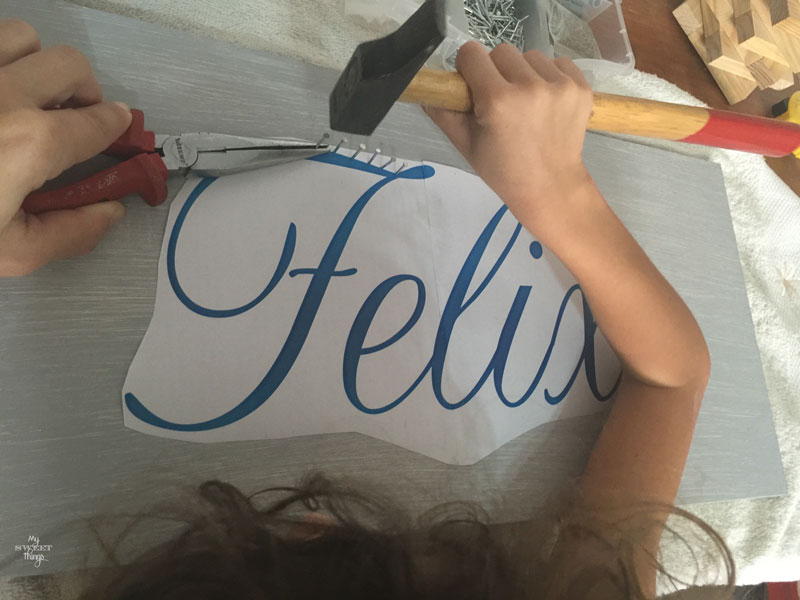
I printed the lettering on two sheets of paper.
It was Miss S turn to begin nailing
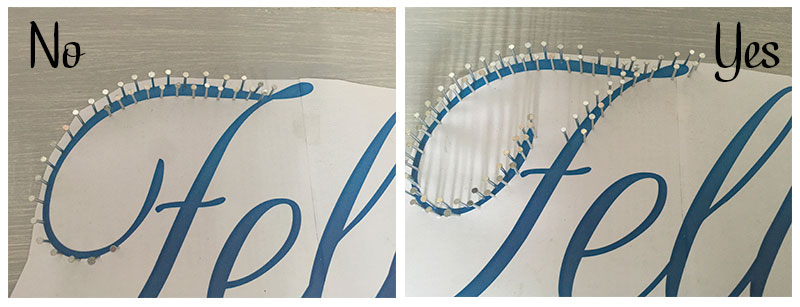
Then we realized something: it is better to nail on paralel than doing one side first and then the other… It is quite difficult to make the inside when you have a full row outside.
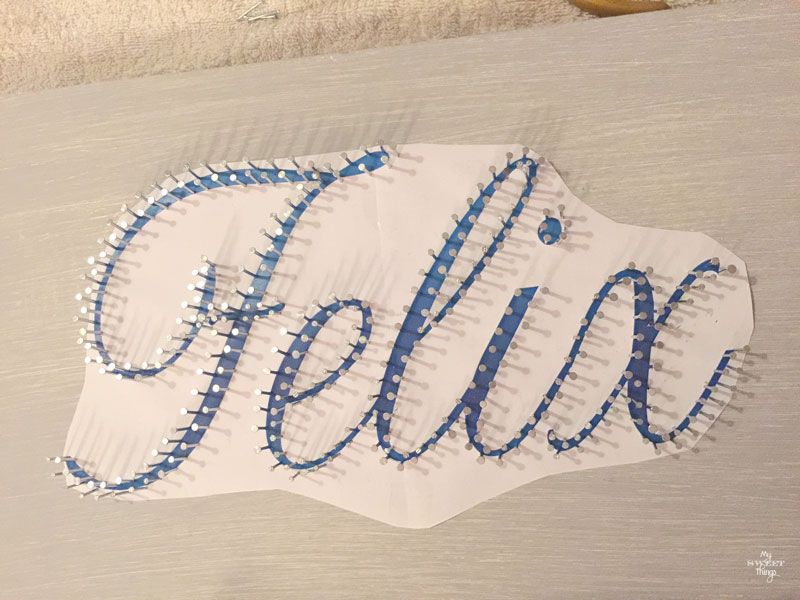
When we had all the head nails on place, it was time to remove the paper. You can help yourself with a tweezer for the difficult areas.
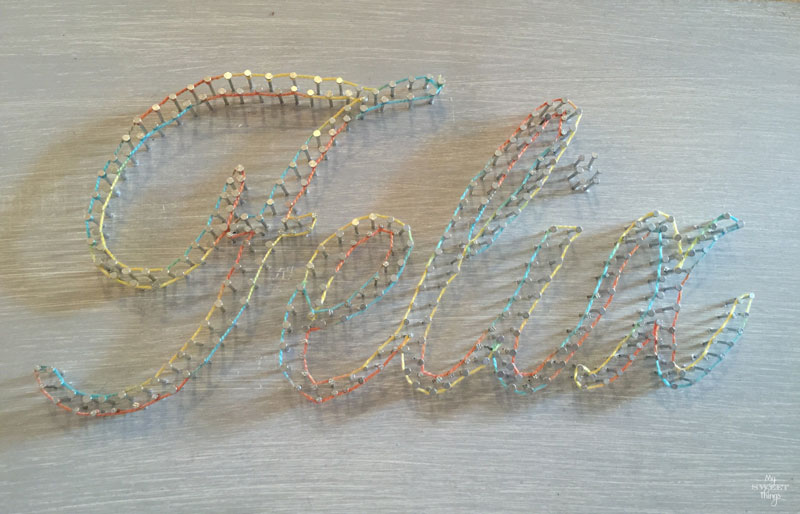
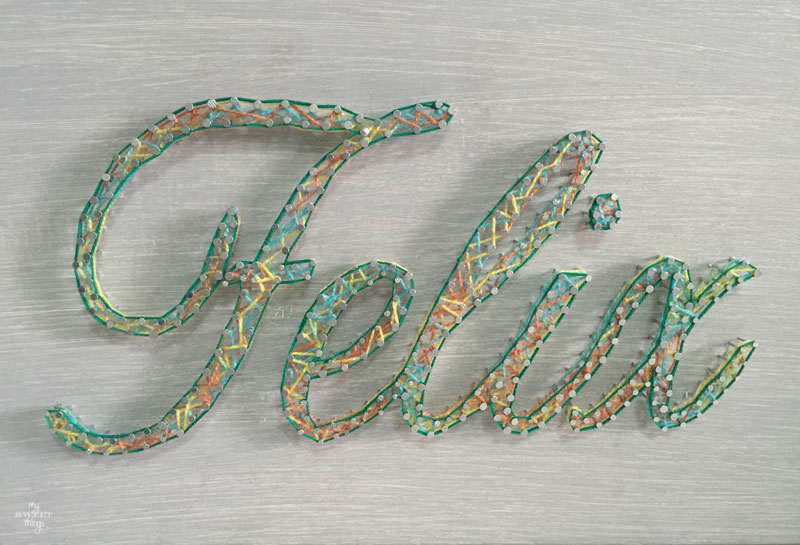
We chose a gradient thread, and did the outlines first. Then the girls took turns and zig zag the thread through all the nails.
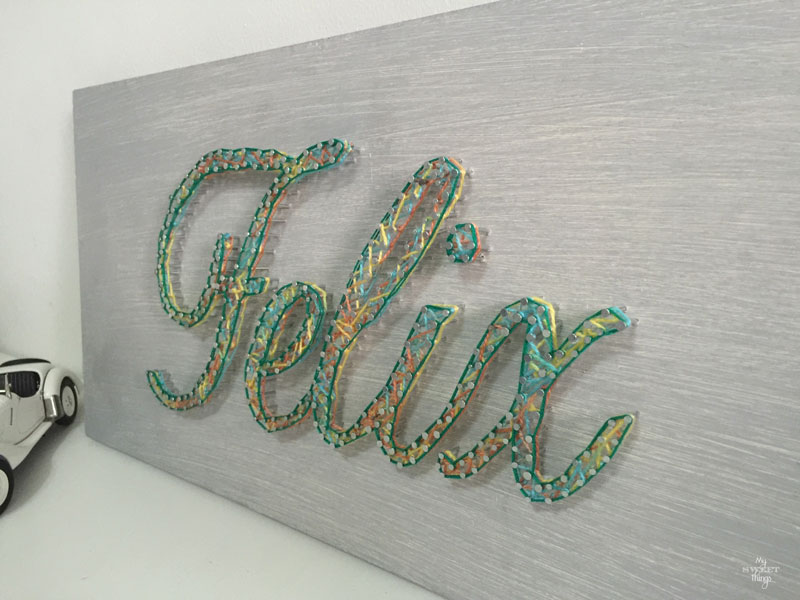
When it was done, we thought it was missing something and decided to add a solid green thread to outline it.
Love how it looks now!
I have to tell that it was a success! When he opened it all the parent were like wow, this is so cool!! My daughters were really excited about the compliments and really happy Felix liked it too.
Isn’t it cute for the kids’ bedroom? No need to buy expensive things or toys that will remain forgot at the end of a drawer, do you agree? Or maybe is just I am in love with string wall art in general… Anyway, if you liked this you may want to check some other projects or another string art gift I made.
Have a great weekend!
Hugs,
Pili
Do you love DIY, recycling, home decor, furniture transformation and all kind of crafts? Then we have the same passion! I would love to share all my crazy ideas and projects with you so I would love if you SUBSCRIBE for my post e-mails.
I also share interesting content on Facebook and other social media, and I would love to hear from you! Not following me yet? Don’t be shy and stop by to say hello. Follow me on FACEBOOK, PINTEREST, INSTAGRAM, TWITTER, +GOOGLE.
Linking up to these parties




Pili, this is awesome!! You and your daughters did a wonderful job on this string art!! This is a great gift and something that Felix can hang up no matter how old he gets!!
Exactly, that is what we thought when planning what to do. I can imagine him as a teenager hanging it on his special room. Thanks for your kind comments 🙂
This would be such an amazing gift to receive at any age! You guys did a great job!
Thank you so much, Erin! He just turned 4 but we would love he keeps it as a special memory, nobody will have another one like his.
What a beautiful personal gift Pili! I love giving personal gifts instead of store bought. They are so original and the recipient is usually very impressed with the thoughtfulness of the gift. This came out stunning. You are a lucky lady to have such helpers.
I believe the same, Mary. It is not about the gift itself, it’s about the love you put on what you are making.
I am really blessed having these two sweet girls always willing to help.
I am bookmarking this to use when my niece has her daughter next week! She will love it! Thank you for sharing at #overthemoon!
Hi, Marilyn! Congratulations on that baby! It is really a special way to show our love for someone.
Thanks for stopping by!
How pretty! I would love to try this with our family name to hang on the wall!
Hi Emma. The bigger you make the easier it is, and it looks so much better.
Thank you so much for stopping by!
I have been wanting to try some string art! This is pretty cool, I love the colors! I am sure he is so excited to receive this gift too. What a fun idea!
Yes, Millie, I was wanting to try it for a long time too! I’m planning more! He was really excited, what else could we ask for?
Turned out well – can you share a source or brand/ model of the darling race car! Thanks!
Hi, Nicole. It was a present from the BMW but it was long ago and I don’t keep the box so I don’t know which model it can be. I only know it’s an old BMW version.
Sorry I can’t be of too many help.
Hi, Nicole! I found it! The model was a BMW 328 Roadster. 🙂
I think this is wonderful. I have a few questions.
Are all the nail heads the same size?
I have studied your posted photos. How do you determine where to place nails?
I think I see a triangle type pattern.
Two nails on outer line and one on inner line. Inner nail is between the two outer nails? I hope I am making my question clear.
I have not attempted String art “yet”!
Is there a specific pattern to how you loop around the nails? Outline entire name and then crisscross to both sides?
I appreciate any help you can give me! I really want to do this
Hi, Mimi. I will try to reply to your questions the best I can:
– The nail heads are most of them the same size, but when I bought them I didn’t realize the letters weren’t too big so in some places I used smaller nail heads. This is my first string art project and I think for smaller designs smaller nail heads work best. For bigger designs, bigger nail heads.
– I tried to place the nails evenly on the same row. At first, I used my little finger as a measure but after some I just did it eyeball. I tried not to place them parallel, so maybe that’s why you saw that triangle pattern.
– There is no specific pattern to loop around the nails for me at the moment. I have seen beauties on the blogosphere and I think they really follow some pattern but I don’t know what it is. I just try and if I like I keep moving, if I don’t like I take the string out and try some other nails. What I did here was outline the name first and then crisscross, and finished outlining with solid color again.
I think it’s more difficult explaining and trying to understand it than doing it, so I am sure you will do a great job with yours. I also think that practice makes perfection, so I will trying more too. I you make yours, I would love to see it!! I have a special place for it here: https://sweethings.net/readers-projects/
Thank you so much for stopping by, I really appreciate your visit!!
Thank you! I think you explained very well!
Hi Pili. I also love the colors. You did a wonderful job. I remember way back when string art was popular. It seems to have picked up again. I like the idea of using string art for someone’s name. Who doesn’t like a personalized gift!
Right, Darlene. I remember when I was in school about 30 years ago we made a little fish as a gift for mother’s day, and haven’t seen anything else in all this time.
Felix liked his present because it had his name on it and felt special.
How fun! I’ve seen string art before, but I thought it was hard. This is a great gift idea!
No hard at all, Keri. A little time consuming but that’s all. I also think is a great gift idea 🙂
I’m not a very crafty person, but this is about attention to detail and I am good at that. It was really clever and looked great!
You’re right, Leanne. You don’t need any craft skills for this. I even think organized brains of non-crafters would make better results.
Thanks for stopping by!
This is amazing!! Great job.
Thanks Pili for sharing this with us at Cooking and Crafting with J & J!! Enjoy the rest of the week and weekend.
We hope to see you again
Julie xo
Thank you so much, Julie! I enjoyed stopping by your party!
Fantastic and a great, thorough tutorial. Thanks for linking up to the Talk of the Town party!
Thank you so much, Becky! I’m honored to have you here, welcome 🙂
This is such a cute idea! And a great gift! I have to try this for the next birthday present we need 🙂
With little kids there are birthday parties all the time, at least for us, so if you are like us you will be making one soon.
Thanks for visiting!!
Pili, This turned out adorable! What a lovely gift for Felix to treasure for years to come! Pinned and tweeted 🙂
Many thanks, Laurie! His parents hung it on the wall and they told me he is really proud of it, he shows it to all his friends.
Have a lovely weekend!
Love love love this! Thanks so much for sharing with us at #merrymonday!
Glad you like it too, Lindsay! Thanks for stopping by and enjoy your weekend!
I have always loved how this project turns out!
Thanks for joining Cooking and Crafting with J & J!
Amazing what a bit of thread and head nails can do, right? Thanks for visiting!
Yes, it is cute for a kids bedroom and so thoughtful too. Thanks for sharing with us at Merry Monday. I like the idea of crafting gifts.
Thanks, Shirley! I also prefer the idea of handmade gifts 🙂
This looks wonderful Pili. You and the girls did a great job. No wonder Felix and his family liked the gift. It’s lovely and truly unique.
Sally @ Life Loving
#LifeLovingLinkie
String art is so fun to do! It is like a meditation, hammer nails one by one, focused on what you are doing and nothing else.
Thanks for visiting Sally, I really appreciate you stopping by each week!
Ok so I’m stalking your blog a little bit now haha.
It’s right up my street though – love DIY and crafts and think this is a fab idea!
Great post #lifelovinglinkie
http://www.numbertwentysix.co.uk
KT xo.
Haha, glad you stopped by and had a look at it! You can make any design with string art and it will turn out cool for sure!
Have a wonderful week, Kirsty!!
What an incredible birthday gift!! I am sure Felix will enjoy this for many, many years. It was very thoughtful and extremely well put together, I’m sure the girls enjoyed doing this with their mom. And I’m sure they told you that you were the best mom ever! It’s so cool how creative you are and that you are teaching your girls that they can give extremely thoughtful and well put together gifts that mean as much to them as the one receiving it.
The girls enjoy doing things with me, but this is something they especially like and I can understand why. I remember doing my first string art when I was a kid, and being able to use a hammer (which usually adults only use) was really exciting!
I really like this idea and my head is spinning with ways to use it. Thanks for sharing!
Leigh, you can make anything you can imagine with string art, and it will turn out cool for sure!
Thanks so much for stopping by!
I’m sure Felix loved his birthday gift and appreciated that it was made lovingly by three pairs of hands.
Hi, Linda!! Yes, Felix loved his gift and the girls were so proud of being part of it. That’s the best about DIY!
Have a wonderful week!
I LOVE this! What a pretty, personalized gift for a little boy! And definitely doable with your great instructions! I featured it, come see it tonight!
Thanks for sharing at my craft party! Hope to see you again tonight (Thursday) at 7pm EST.!
Thank you so much, Denise!! Glad you like it too!
Pili, that looks fabulous! Thanks for sharing at Five Star Frou-Frou this week. Love, Mimi xxx
We’re hooked on string art, Mimi!! Any remedy for us? 😉
Privacy Overview