Hi, my sweet friends!
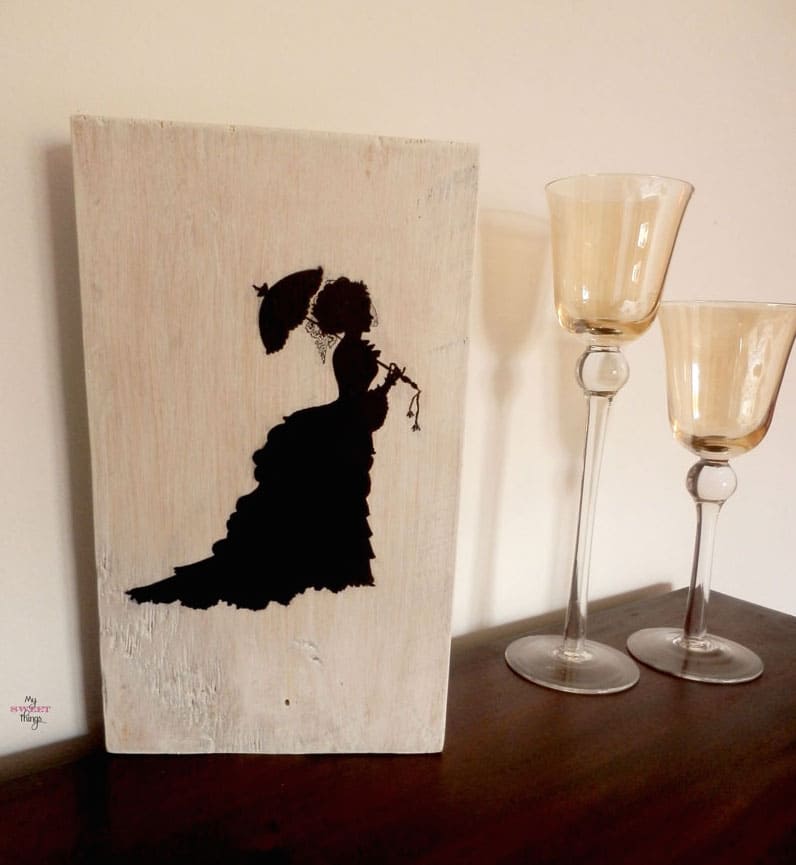
Keeping up with decorating for little money, I’ll show you a cute wall art that cost nothing, as I used some materials I had on hand already.
To do this we will need the following:
– A piece of wood
– Printer
– Plain white paper
– Scissors
– Glue / latex / ModPodge (choose one)
– White paint and water (optional)
The first thing to do is to decide if you want natural or painted wood. I white washed it mine (white paint and 50% water) and let it dry.
Meanwhile, I looked for a silhouette I liked and I found this. I do not remember the source, so if anyone knows the author please let me know to give credit.
I printed it and cut out near the edges of the image. Then I applied ModPodge on to the printed side, the black one, and glued on wood.
Here it comes the hard part … wait. It must dry for at least 5 hours, so I usually do this at night and do not fall into temptation.
Once it’s completely dry, we moisten a cloth and rub the paper with. Little balls of paper will be coming off, and the image will be sharper. My recommendation is to rub a little and let dry. Rub a little and let dry again. Do this until you have a nice and clear image.
When no longer paper pulp comes out, you can wax the image and then varnish all to protect the whole piece, or just leave it unvarnished for a more rustic look.
You can check the tutorial on how to transfer on wood with pictures here.
What do you say? Isn’t it a nice touch for the house with hardly any cost?
Have a wonderful day!
Hugs,
Pili
Do you love DIY, recycling, home decor, furniture transformation and all kind of crafts? Then we have the same passion! I would love to share all my crazy ideas and projects with you so I would love if you SUBSCRIBE for my post e-mails.
I also share interesting content on Facebook and other social media, and I would love to hear from you! Not following me yet? Don’t be shy and stop by to say hello. Follow me on FACEBOOK, PINTEREST, INSTAGRAM, TWITTER.
Featured at:


Pili, this is soooo beautiful. I love opening my e-mail in the morning and getting all these beautiful surprises! And you know so many techniques.
Thanks Mary! I love to do pretty things at zero cost
So pretty! Thanks for sharing!
Hi, Jessica!! Thanks for stopping by, my pleasure!
I love your posts Pili they are so clever especially as I am hopeless at DIY. You inspire me. Thanks for sharing with us at #AnythingGoes.
You’re always so kind, Sue. Really glad I can inspire you.
She’s lovely. I’ve pinned her so I can find her again. TY
Many thanks, Stella!
This is adorable! 🙂
Thanks for joining Cooking and Crafting with J & J!
Many thanks, Jess! You’re so kind!
This turned out so cute, and I love how thrifty (and easy) it was to create! Pinning for sure! Thanks for sharing this with us at Merry Monday! 🙂
You’re right Christine, thrifty and easy, the kind of projects I love most! Thanks for stopping by!
Great Project! Love how it turned out! Have a great week 🙂
Many thanks, Brenda! Have a great week too!
PINNING!
This looks super lovely – thanks for sharing such a great idea! Love art.
Glad you like it, Sagan! Thanks for stopping by and pinning!
I love this idea! It’s so simple but so very cute! Thank you for sharing!
Thrifty and easy, the projects I really like to do! Glad you took time to comment!
It looks so nice. Classy and with style.
I love your ideas, Pili.
Thank you for joining #tiptuesday .
There’s no need to spend a lot of money, sometimes simple things looks nice
This is such a cute little addition! And I love the cost! Thank you for sharing with Dream. Create. Inspire. Link!
Cat
Hi, Cat! The cost is what I like most of it!
Thanks for stopping by!
I love the method you used for this. I’m going to give it a try. Thanks for sharing at Snickerdoodle! Pinned and Tweeted.
It’s simple Beverly, the more you try you get better results
Wow! Simple and easy, but it looks so pretty in your home. I love the rough texture of the wood it makes it even more interesting! Love it!
Yes, I think this wood gives it character. Love the projects I can recycle things at no cost
That’s very interesting how you did that! So you basically transferred over the ink to the wood and took off all the paper. Neat trick! It looks really great. Thanks for sharing with the #FFBH. 🙂
Yes, that’s basically how you do the transfer. And you can use anything to adhere the paper: paint, varnish, glue, ModPodge… anything you have on hand
What a clever idea! I can imagine using this technique with different images for holidays, too. Thanks for sharing…pinned!
Yes, Leigh, lots of projects to do with this technique. You can find a graphic tutorial here: https://sweethings.net/how-to-transfer-on-wood/
Thanks for stopping by and welcome to my crazy world!
That is fabulous. Thanks for linking up with us this week.
Thank you very much! See you next week!
a Great addition to any home! Thanks for sharing at the #HomeMattersParty
Many thanks for your comments and visiting, Vickie!
Love this and mod podge! 🙂 This is lovely and I am so glad that you shared this on MMM!! See you next party!
Cathy
I love mod podge too! Every trip I make to the US means I bring some with me back to Spain!
Hi Pili,
I really like how you kept it simple and what a neat method you used to transfer the image on the wood. Thanks for sharing at Talented Tuesday.
Cheers,
AJ
I always try to keep it simple, many times less is more!
Pili, I’m here to let you know that this post was the most clicked of last week’s Tip Tuesday and it’ll be featured today.
I really appreciate it, Debbie! Love to be part of the party
This is so cute!!!
Thanks so much, Holly!
I actually did a lecture on transfer techniques for high school art teachers. It was really fun trying different ones.
It sounds really fun, Alissa! I love experimenting new ways to do things
Good Morning Pili!! Just popping in to let you know your post has been picked as a feature at the Welcome Home Wednesday Link Party! Stop by this morning to see your feature and link up! Don’t forget to grab your “Featured Button” too!
Many thanks, Lisa!! I stopped by to link up and saw the feature!! So excited!! I placed the button proudly on my post 🙂
Hugs,
This is so very lovely, Pili! I want to redo a transfer I did awhile back and use this technique! I love using ModPodge! Thank you for sharing at #Omhgww! It’s always fun to see what you are up too, and it’s a pleasure too co-hosting with you! Have a beautiful week!
Hi, Christine! This technique is really neat, and fun too. If you need a graphic tutorial you can have a look here: https://sweethings.net/how-to-transfer-on-wood/
Thanks for stopping by! Love to be part of the party and co-host with you! Enjoy your week!
Pili, it’s beautiful indeed..I want to have one ar home as well..Always love all the vintage look 🙂
Many thanks, Indah! You can have one, it’s really easy to do!
Pili I love the olde worlde look of this project. So pretty. Thanks for sharing at Five Star Frou-Frou this week. Love, Mimi xxx
I love it too, so vintage… Thanks for stopping by, Mimi!
Hi Pili. This is awesome! I love decor or crafts that can be made with items on hand. Nice to co-host with you at #OMHGWW.
Many thanks, Donna! I try to use what I have on hand most of the time. Glad to co-host with you, we’ll see soon at Two Uses Tuesday 🙂
How neat…..Thank you for sharing with us at #JoyHopeLive!
Thank you so much, Mary!
It looks very sophisticated & so simple! Love it! Thanks for linking up to #frifree4all. Don’t forget to tweet out a link to this post and tag me in it & i’ll RT 🙂
Can’t be simpler! I’ll try that about Twiter, I’m still learning!
Privacy Overview