Hey friends!!
It’s again the end of another month, and you know that means time for our Int’l Bloggers Challenge!! I can’t believe we are nearly in June, this winter has been too long and spring has been almost non-existent, geez!
Sorry, if you are new to the blog maybe don’t know what this Challenge is so let me clarify. Some friends around the world teamed up to bring you each month different traditions or crafts we do.

Last month we decided to use “weird things” as planters and this month we thought about using wire to make something. This is really fun because all of us have different ideas!
Well, back to the weather and my project, I had enough winter and as soon as the rare sunny and warm days began to delight me with their presence, I wanted to spend some time outdoors, taking care of my plants and herb garden.
It turns out that some months ago I saw on the internet how a guy made his own composting bin to recycle all the veggies leftovers and after a time they were transformed into soil for the plants.
How cool is that? Instead of throwing away more rubbish I could have free soil, and FREE is something I like… a lot.
This guy is called Toni and he has a YouTube channel where he explains lots of interesting things about composting, herbs and garden. That tutorial is in Spanish but it’ll be easy to follow as all the process is very simple.
Our little DIY worm compost bin worked great but I found out it was too small, and we still had to throw away a lot of veggies. The only option was to build a bigger one, and Pinterest came to the rescue.
How to DIY worm compost bin for vermicomposting
You don’t need expensive or difficult to find materials to build your own DIY worm compost bin. I will provide some affiliate links for your convenience.
- Wood
- Wire
- Pliers
- Staple gun
- Glue
- Nais (or screws)
- Plastic container
- Worms (Californian red worms)
Simple, right?
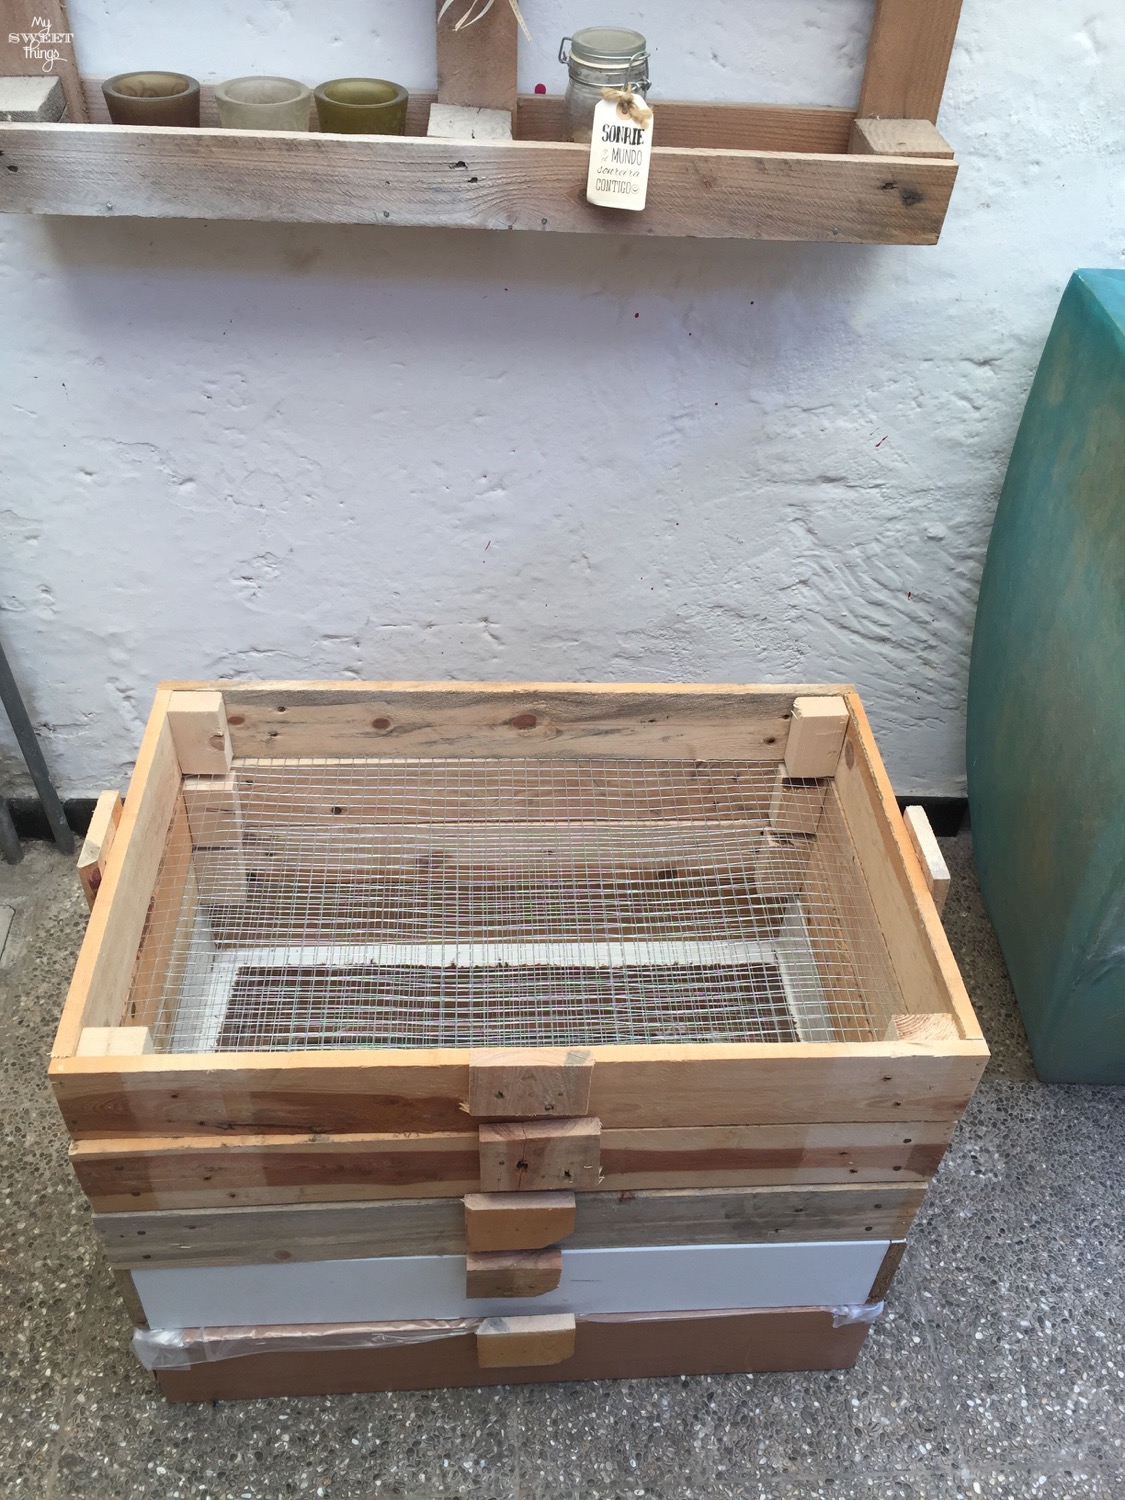
The idea came when I found two drawers curbside that happened to be almost the same size.
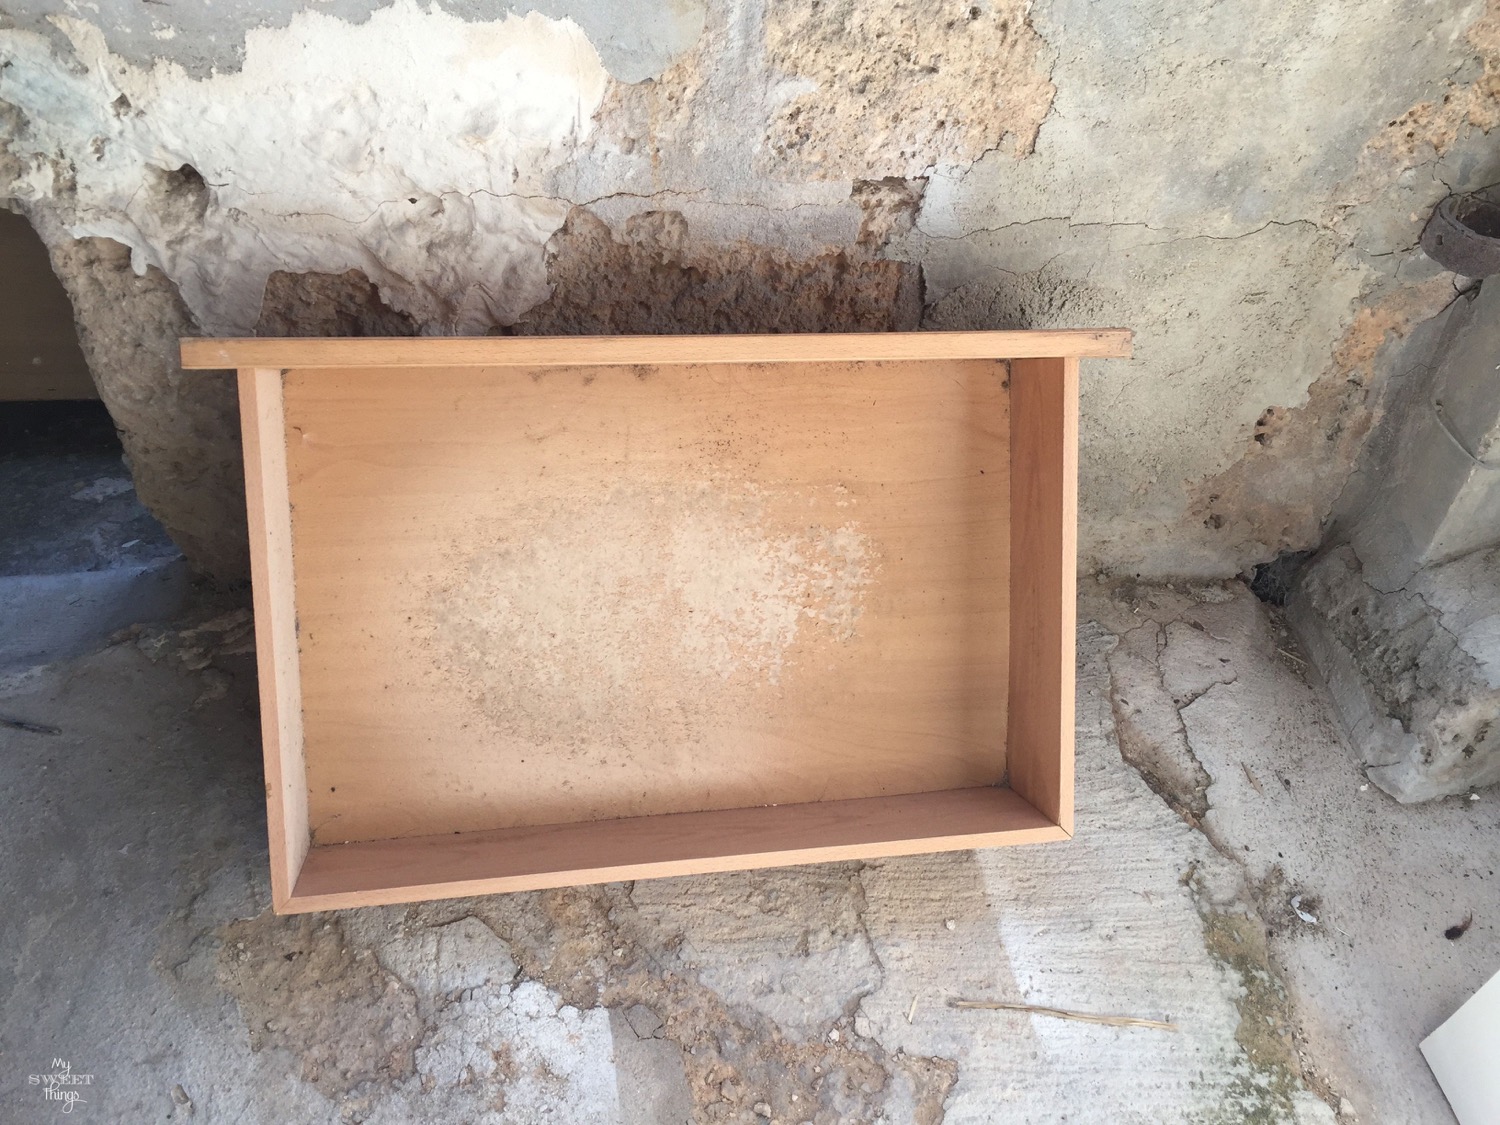
The smallest one would be used for the bottom, to collect all the leachates. If you have never heard that name before don’t worry, you are not the only one 😉
My hubby was as excited as me with our DIY worm compost bin, so we worked together on it.
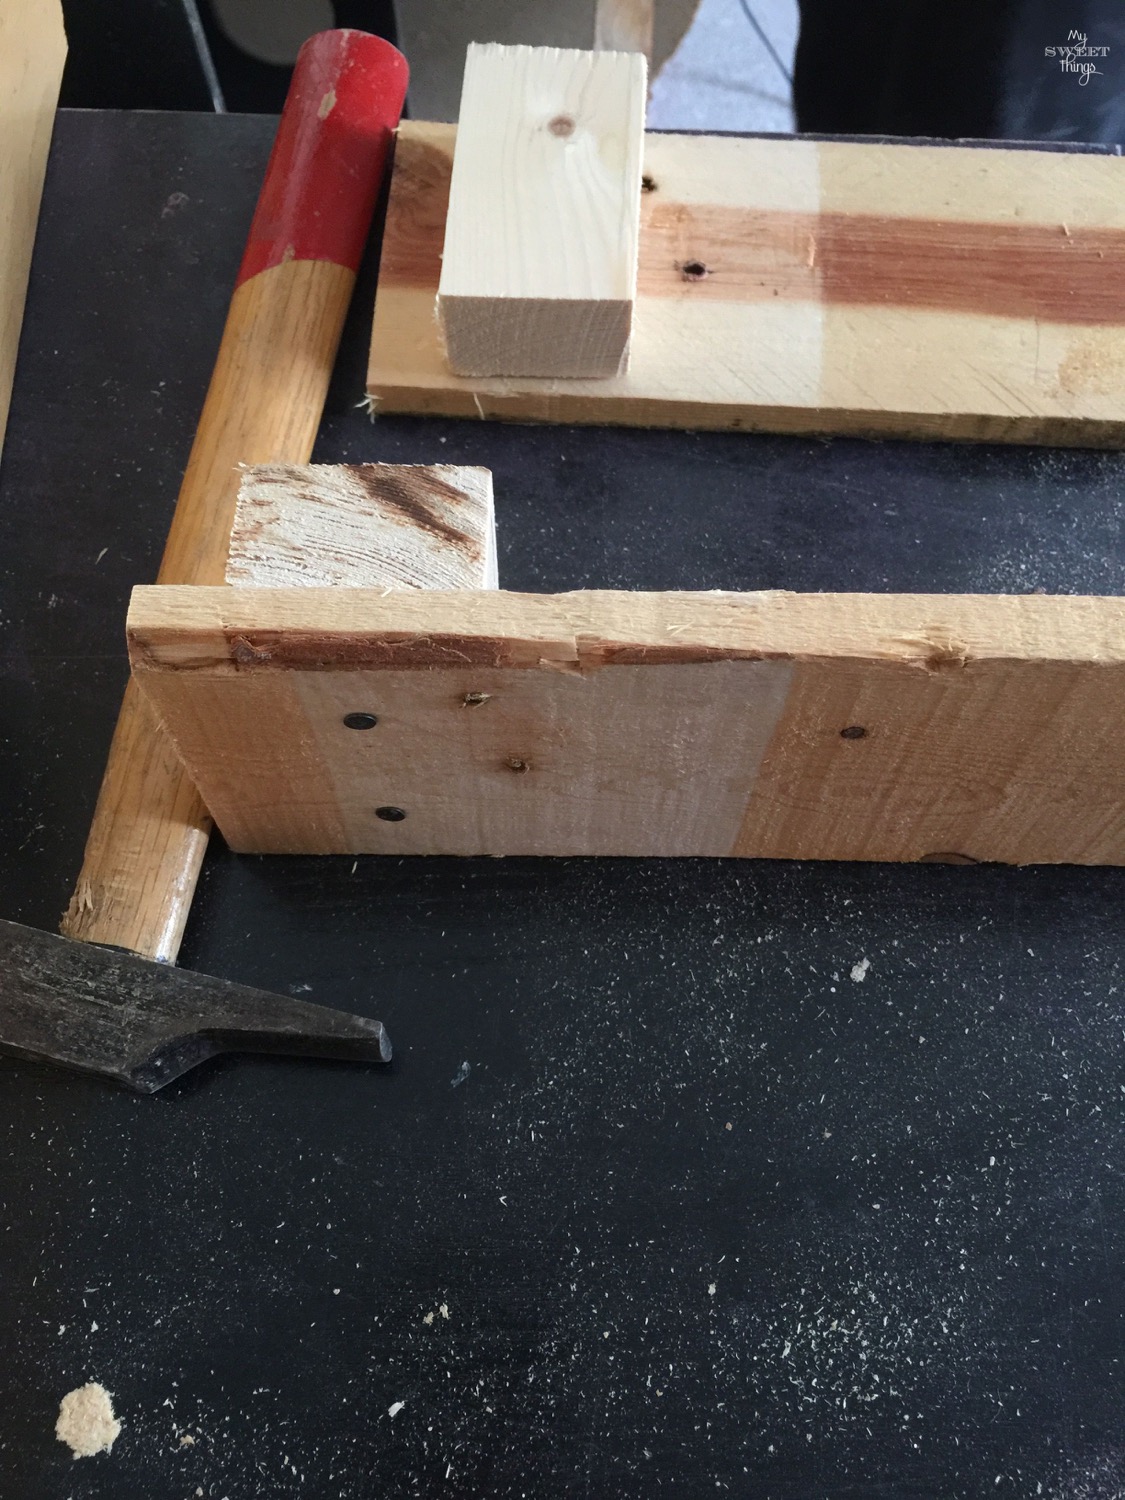
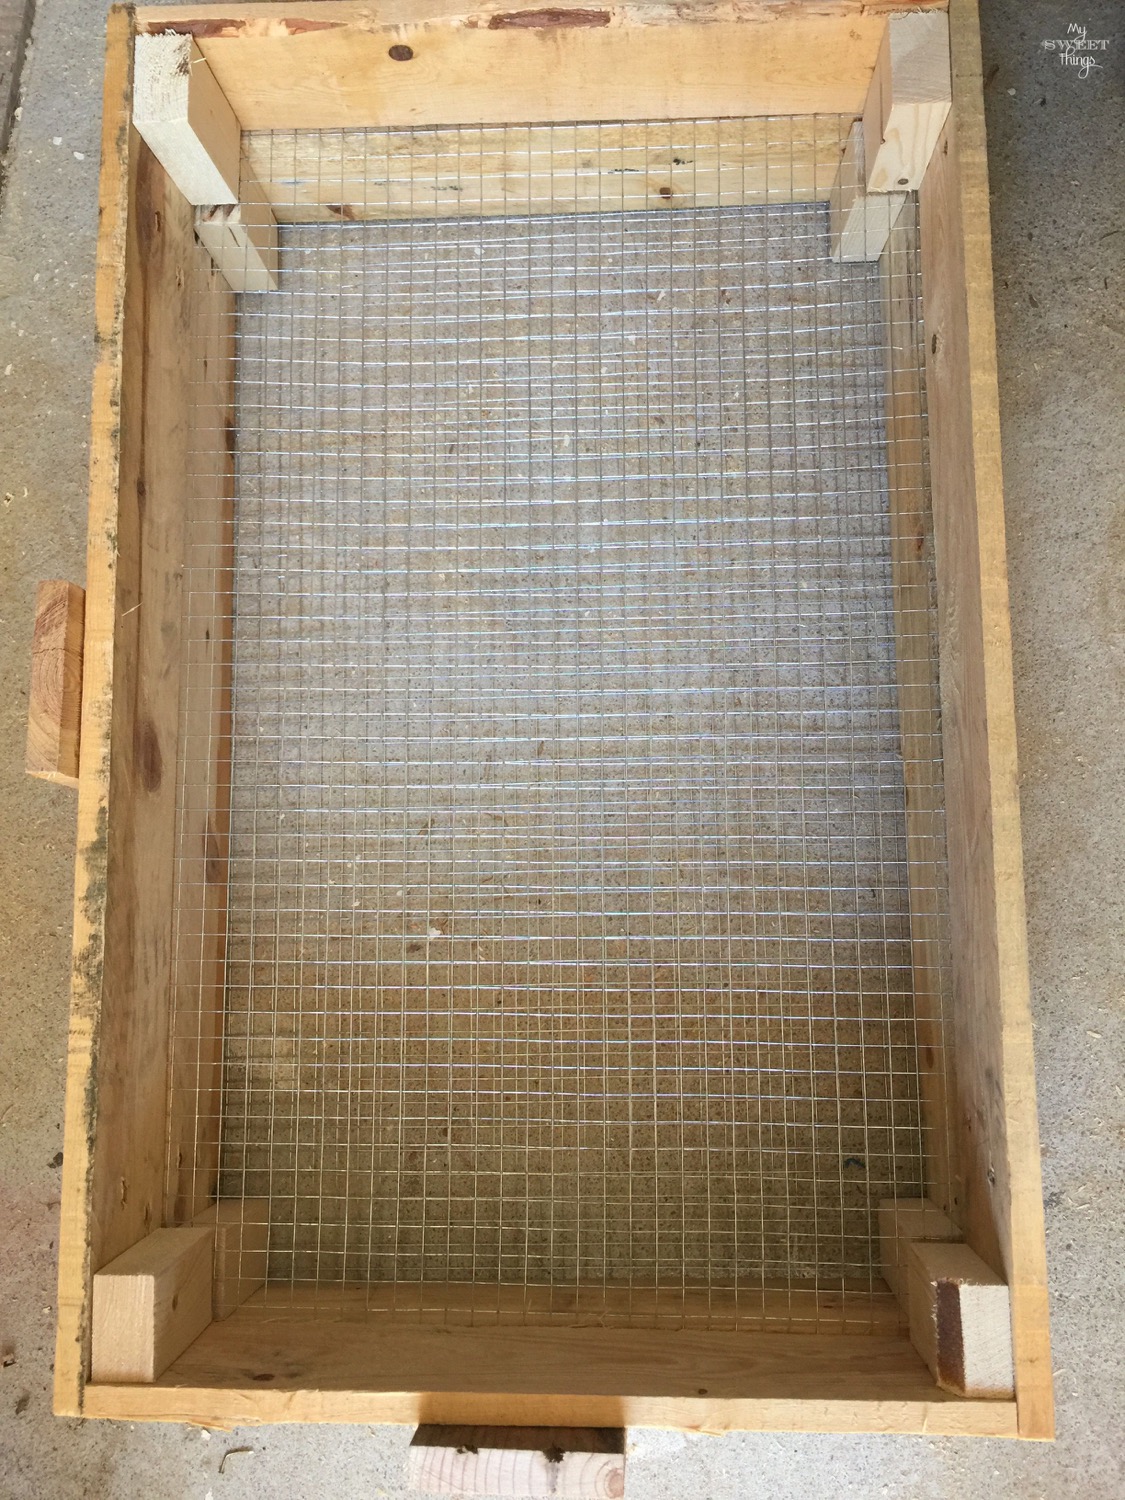
The first thing was to measure the drawer and cut some pallet wood we had laying around to build more “boxes”.
We used some scrap wood and glue to nail everything. We did the four sides and left the bottom open.
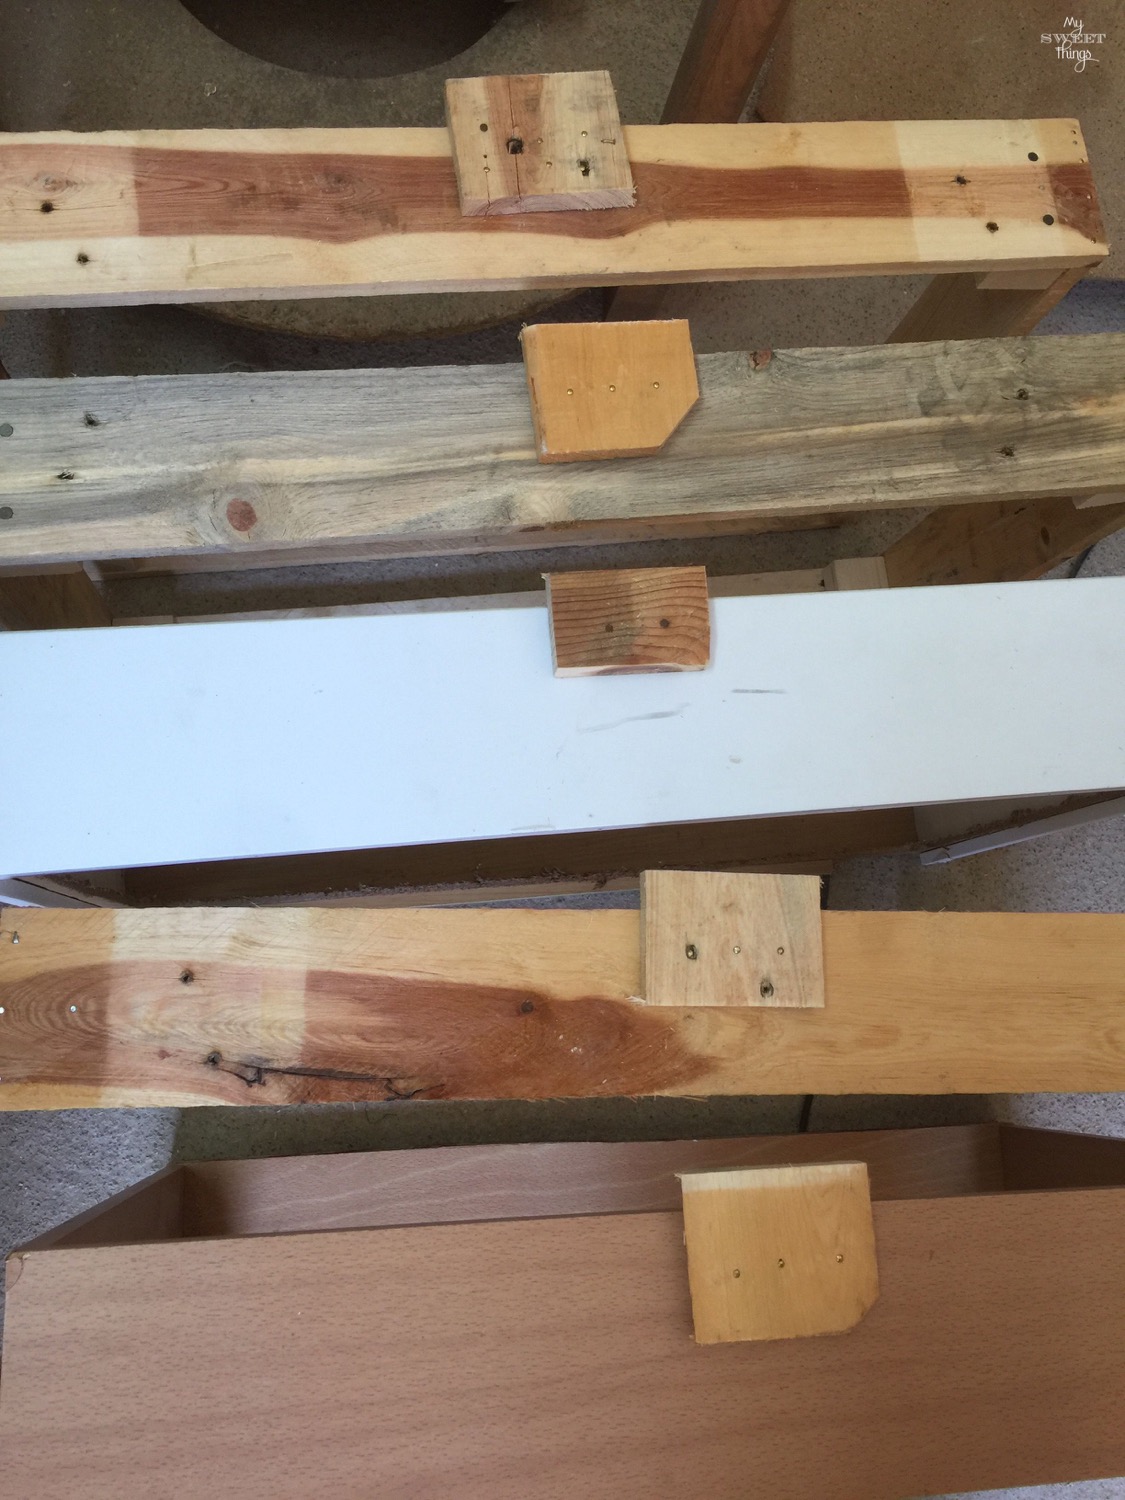
When the boxes were done, we stacked them up to see if they fit. They did and we decide to use more scrap wood to nail it on top of each side to prevent them from falling apart.
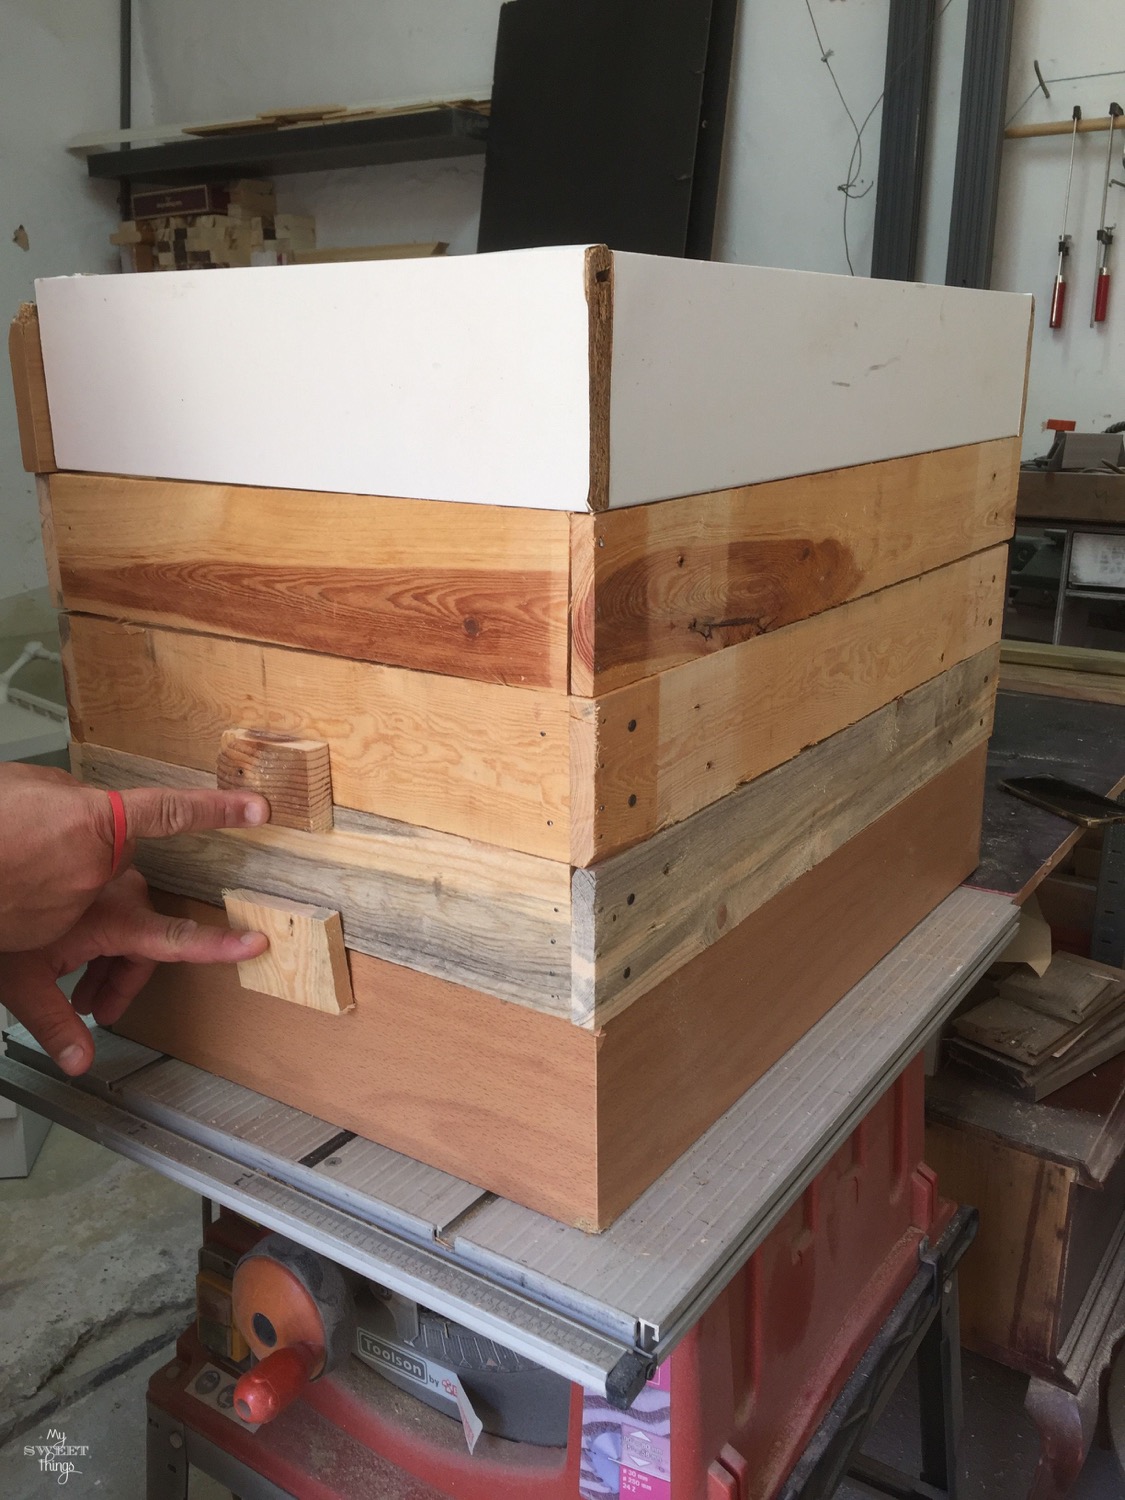
Kind of this
The only thing we had to buy was the wire. We measured and folded to make it easy to cut it.
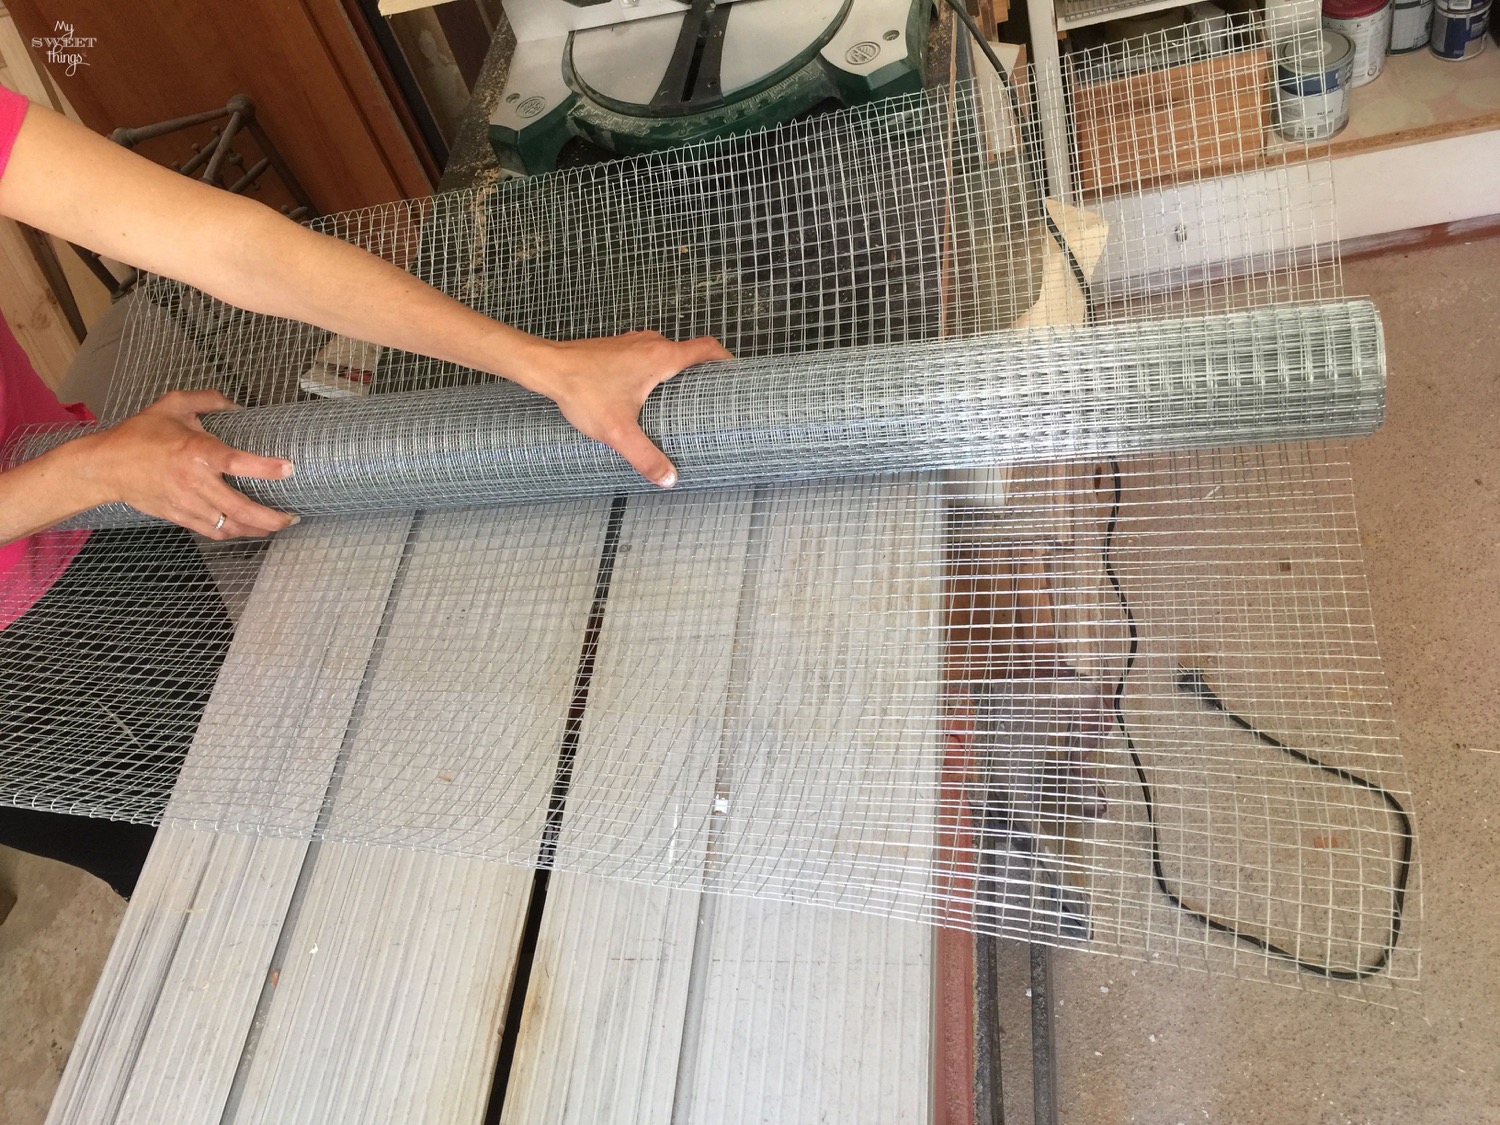
While I was holding it to prevent it from unwrapping and causing a big wire mess, hubby used pliers to cut it.
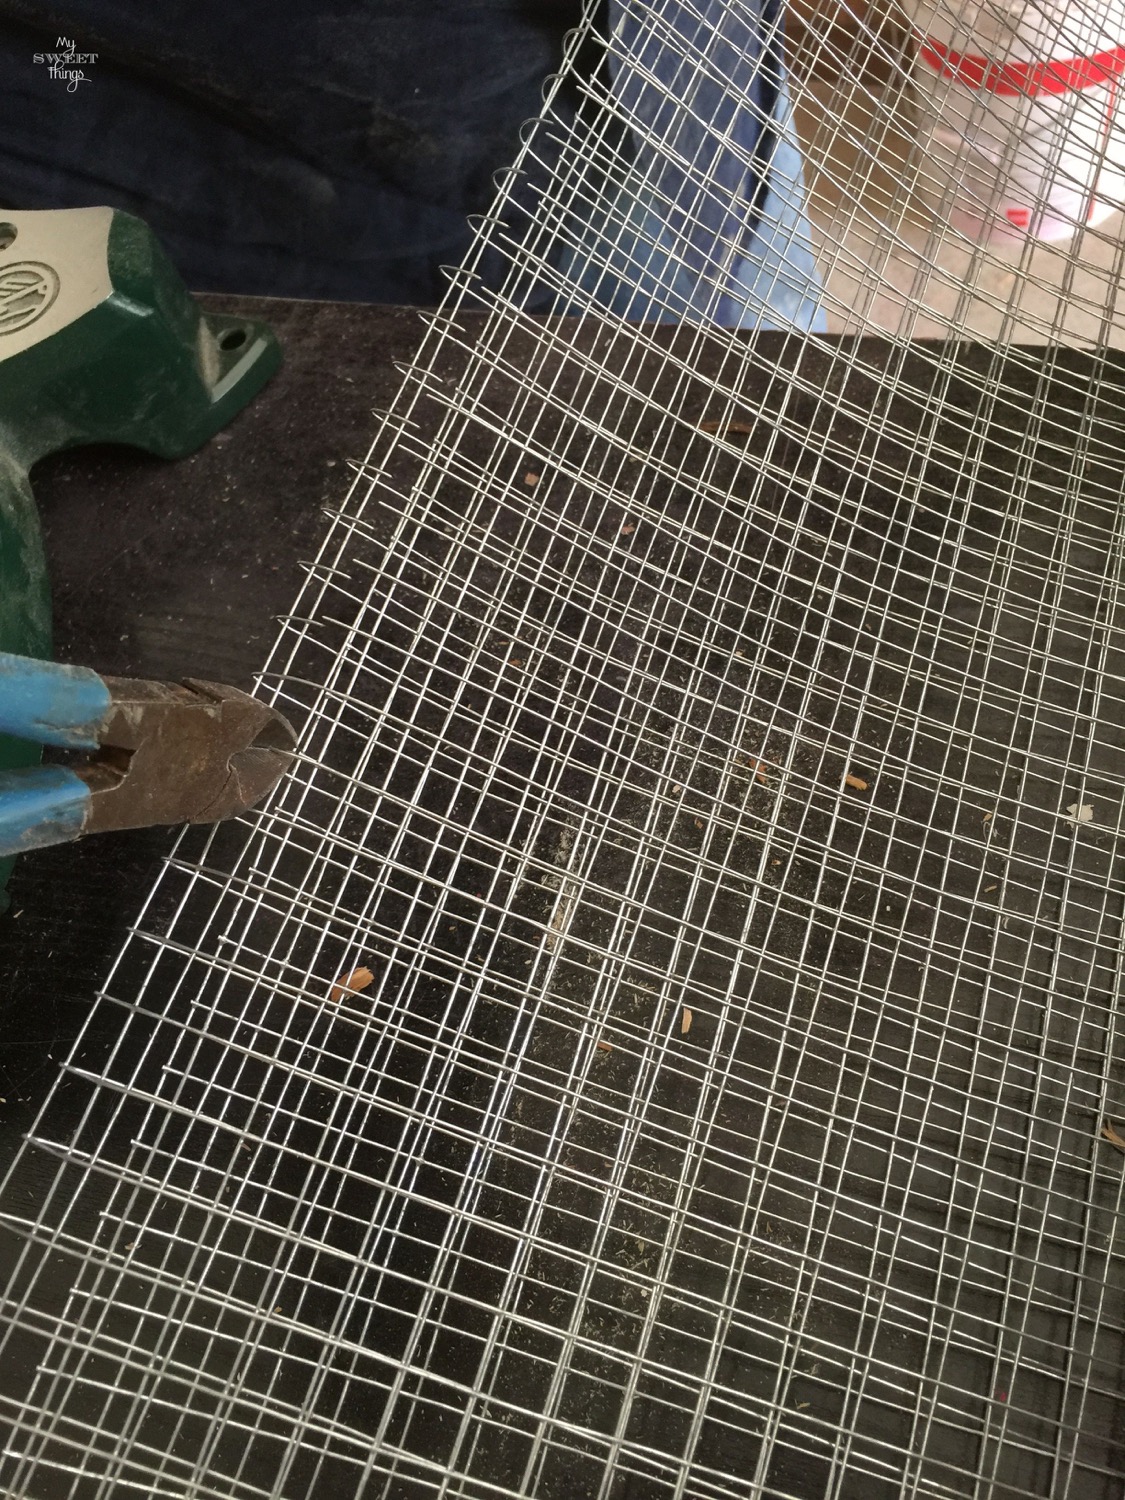
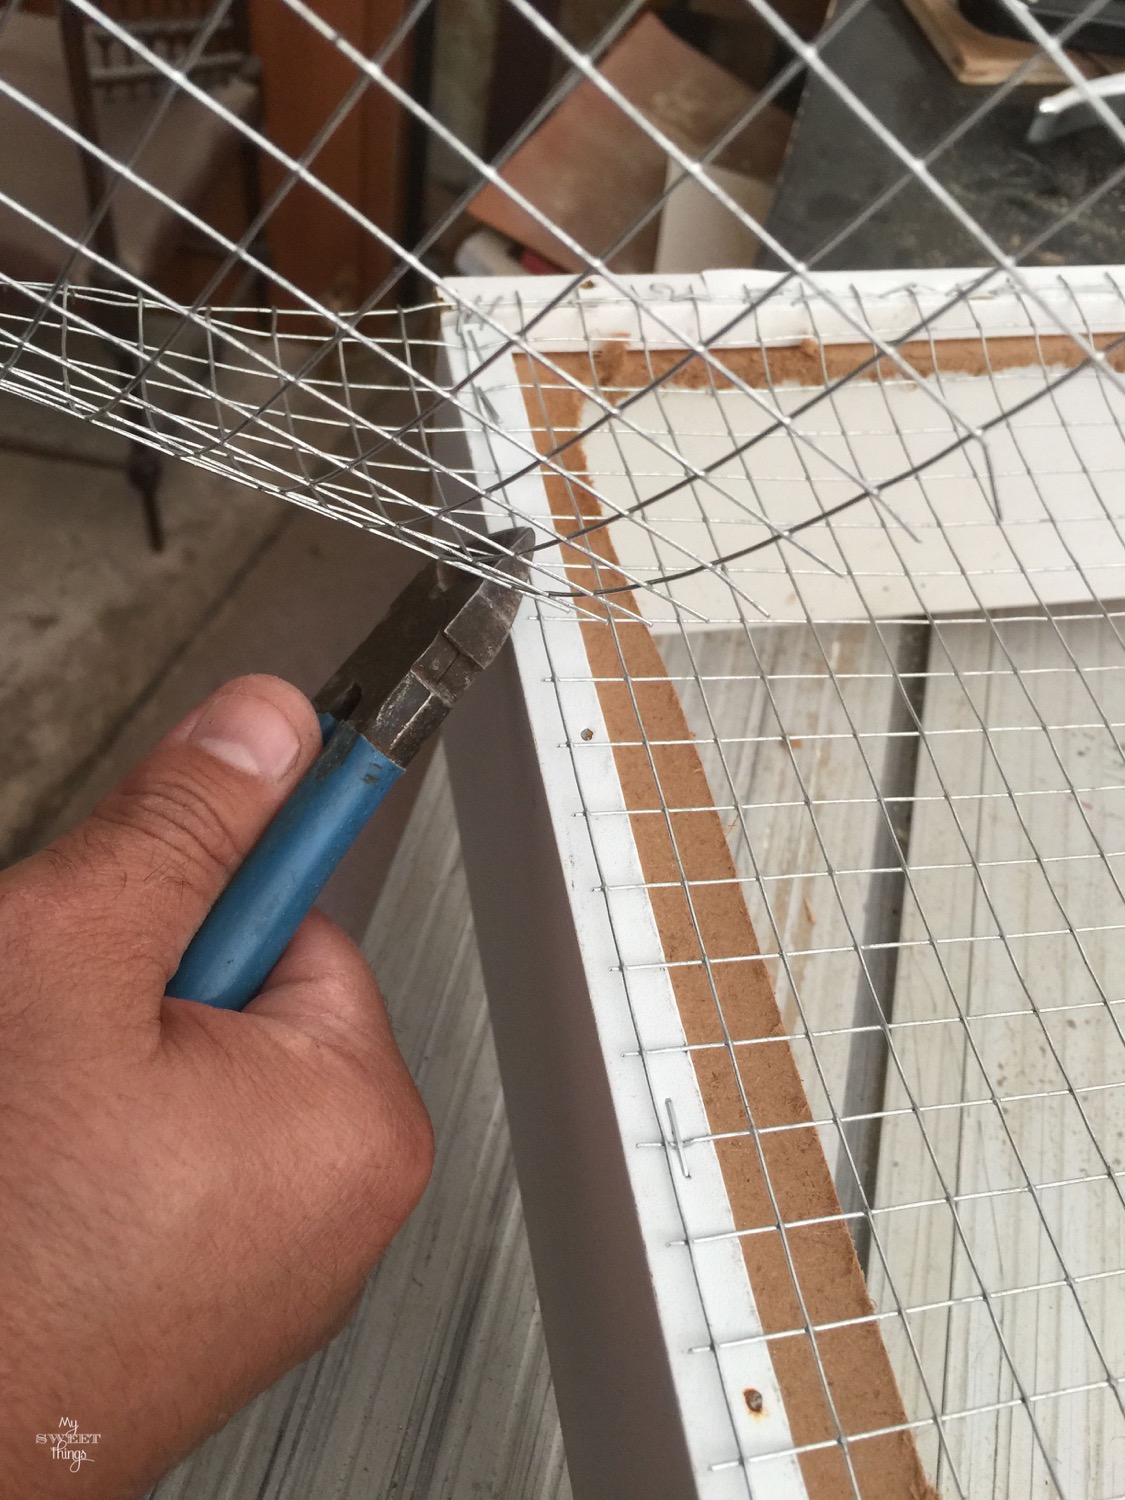
Once it was all cut, we stapled the wire in place.
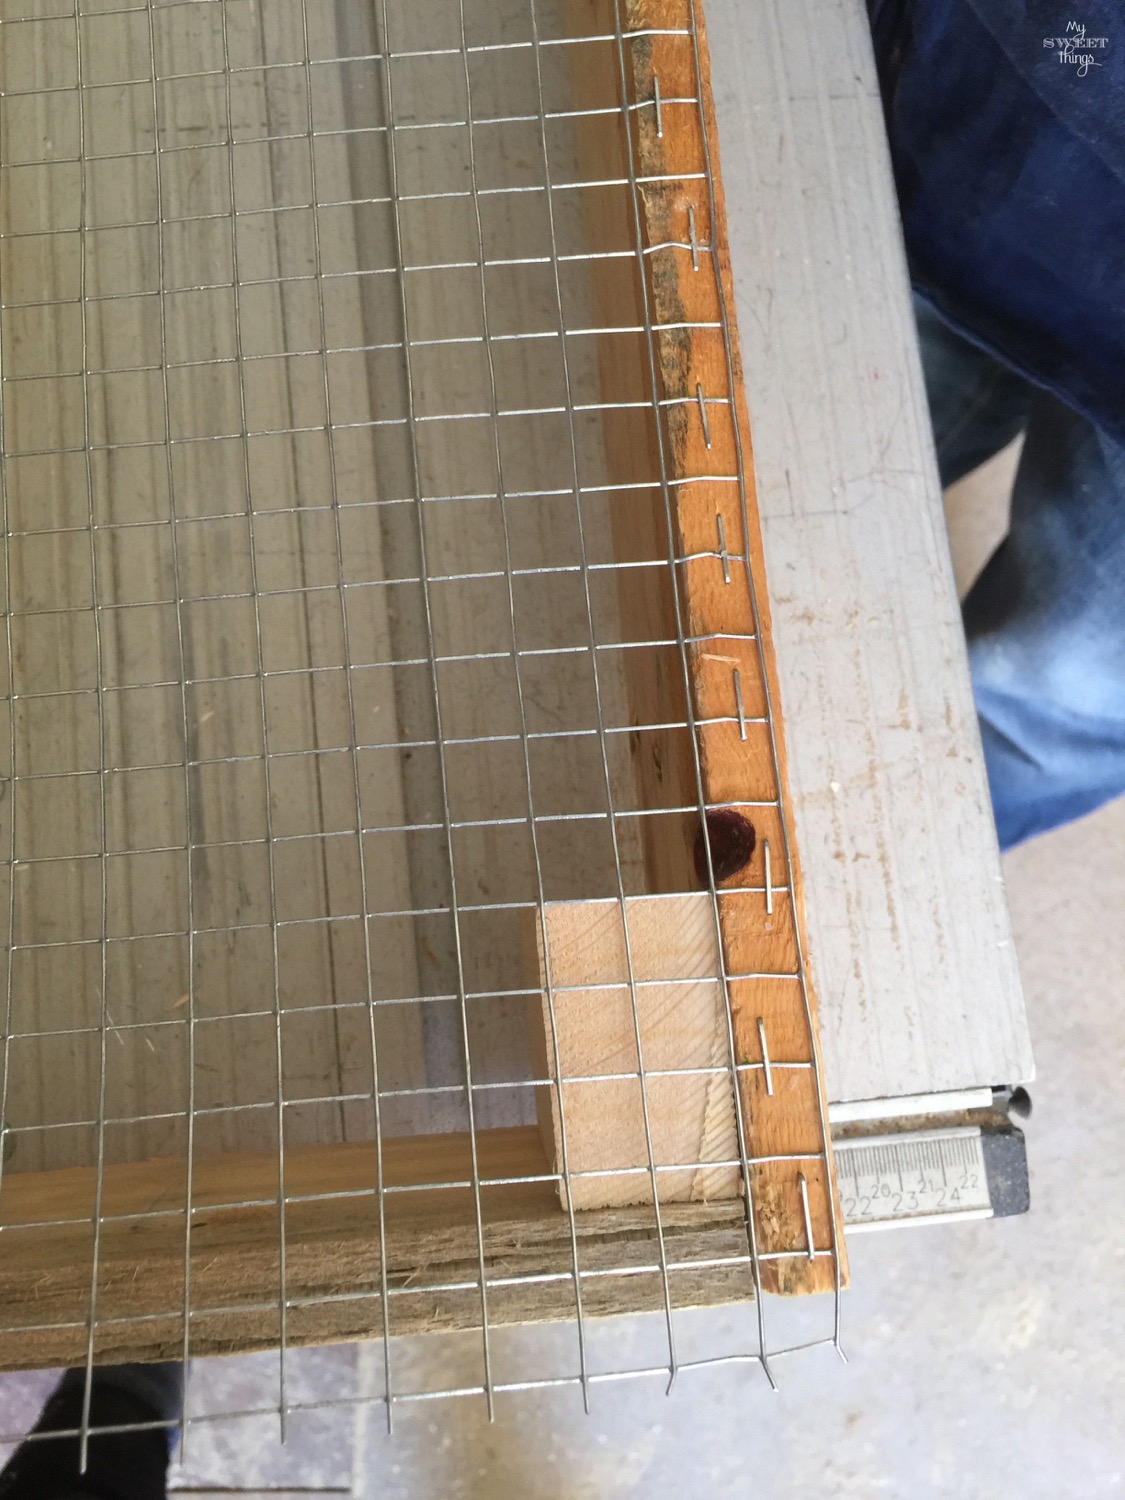
We stapled it all around because it’s going to hold quite a lot of weight and we don’t want the wire to fall apart.
Hubby trimmed all the excess. Oh my handyman, love him.
The reason to add the wire to the bottom of each box is because you need the worms to be able to go up and down each one to get the food and do their job.
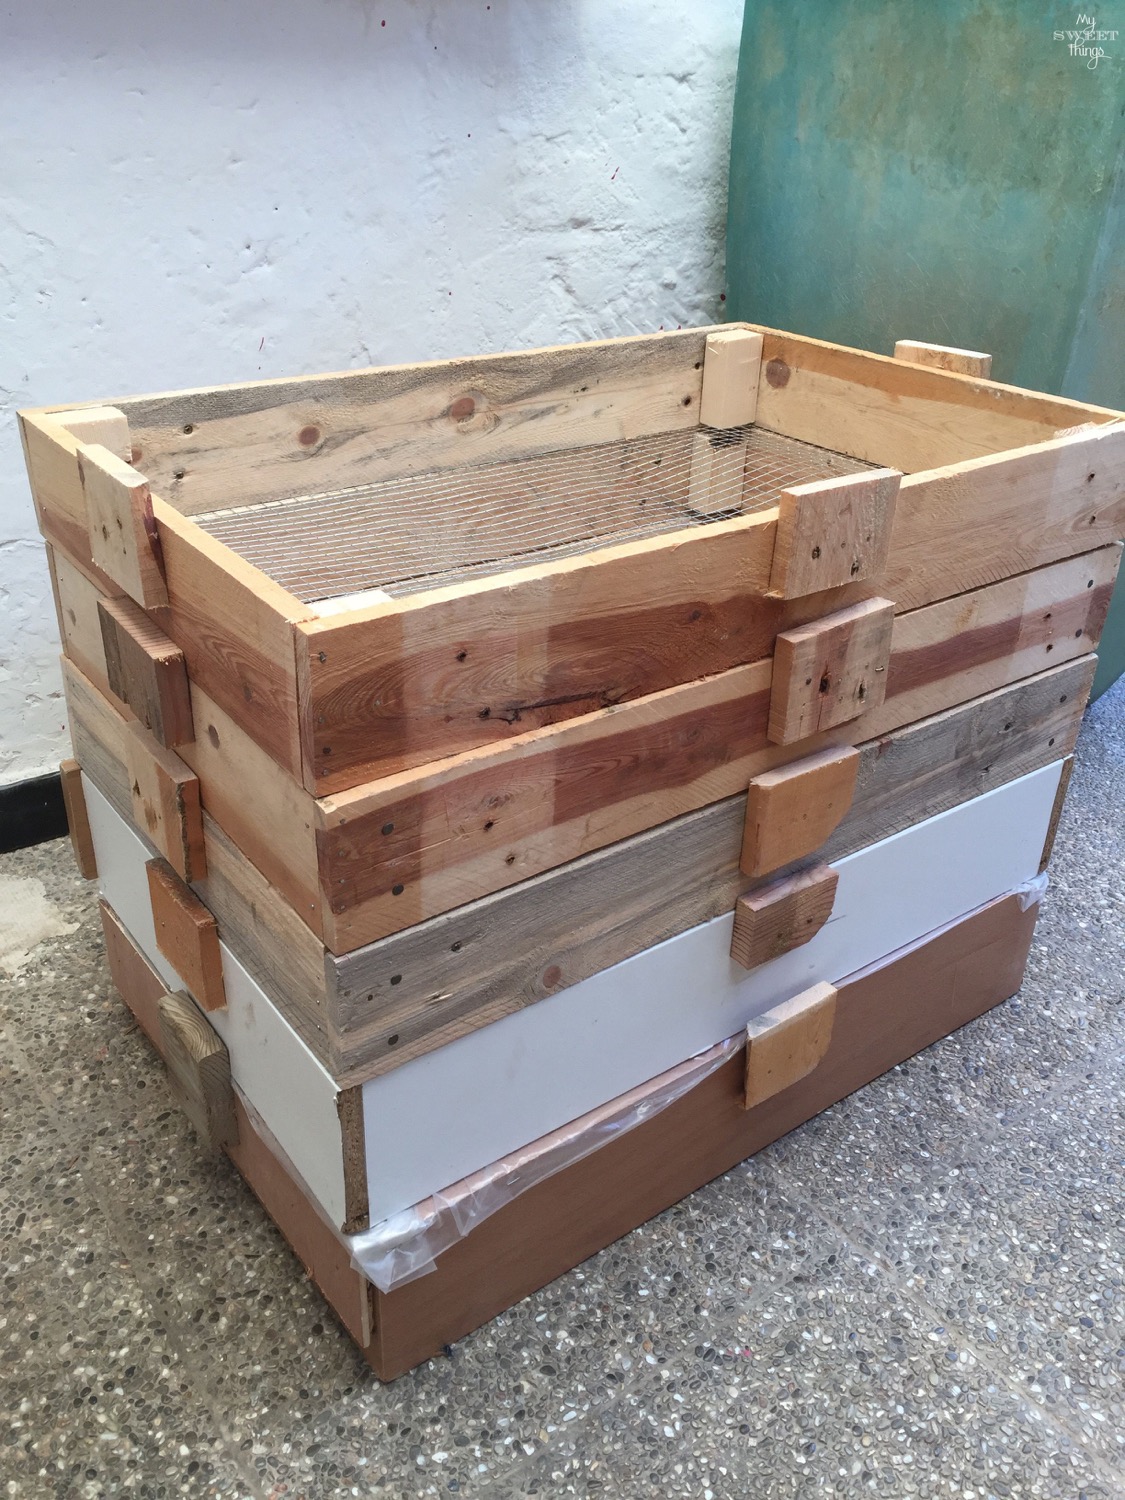
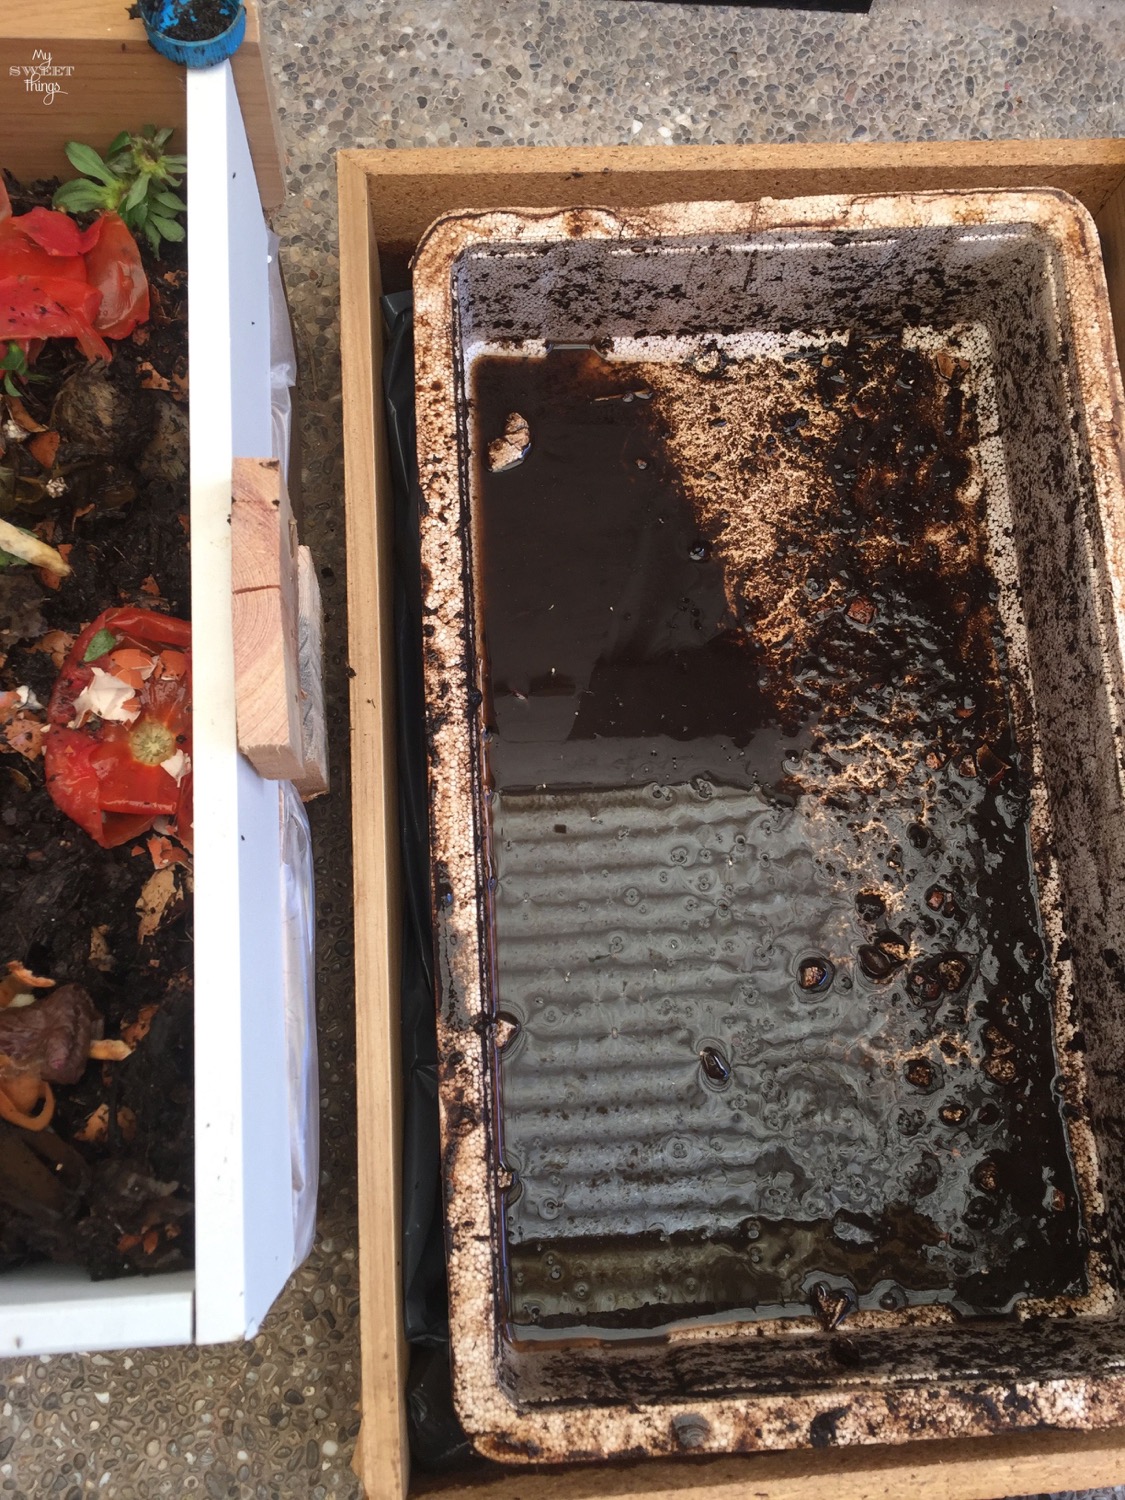
Finally, he took some plastic and stapled it to the drawer. This will be the bottom box always as it will hold all the leachates. You can use a plastic bin instead of stapling plastic but we didn’t have any that size so this would work for now.

The last thing we did was to cut a piece of wood to fit the top, let’s say as a lid. The worms need to be wet and this lid will help to keep the moisture of the soil and food scraps.
Here it was all stacked up. I know it won’t won a prize for the best-looking design but I really don’t mind. I know it will do its duty more than good.
It was time to change our worms from their old tiny house to their new mansion. My daughters were waiting to help, you know, touching bugs and getting their hands dirty it’s something they love.
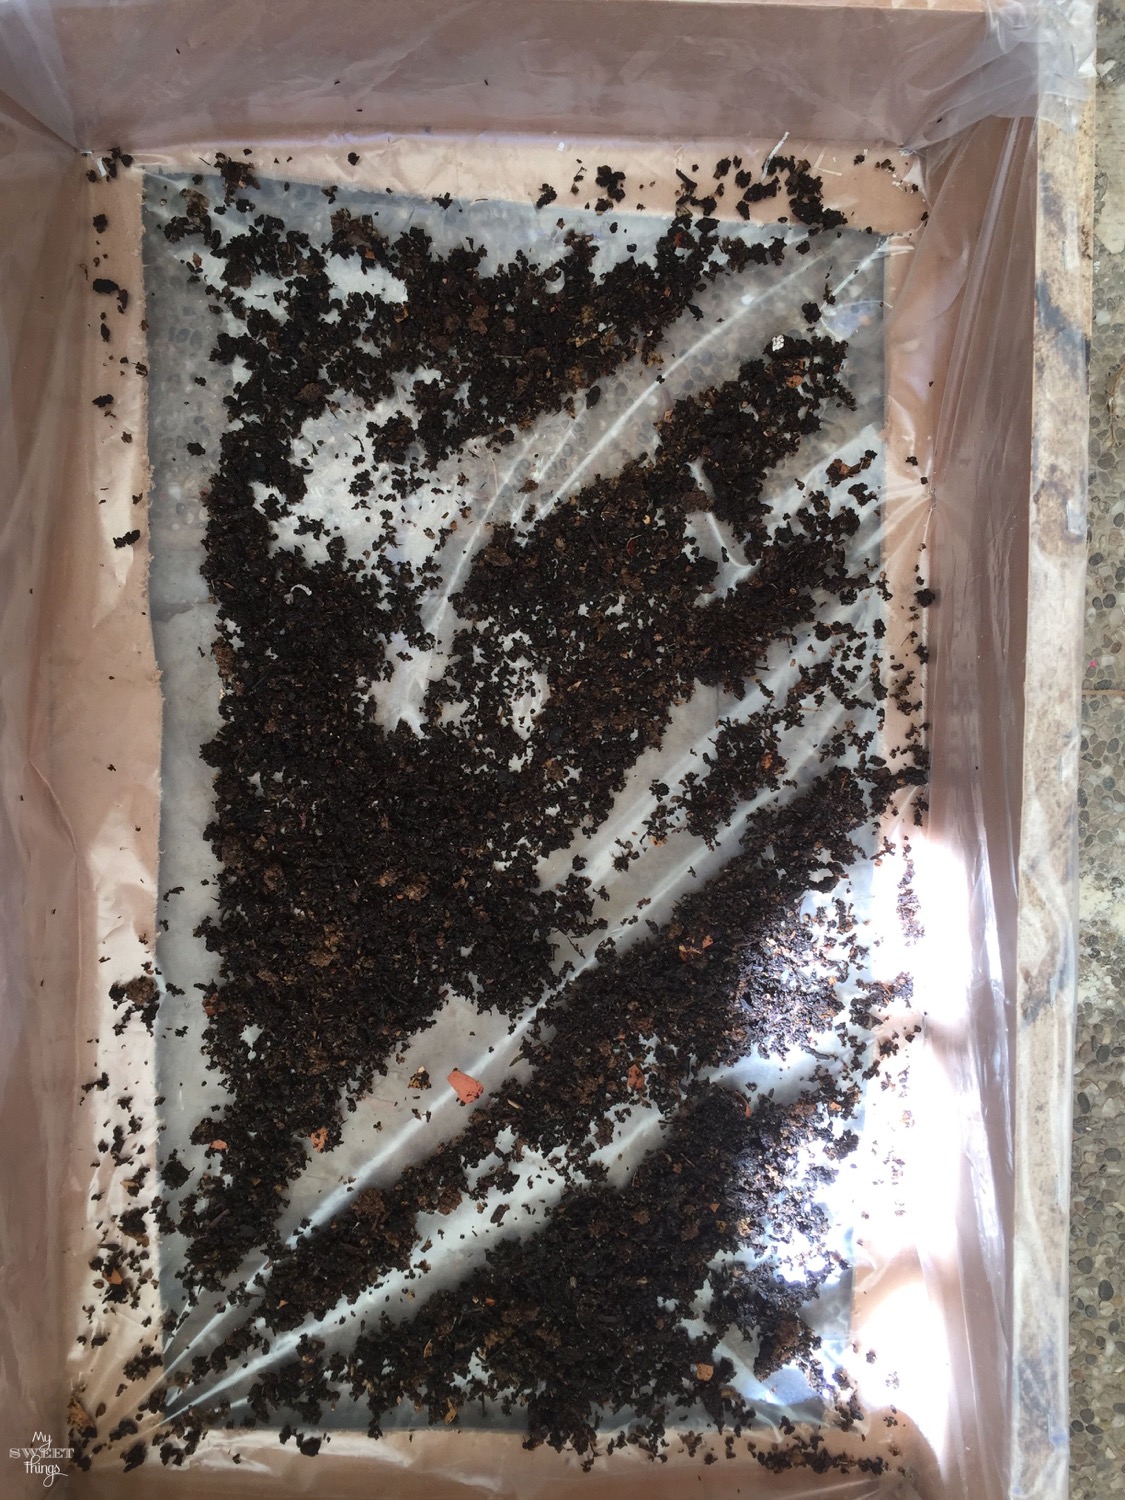
Here’s our hummus almost done. It may seem weird or disgusting but it’s not. It smells nice, like fresh soil after a rainy day. If you look close you still can appreciate tiny bits of egg shells (which work great for the pH of the soil) and some twigs. The smallest bits you add the faster it goes.
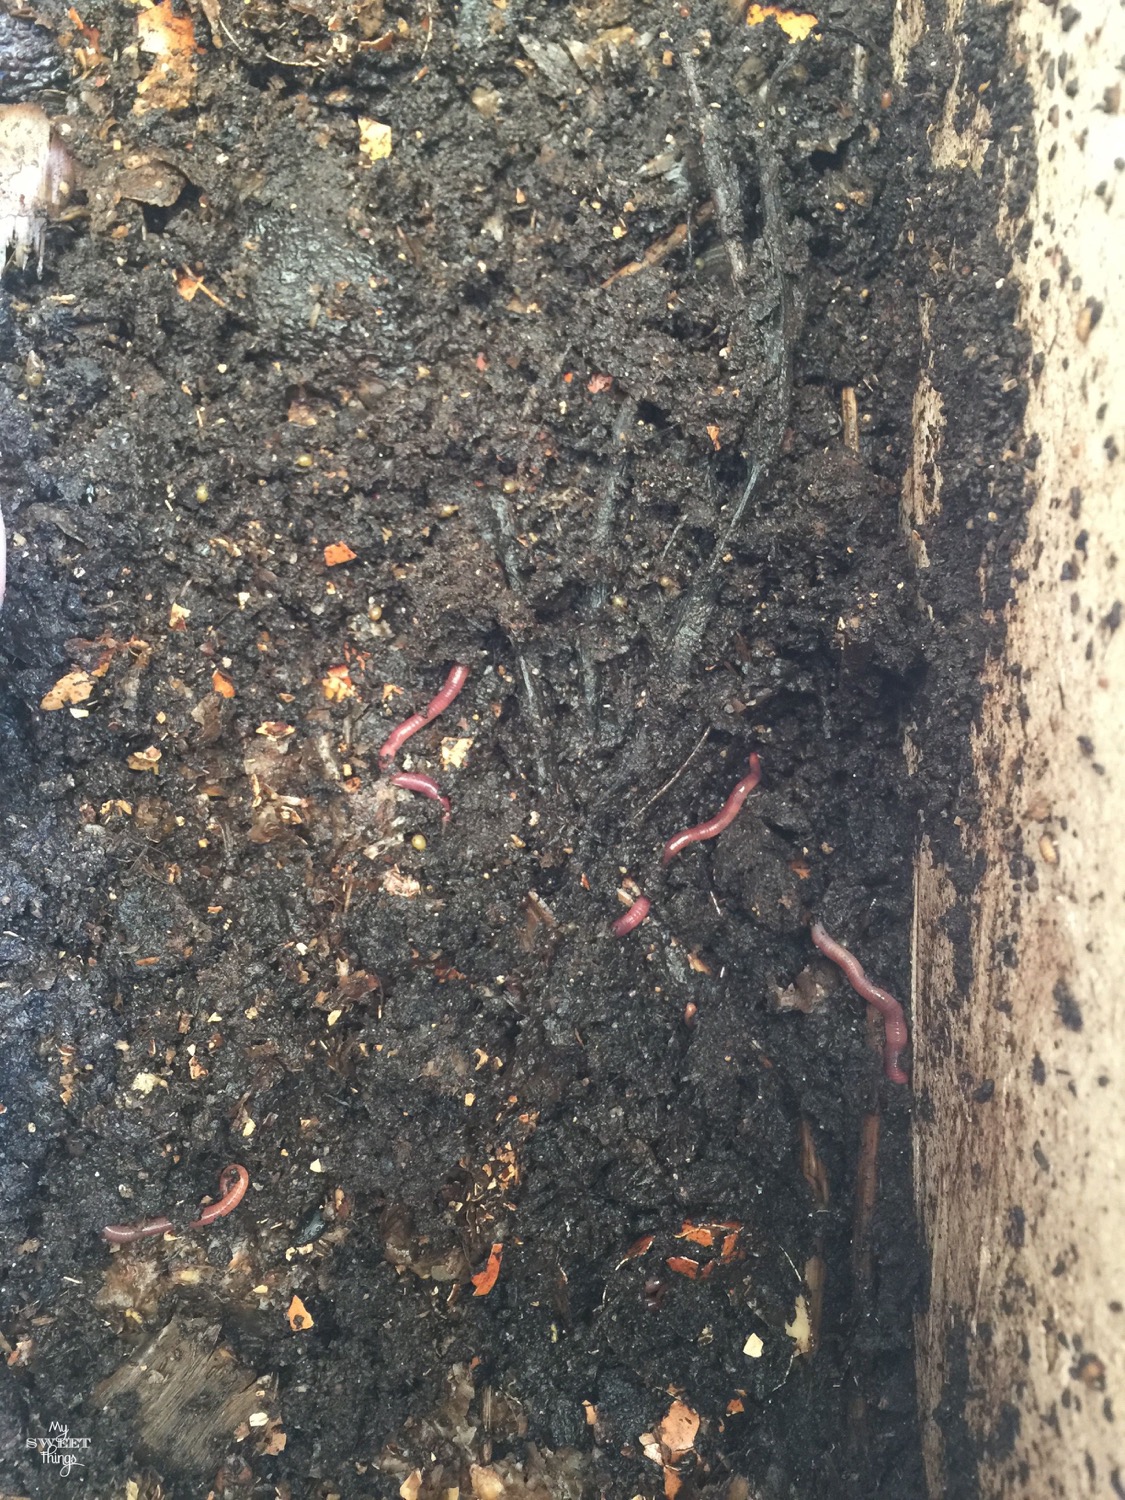
This is some hummus/soil done and ready to use in the garden. Because it’s not too much I’ll leave it some days in the sun so it dries a bit and will keep in in a plastic bag until I have a bigger amount.
Once we moved everything from the small compost bin to one of the boxes, I collected the leachates which are rich fertilizer. It doesn’t smell bad either, don’t worry.
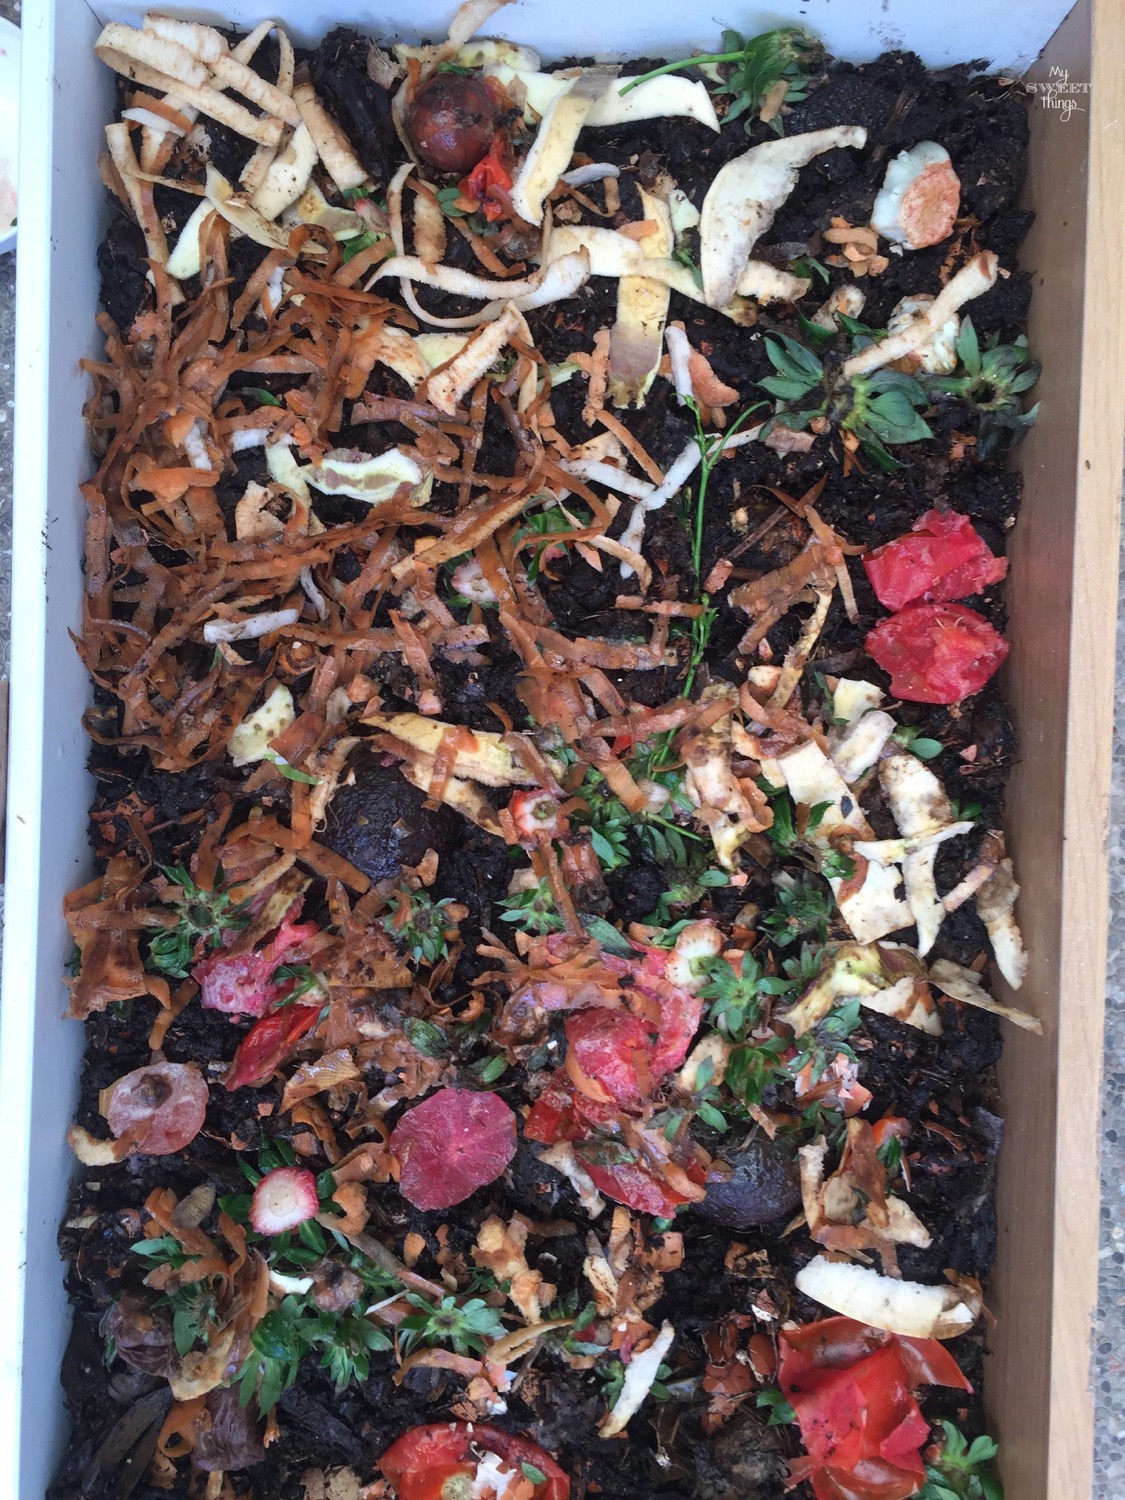
I had a bucket full of kitchen scraps so I put everything on top of the existing hummus. This way the worms would have more fresh food to eat/transform. Now it was half full, still room for something else.
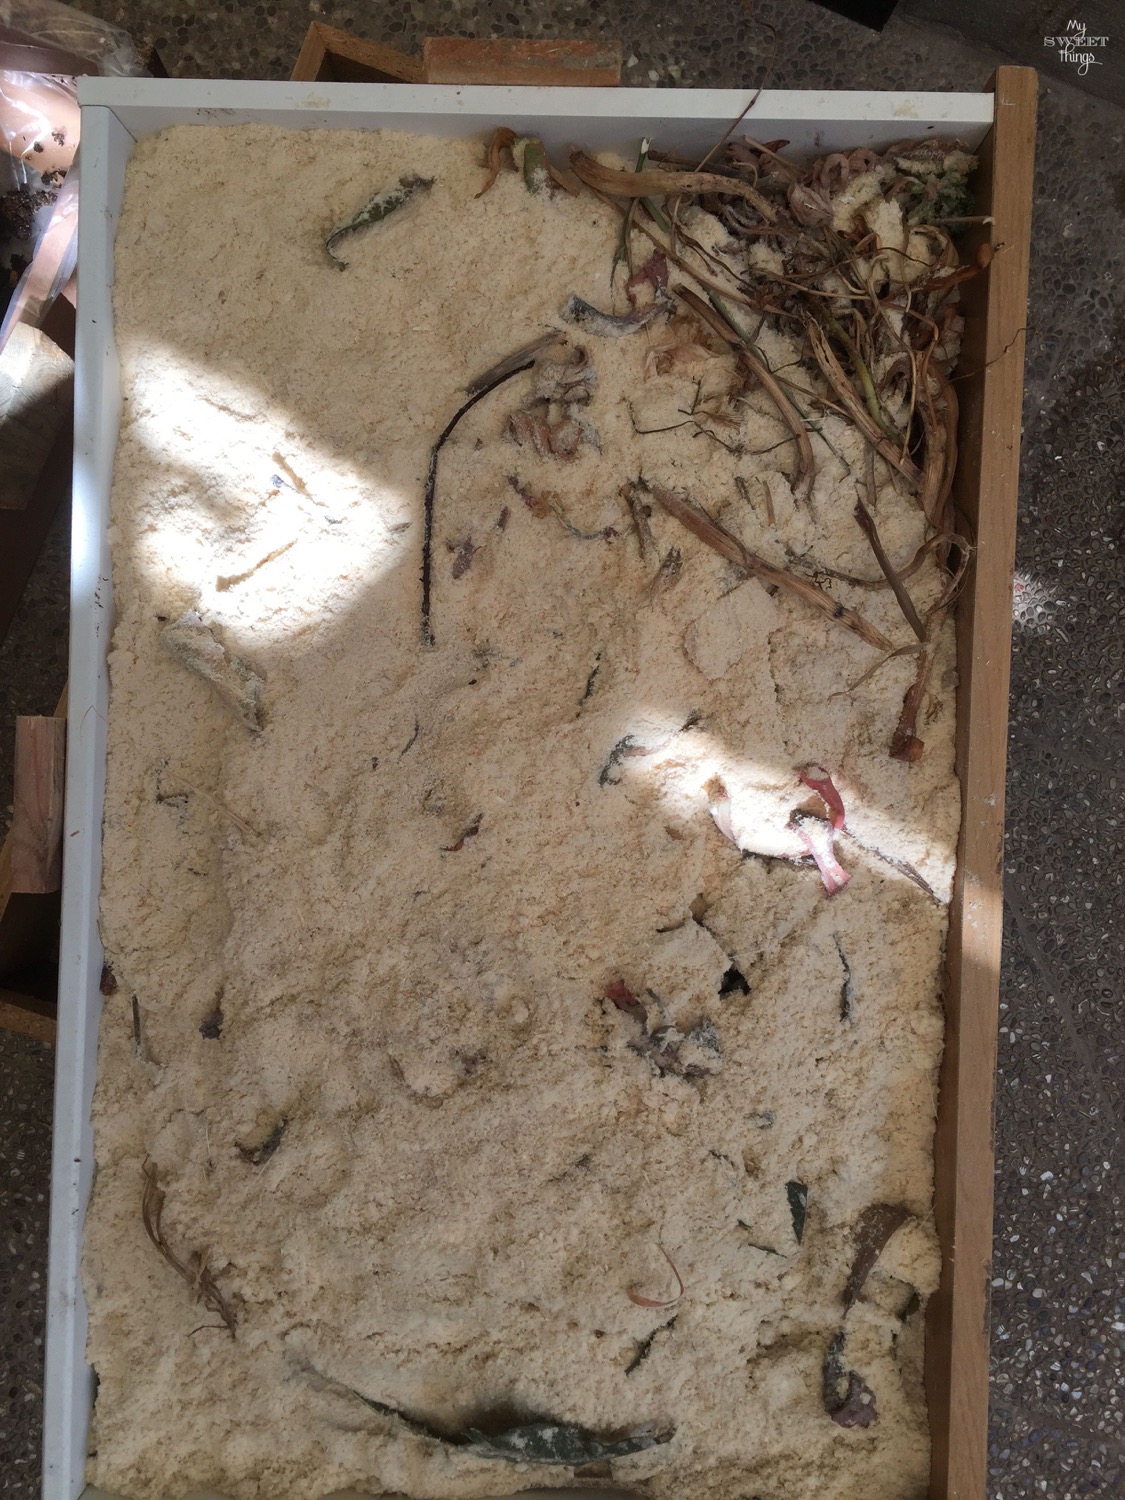
If you don’t want little flies around it you need to cover the food with leaves, better if they are dry but not necessary.

The last thing I like to add is sawdust. The only premise is it has to be from raw wood, if it has paint or dye on it don’t use it because of the chemicals. This way the little flies won’t bother.
For now, we have one box full and ready, but as you can see we have three more left.
![]()
To sum up, a DIY worm compost bin is used to recycle kitchen and garden scraps into hummus / soil for your plants and garden. Making boxes with the wired bottom allows the worms to go up for more food once they are done with a box. Then you just need to take out that bottom box (the second always because the real bottom one will contain leachates), empty the soil and place it on top of the rest to be filled again with more food.
Do I make sense? I hope so!!
Anyway, I’ll be adding more pictures to this post for the next months as our DIY worm compost bin will be growing and giving us great soil for the plants.
By the way, don’t forget to stop by to see what my friends have came up with this month.

Thanks for stopping by
Hugs,
Pili


Do you love DIY, recycling, home decor, furniture transformation and all kind of crafts? Then we have the same passion! I would love to share all my crazy ideas and projects with you so I would love if you SUBSCRIBE for my post e-mails.
I also share interesting content on Facebook and other social media, and I would love to hear from you! Not following me yet? Don’t be shy and stop by to say hello. Follow me on FACEBOOK, PINTEREST, INSTAGRAM, TWITTER, +GOOGLE.
Linking up to these parties
Any content on this website is created for inspiration purposes only. Creating with my suggested methods, products used and tools fail under your own risk. Please ensure you are following proper guidelines with anything used, and you receive professional guidance if you don’t know how to do something. For more details you can read my complete disclosure
Ahhh yes please!!!!!1 We have a small earthworm farm in a bucket and it’s exploding at the seams. This is a way better idea Pili. And those worms are so good for the garden too. Love how you repurposed an old wooden drawer for the base of the farm, that’s very clever and so much more eco-friendly than a plastic bucket.
Thank you Michelle, we love to recycle as much as we can, and this is really interesting. If we had a proper garden we’d build a bigger one with a little door beneath, which is easier to get the new soil out.
What a great project Pili! We’ve always had composts and it’s such a great way of recycling organic materials! Your bin is such a clever idea!
Amazing what those little bugs can make, right? Nature is so clever!
Such a great way of repurposing those boxes. Thanks for the brilliant idea, Pili
Glad you find it interesting, Indah! Thanks so much for stopping by
Pili this is such a great project. We tried making a compost area last year with my dad but he said there were too many flies in it. I will definitely show him this idea. I know he will love it. He is always puttering around in the garden.
The flies have a easy solution, cover the food leftovers with ink-free paper, or dry leaves from the garden, that way they won’t “smell” the food. If you find ants around it then you need to water it, that simple. Tell your dad not to give up
I am thinking of buying one worm bin for preparing compost. Now, I think I should give try to make one myself! Nice, It is indeed a great learning.
YOU lost me when you said “I had a bucket full of kitchen scraps so I put everything on top of the existing hummus.” I hope you meant “humus.” Hummus is no good for worms because of the oil content. I was curious though, do the worms not all wriggle down to the lowest tier? do some indeed stay in all of the upper tiers to work?
Hi Andrea
Thanks for your question because it was a grammar mistake, yes I meant humus.
Yes, most of the worms stay in the upper tiers because they have more food there, but you still will find some worms in lower tiers. That is the good thing, they can move up and down.
Hi! Could You please tell me the measure of the wire? Is it 1inch? Thanks!
Hi Gabriel!
Do you mean the gaps or thickness of the wire? If it’s the gap it’s about 1,5 cm and the thickness I couldn’t tell… it is strong enough to keep the shape but soft enough to cut with pliers.
Hope it helps!
Thank you for the detailed instructions for building the compost bin. What would my next steps be for collection and making worm tea to spread onto my garden?
Hi Taylor.
If you have a look at my compost bin you’ll see the bottom “box” was wrapped in plastic; this way I can collect all the worm tea for the plants.
I hope it makes sense
Pili this is great. My doubt is, how could I collect Vermi wash, the liquid from the compost, any solution?
Hi Thejas
If you look at the images, there is one “box” which is wrapped inside with plastic. That one will be always at the bottom collecting all the tea.
I hope it makes sense
I love this! Thank you! One question though, how do the worms not fall down into the liquid?
They have screened holes big enough to crawl down and up through… what would keep them from going too far down and drowning? Or is it because there’s no dirt/food that direction so they choose not to go that way?
Hi Audree
Yes, unfortunately sometimes they do and drown. But most of the time they keep up there the food is.
Privacy Overview