Hey friends!
Welcome to this months At Home DIY Challenge project! I have teamed up with some amazingly talented bloggers to bring you some storage solutions made out of wood. This is my first time participating so I am really excited about it.
I worked last year in our hallway makeover, which used to be a dark and weird place connecting the hall with the living room and I didn’t have time to share how I built the filing cabinet unit I am using there.
I built this filing cabinet unit entirely out of scrap wood using plans I created. I love creating my own plans but working off my own plans can be a little intimidating because I have no idea if it would turn out or not… that’s the maximum adrenaline I can take!

Without much ado, let me show you what I used and how I did it in case you want to make your own version of a DIY filing cabinet. You will find some affiliate links for your convenience, you can read the full disclosure here.
How to make a DIY filing cabinet unit
Materials:
- Scrapwood
- Miter saw / Table saw / Circular saw
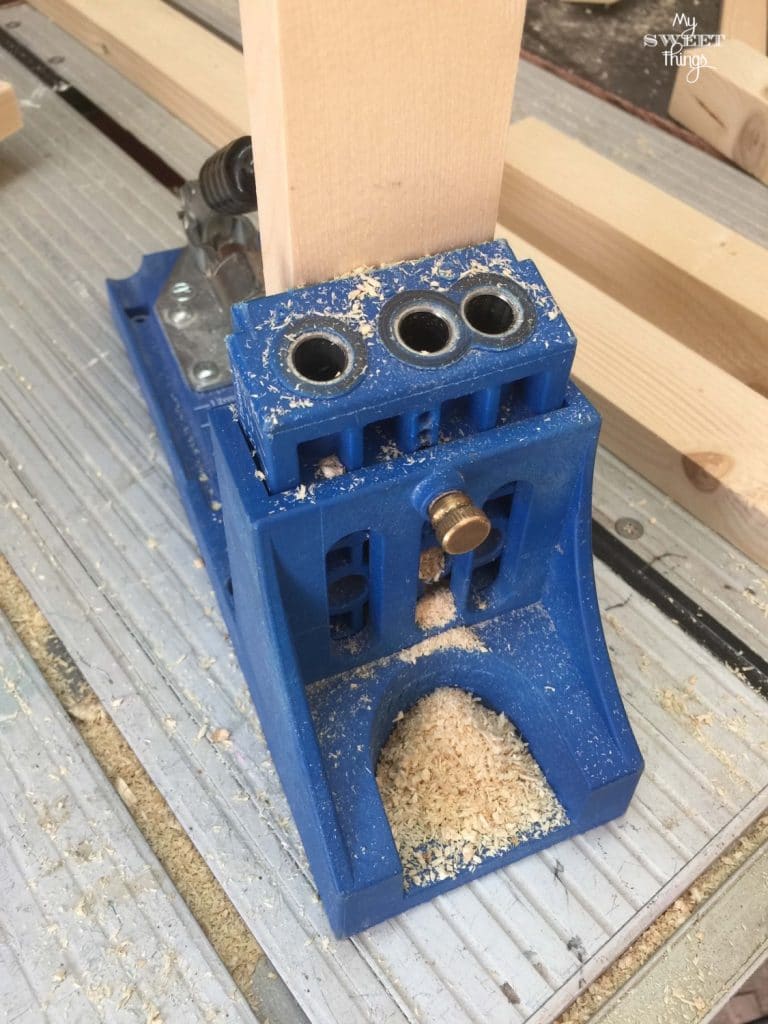
- Kreg Jig (to make pocket holes)
- Drill
- Screws
- Sander
- Wood stain
Process:
I had some old black cardboard filing things that needed to be handy by the desk but they were so ugly that needed to be disguised. So I took their measurements and drew a sketch up. All measures are in cm so you’ll need to adapt if working with inches.

I build custom kid’s house beds so I always have 4×4 cm wood scraps and that’s what I used. I sanded everything in advance, that is the not so beautiful part of it…
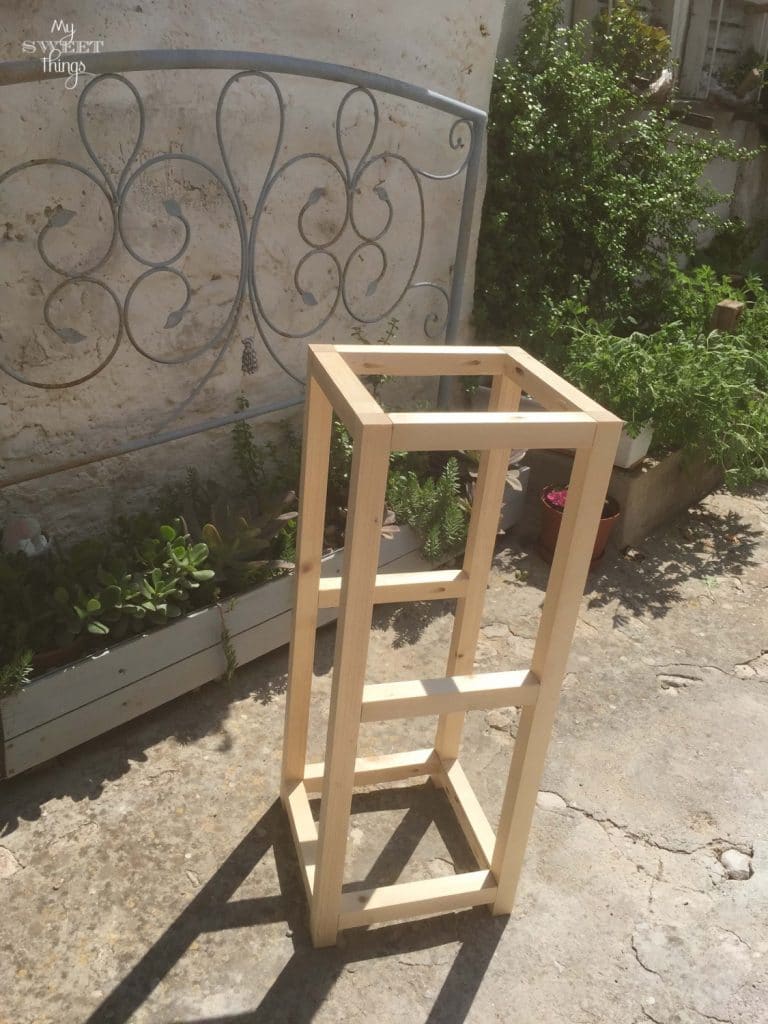
The first thing was to make the frame for the front and the back. I laid the wooden pieces that would cover the cardboard files to make sure everything was ok.

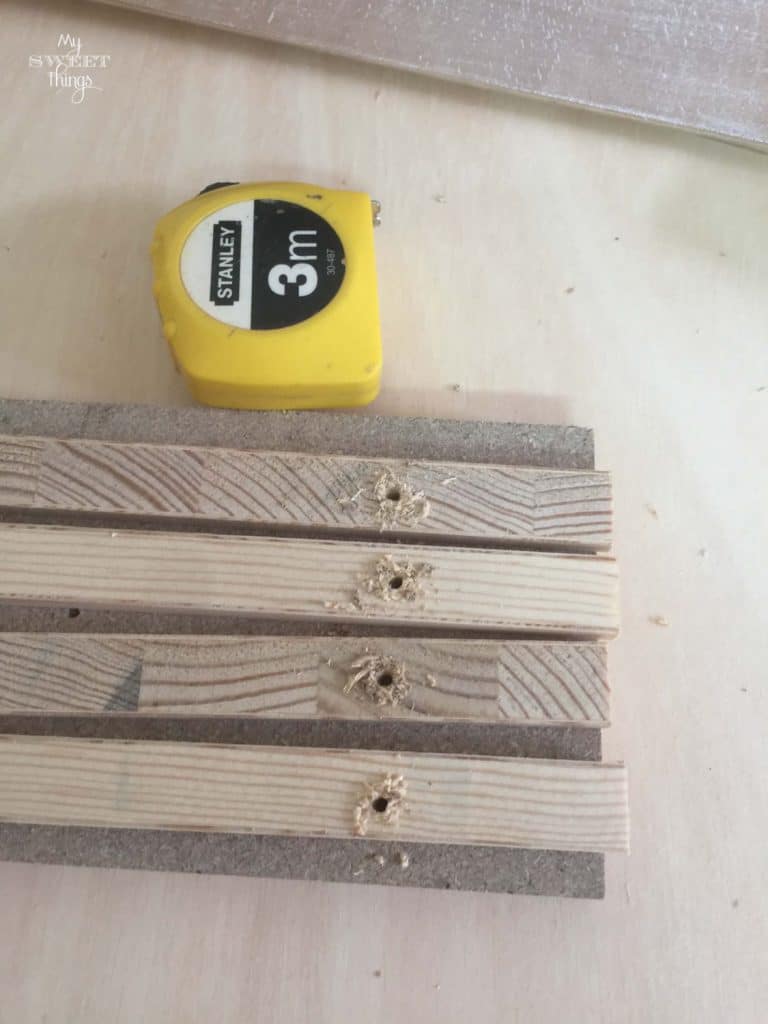
I made pocket holes and used wood glue to reinforce the structure.
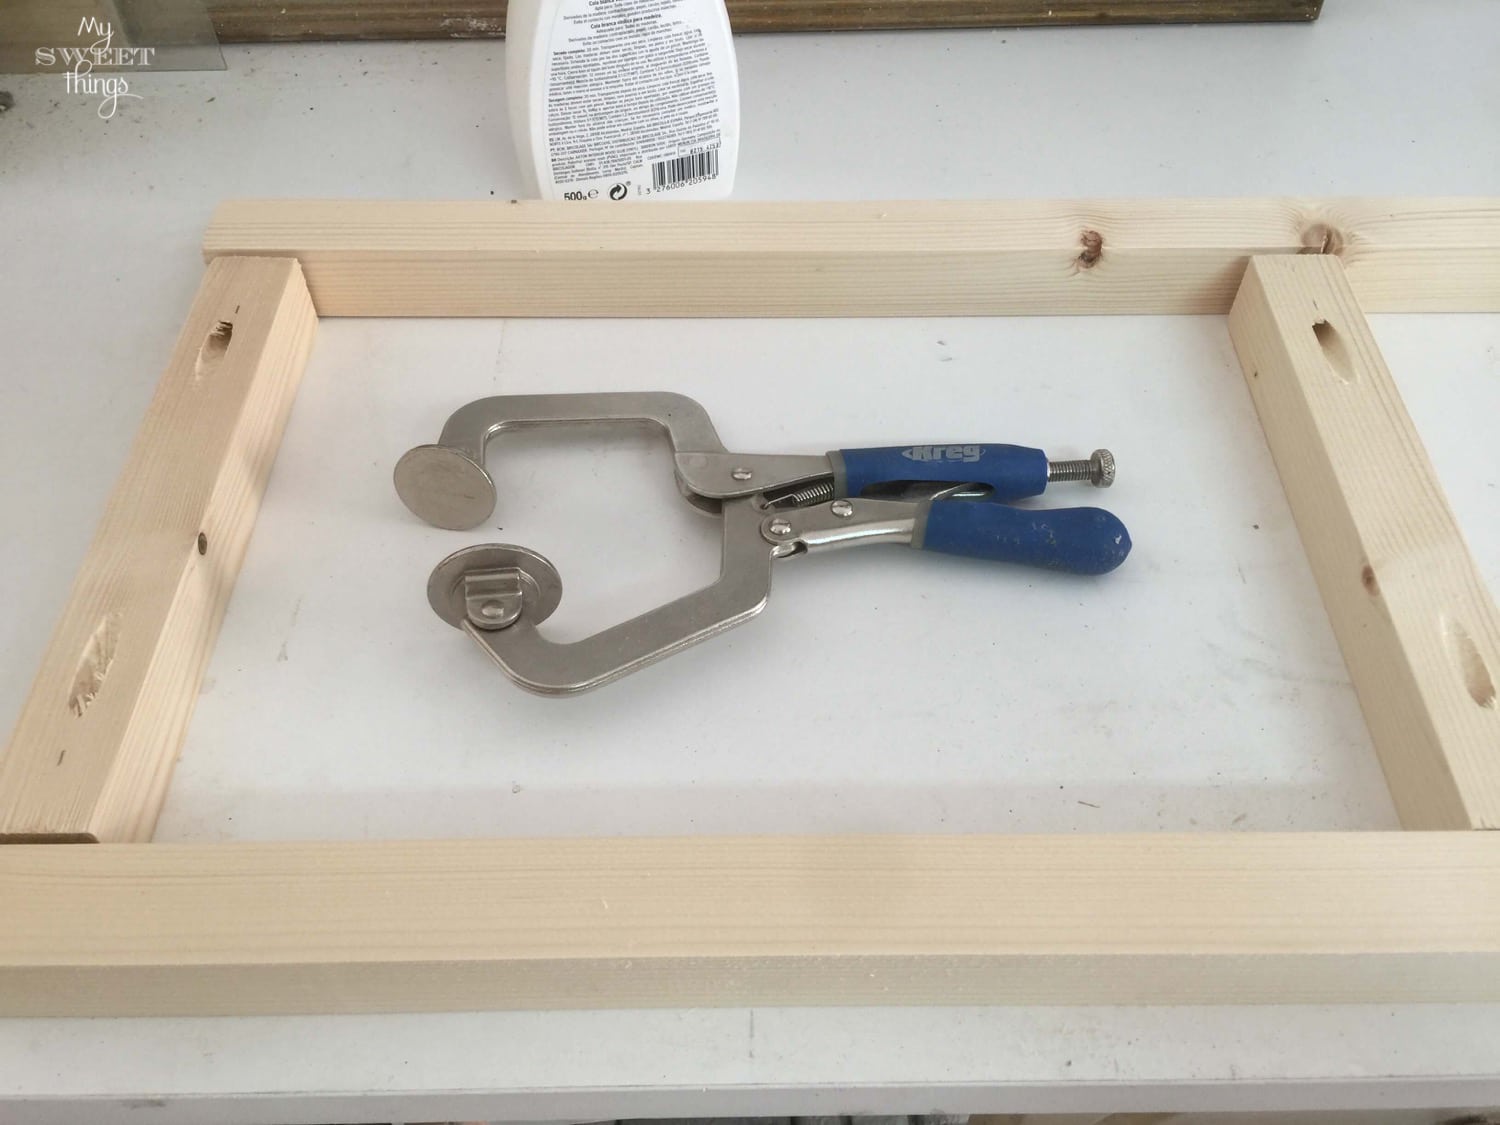
The two frames were ready and set them apart.
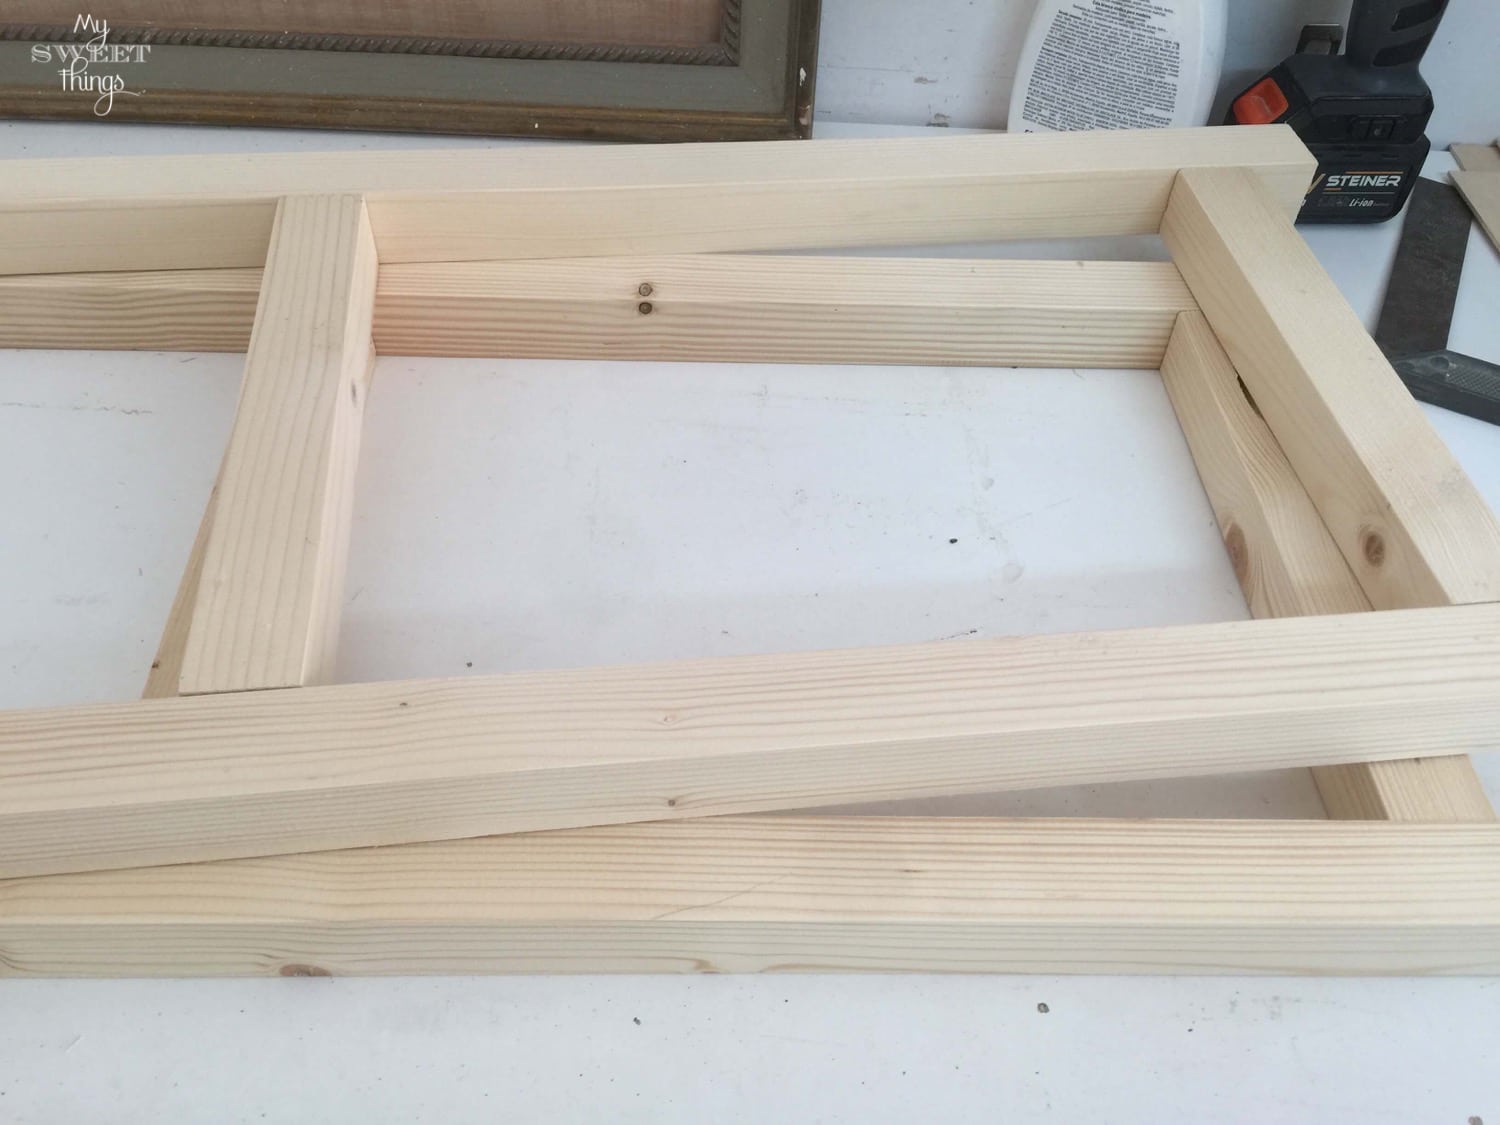
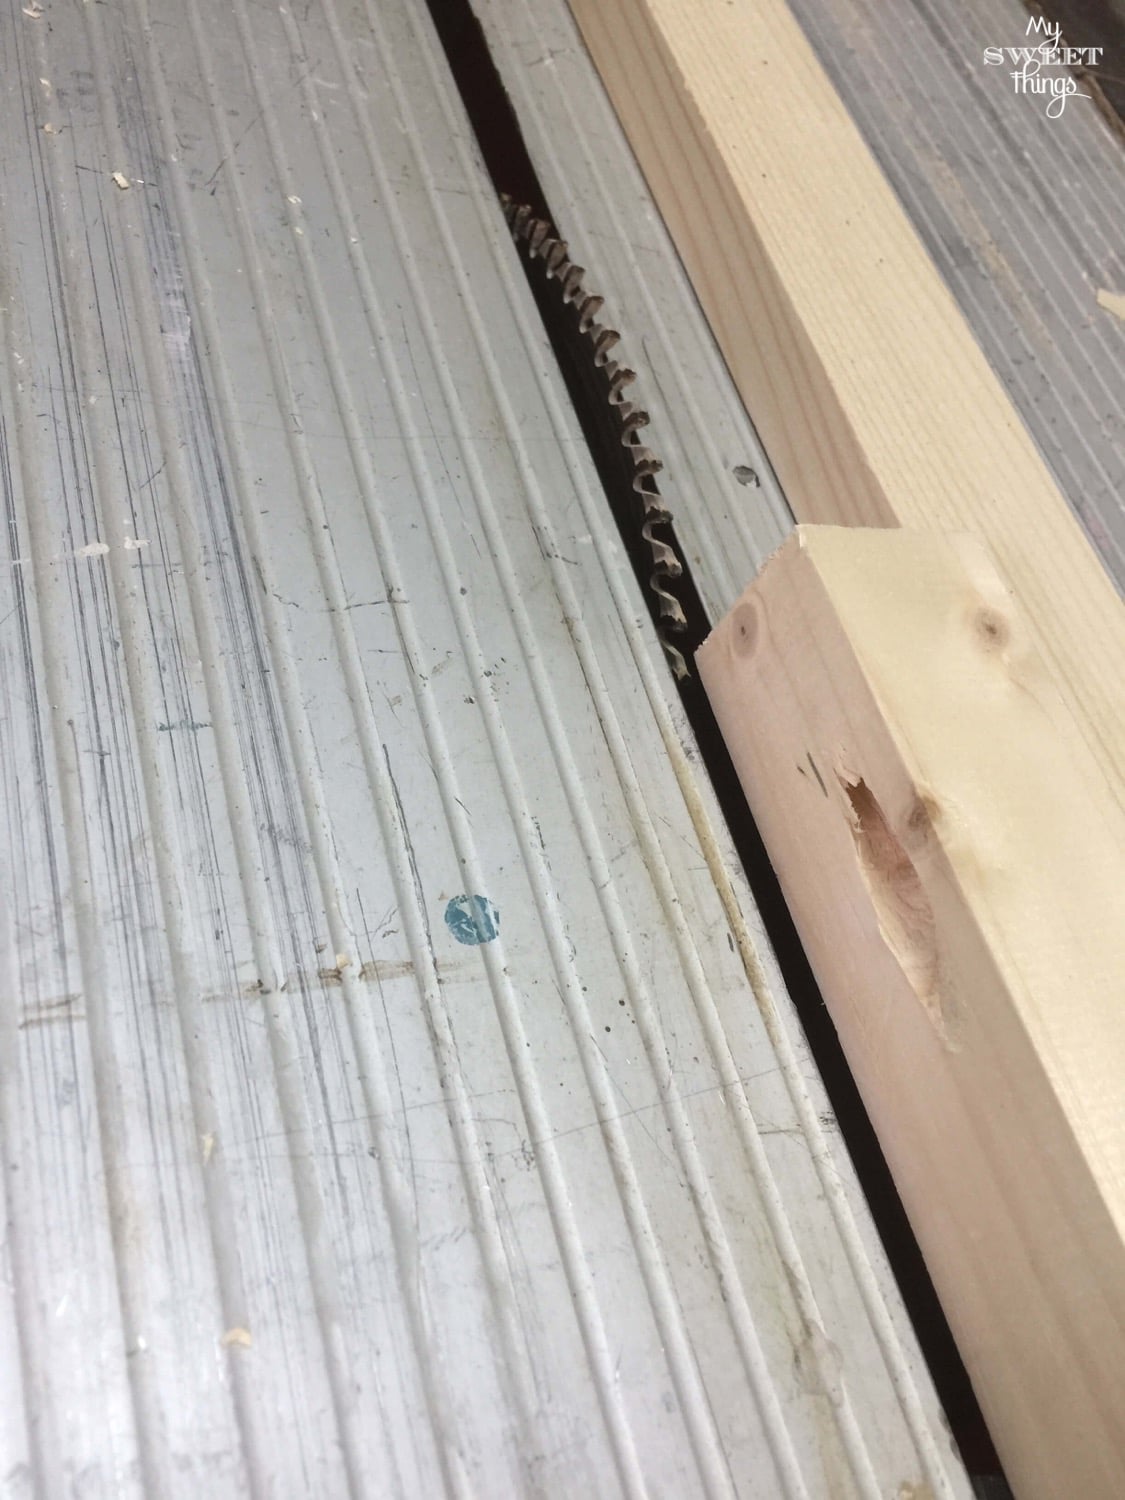
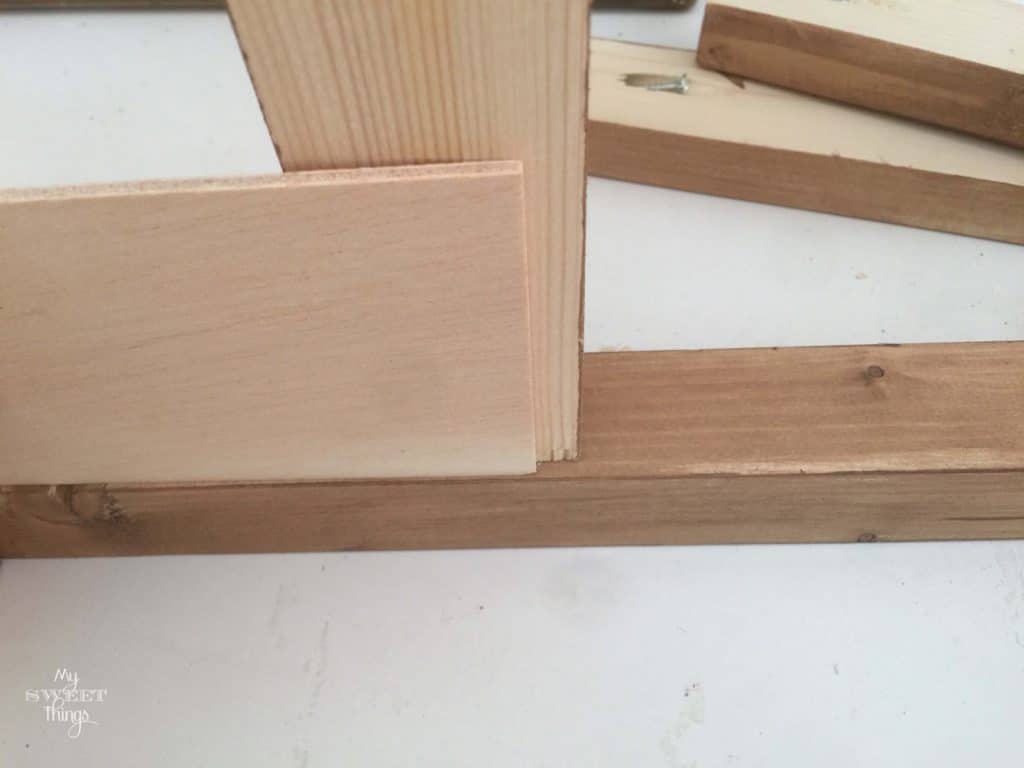
I used my table saw to make some grooves, you’ll see later why. You can do it with a router if you have one.
I drilled those to the frames. I applied glue to all of them.

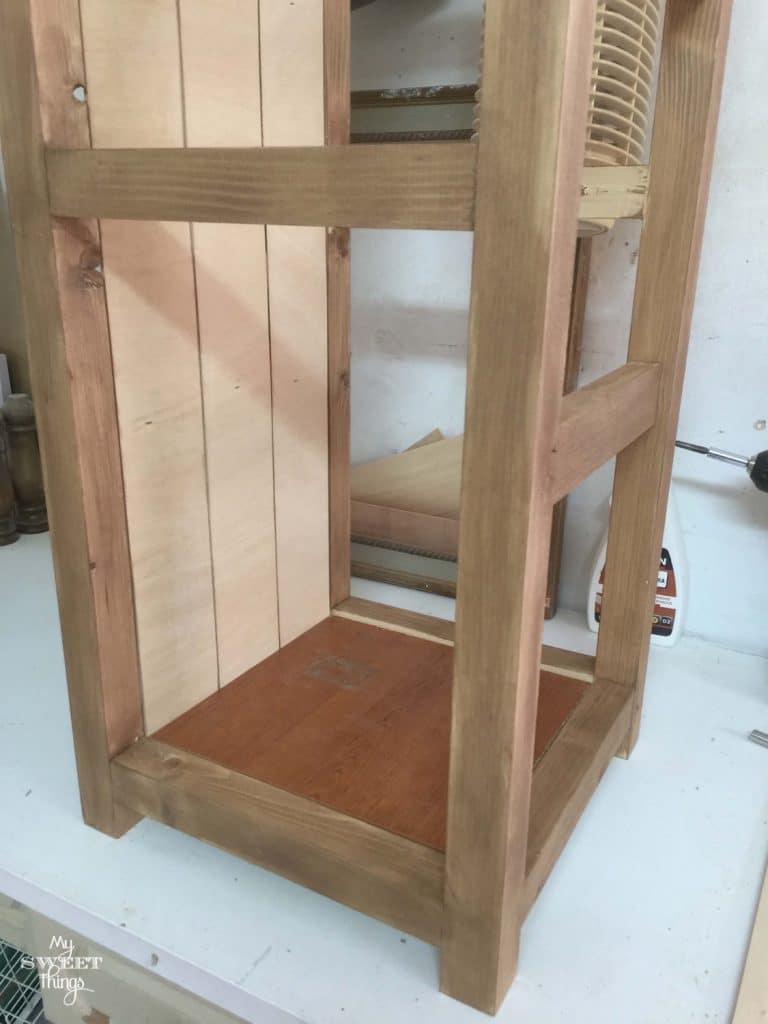
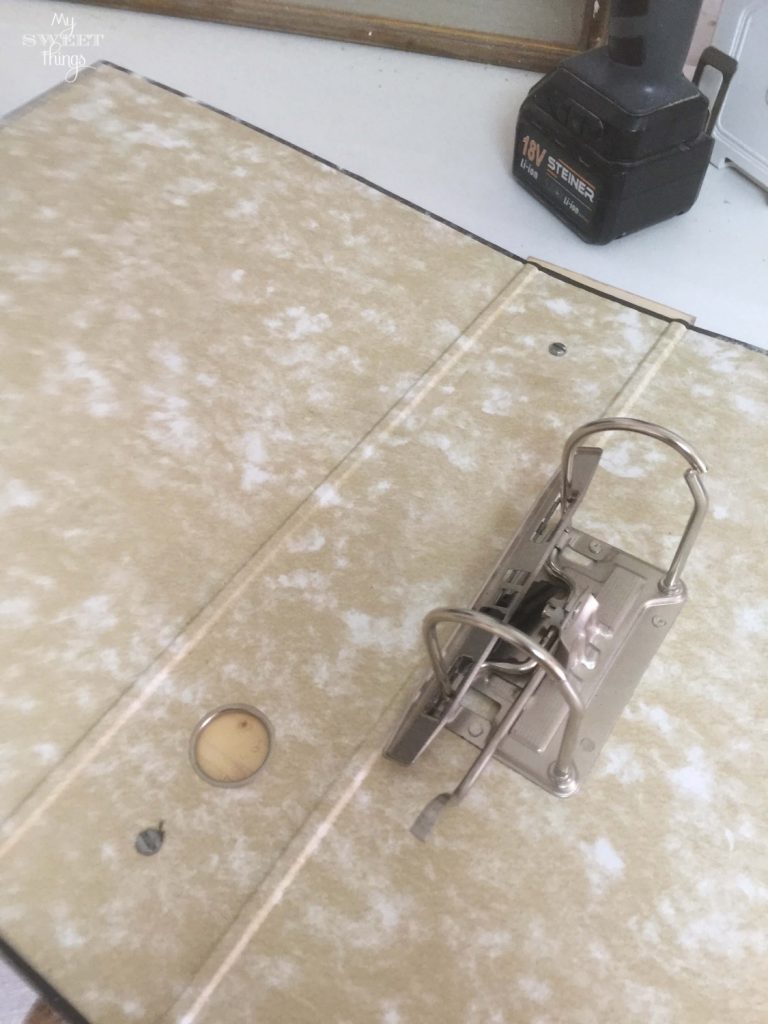
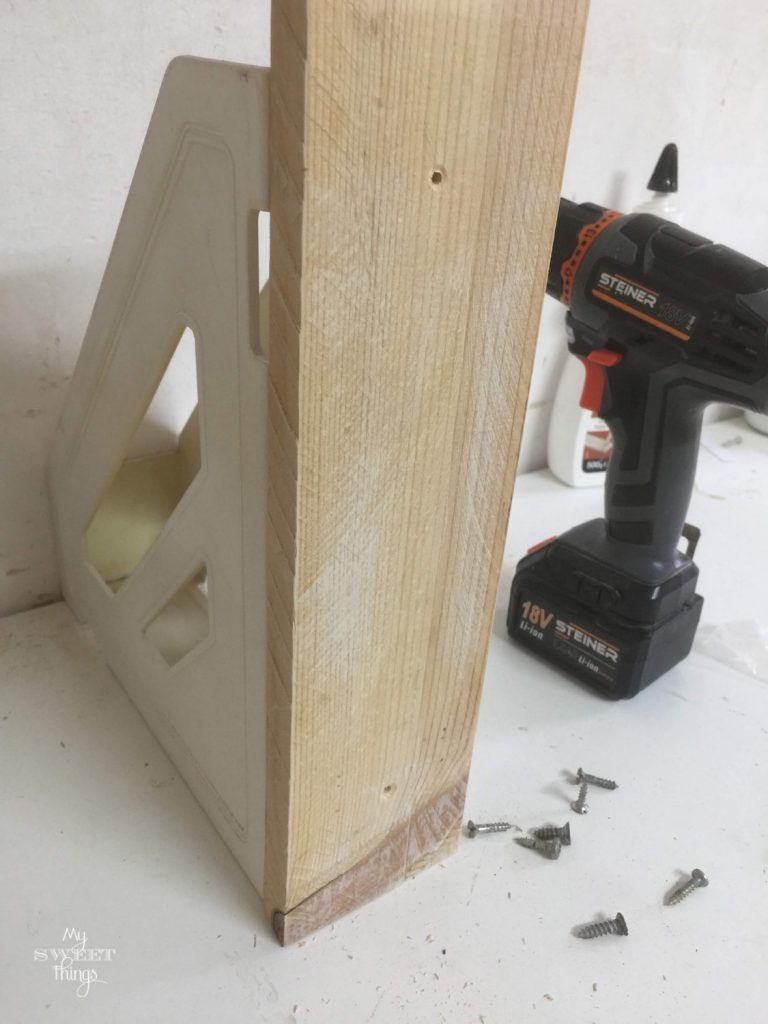
In case you don’t have a Kreg Jig here you can see it. It’s really helpful with woodworking projects. These wider pieces of wood were part of the sides of the cabinet.
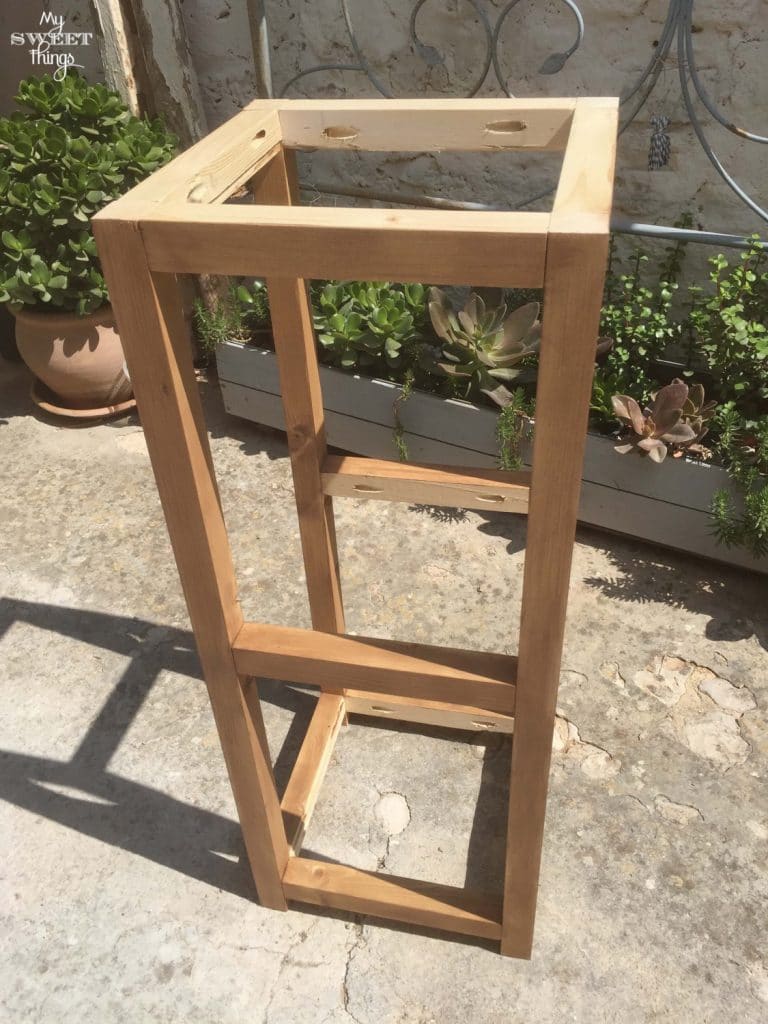
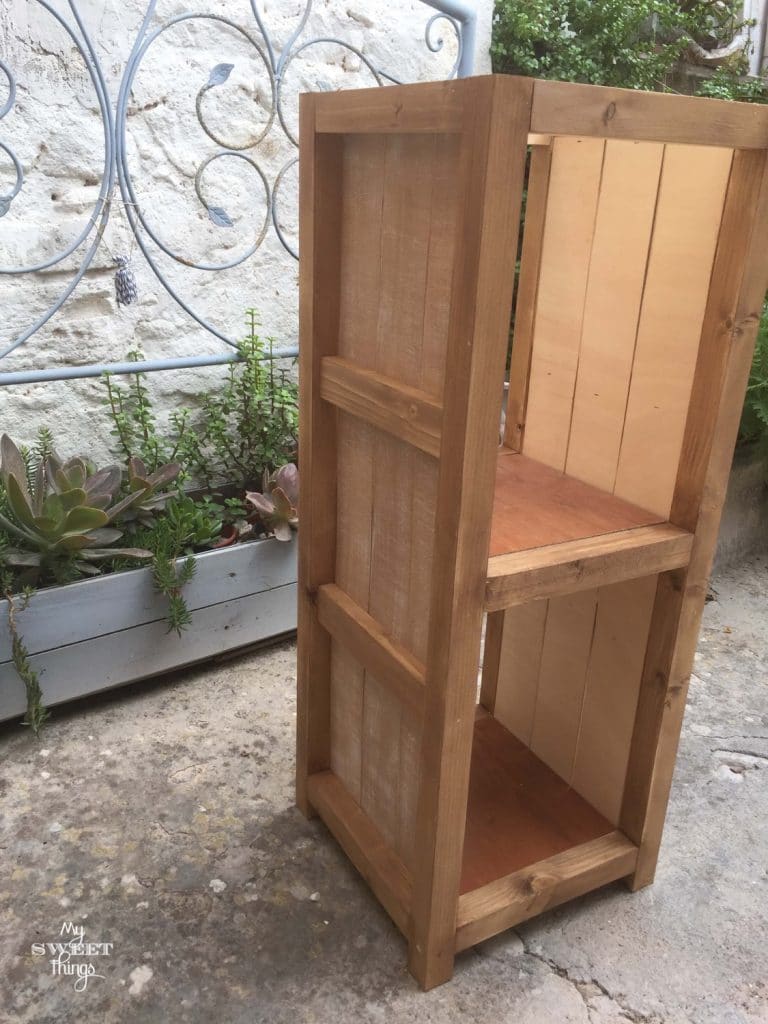
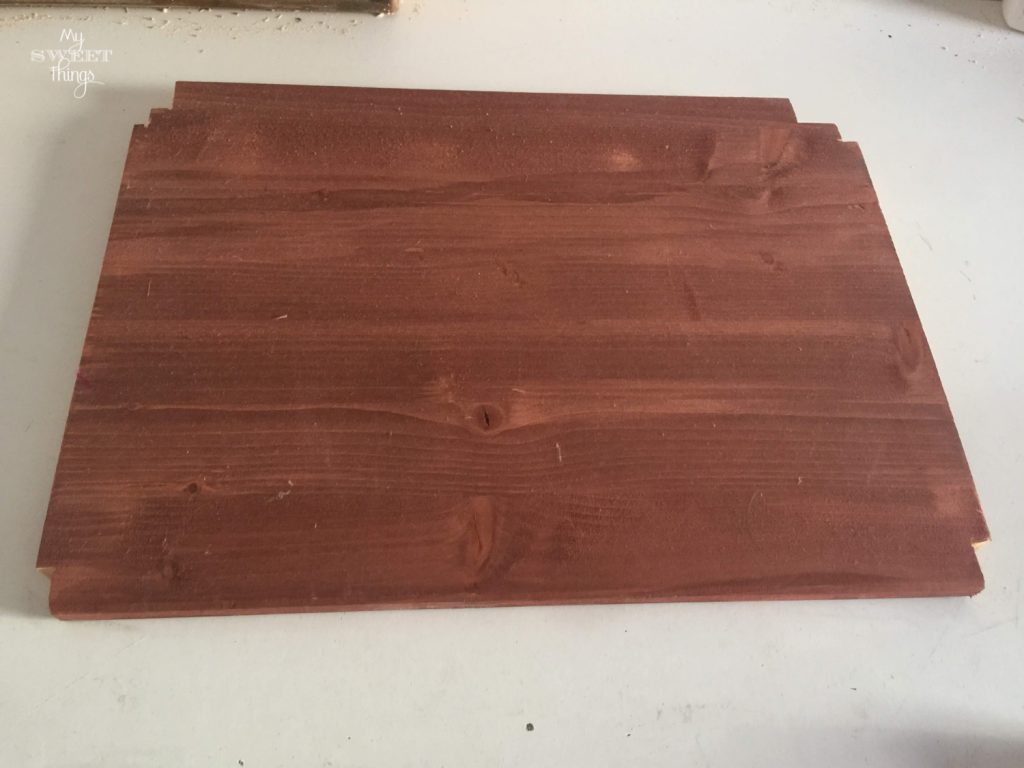
The main structure was done. I took it outside because it was a nice and sunny day 🙂
Time to apply some wood stain and sunbath at the same time. I used walnut color.
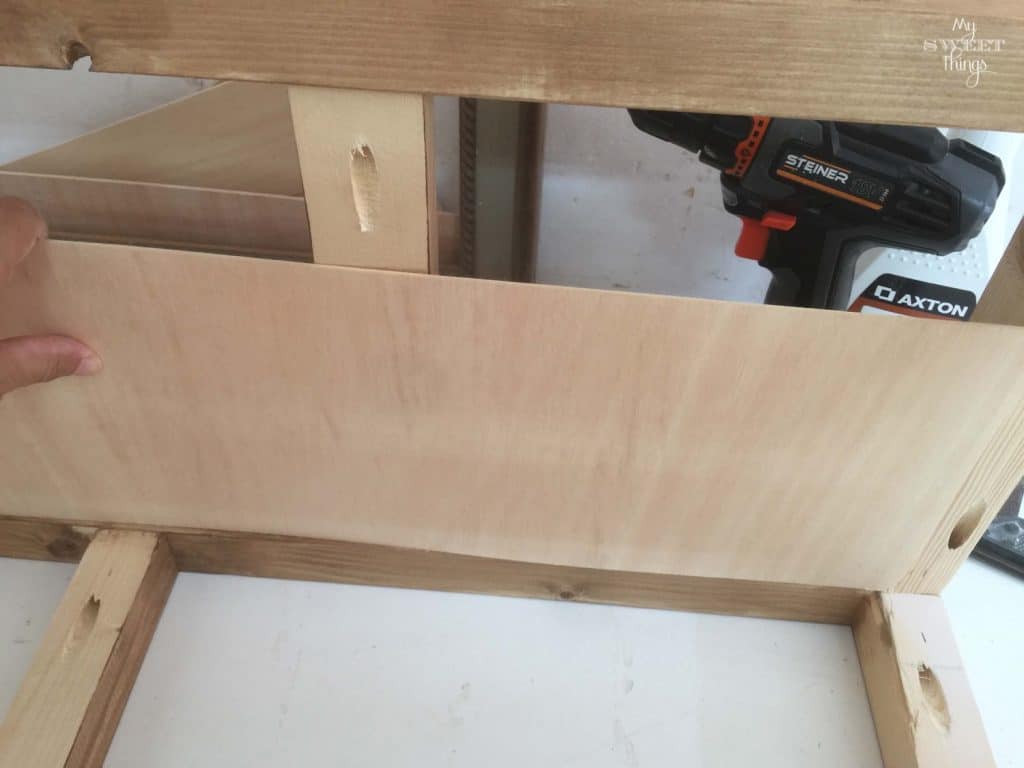
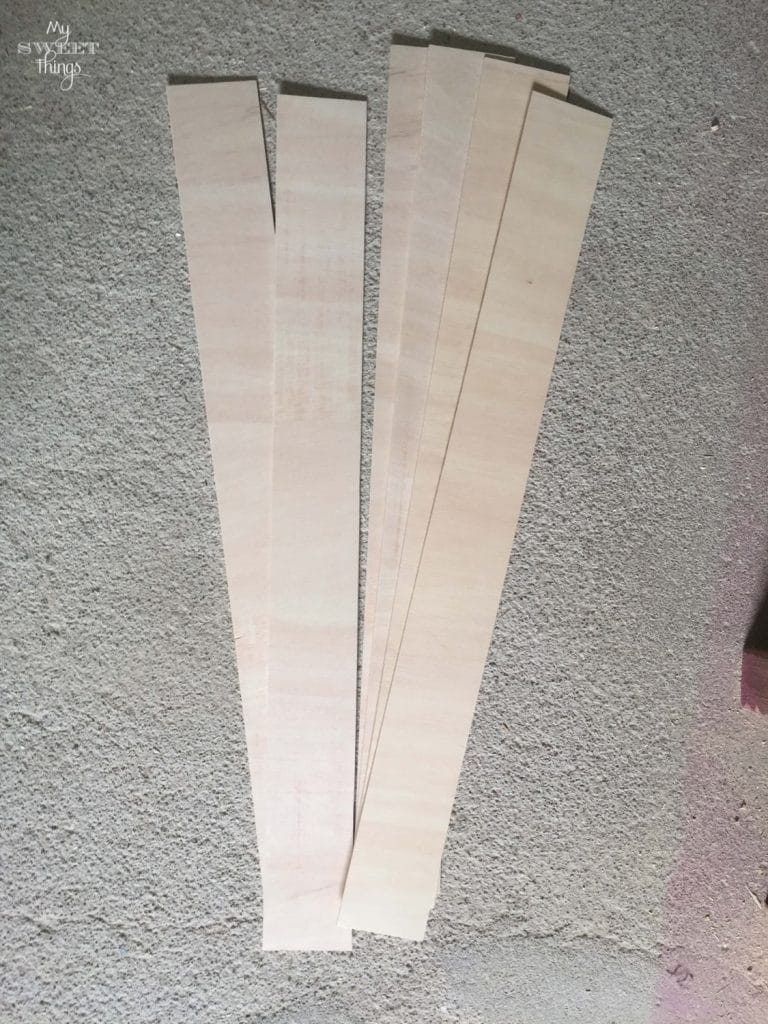
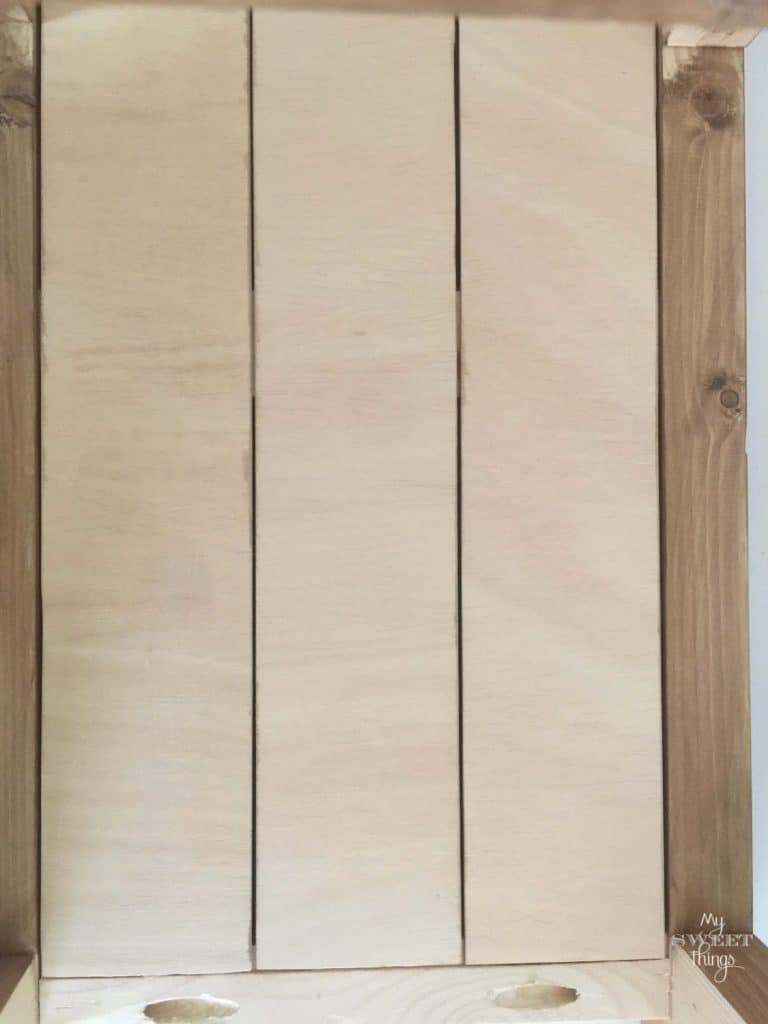
I had some thin plywood scraps and cut them to the same with. Then I aligned them to see where I should screw the sides. Do I make sense?
A picture can help for sure. This would be the inside of the cabinet and they plywood would go inside.
These are the pieces I was telling you, all of them cut the same length and width.
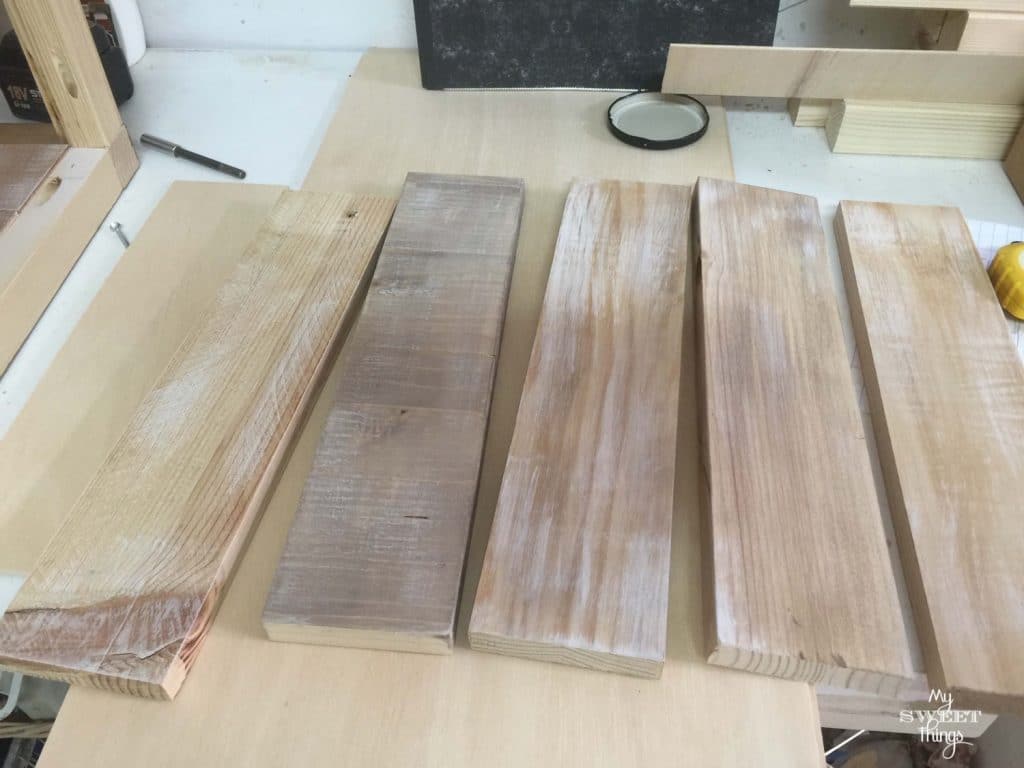
I didn’t want the filing cabinet to be all dark so I dry brushed some white paint on the sides.
And I did the same for the wooden pieces that would be attached to the cardboard files.
Ready to staple them in place.
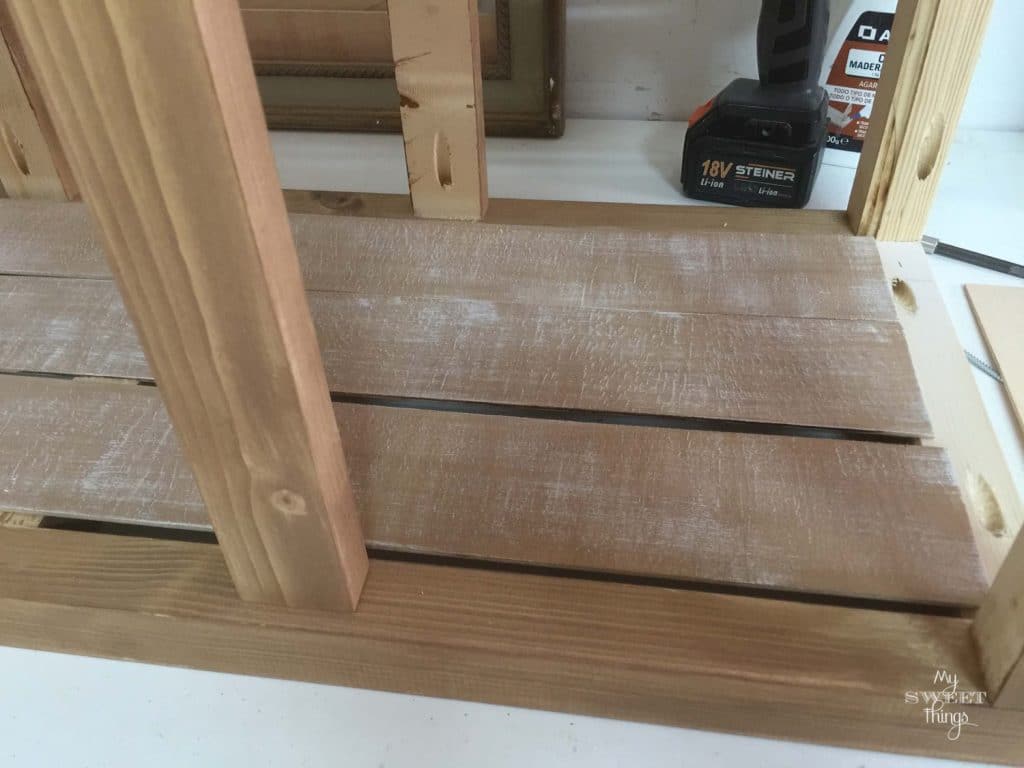
I needed some rails for the bottom and middle part to hold a piece of wood, so I drilled some pilot holes.
Here it is laying on top of the rails. I didn’t mind it wasn’t proper wood because it was not going to show.
Once the rails were attached to the middle I could place the wood on top of them.
I was so excited it was looking great so far!
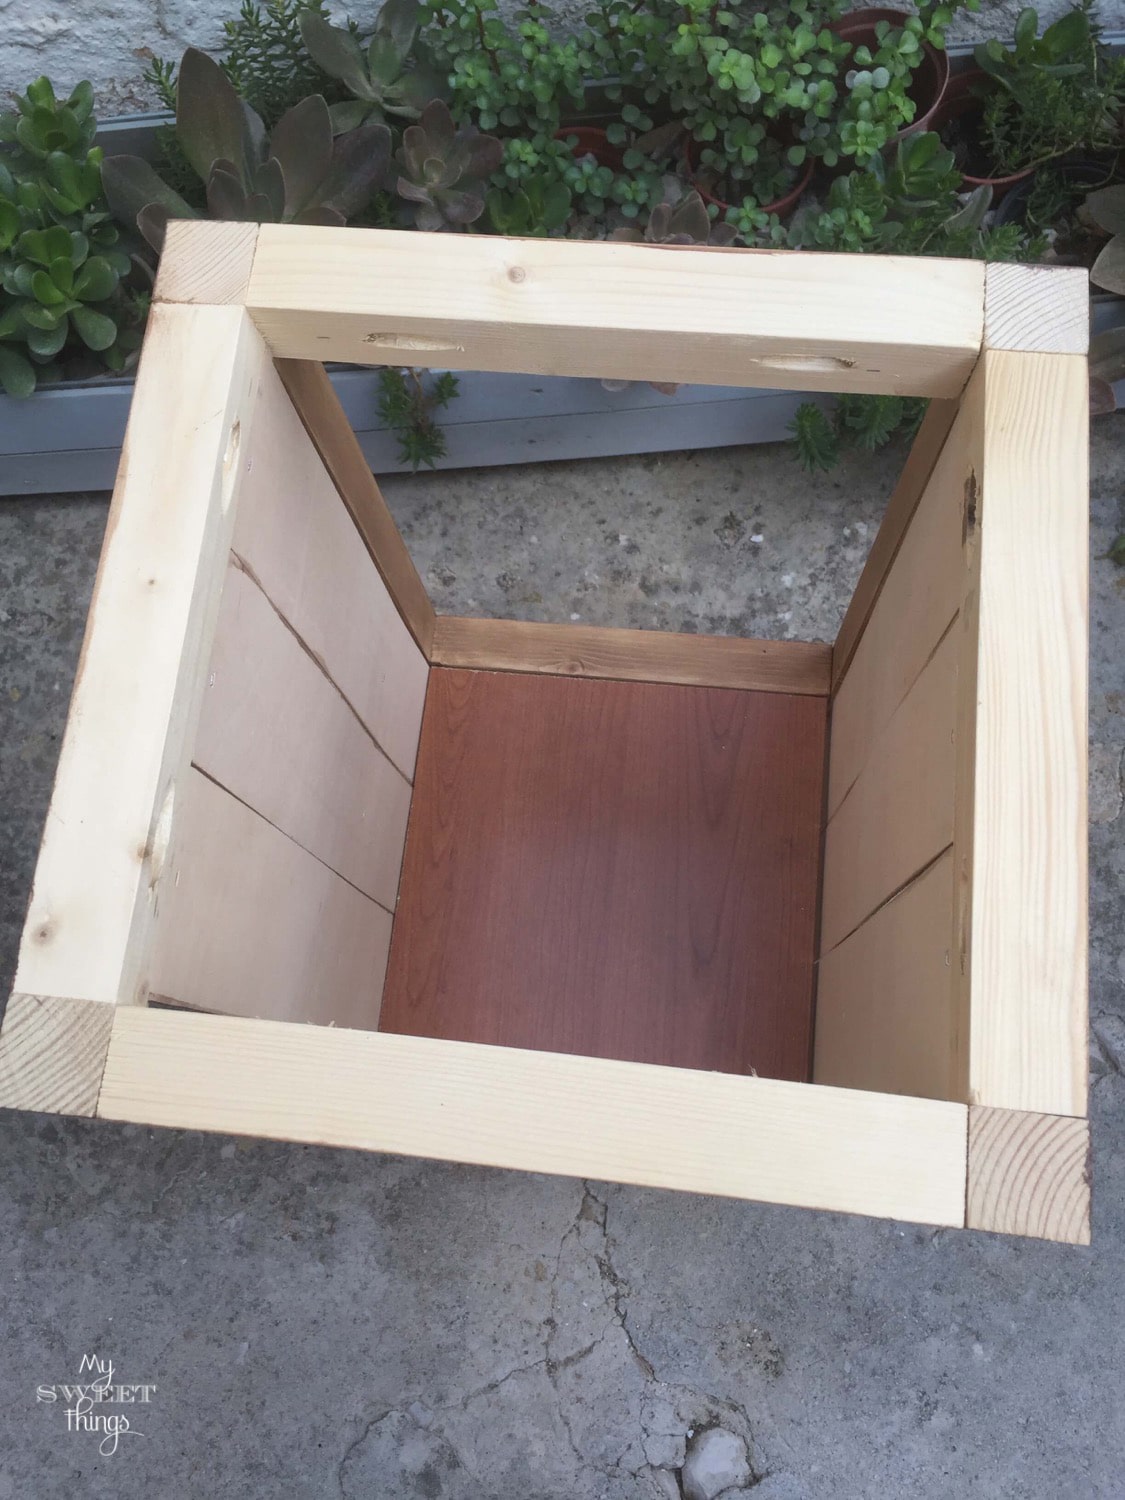
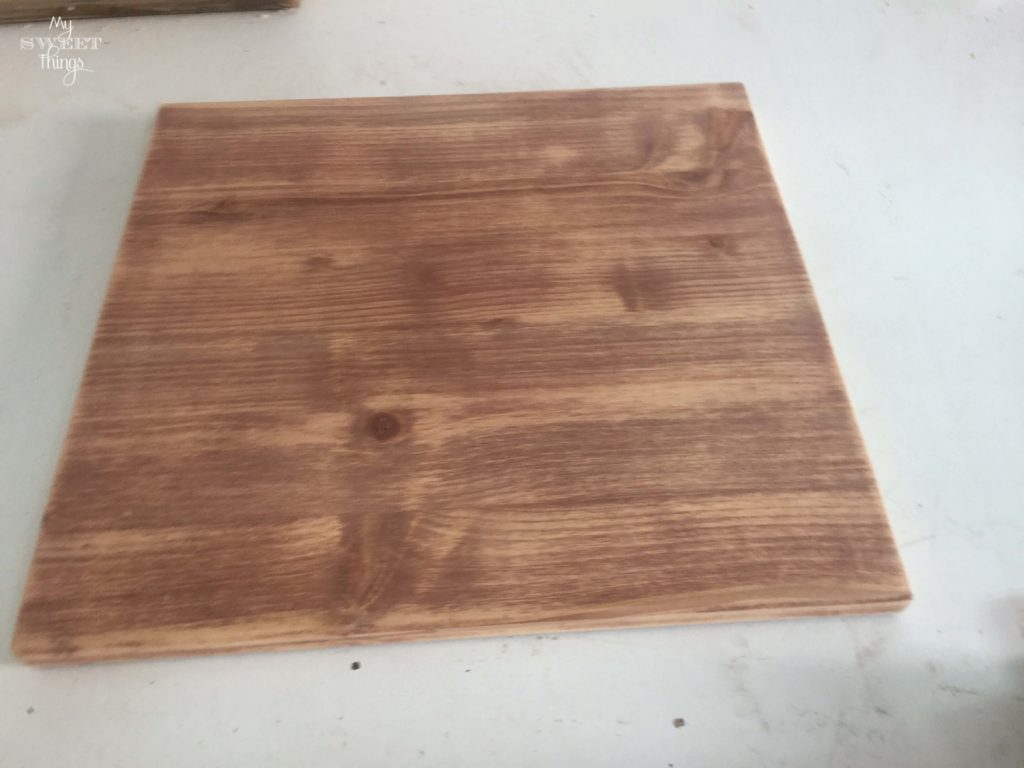
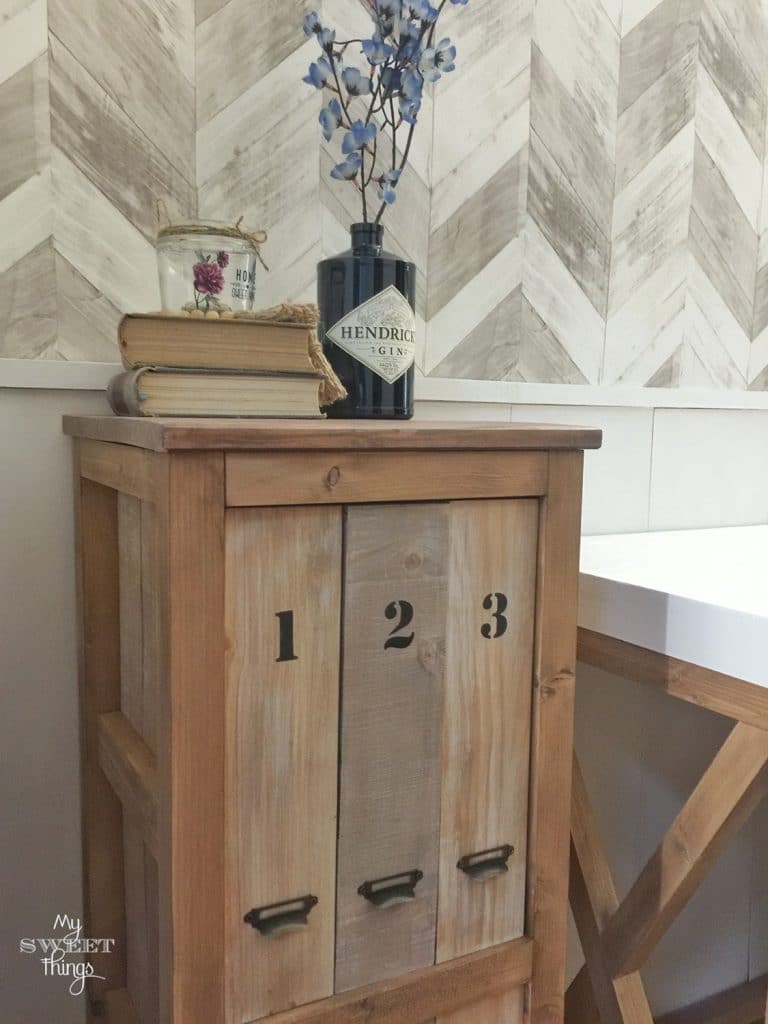
I searched in my stash and found a piece that had the right dimensions for the top, I just needed to cut it a bit.
I sanded it to reduce that reddish color.
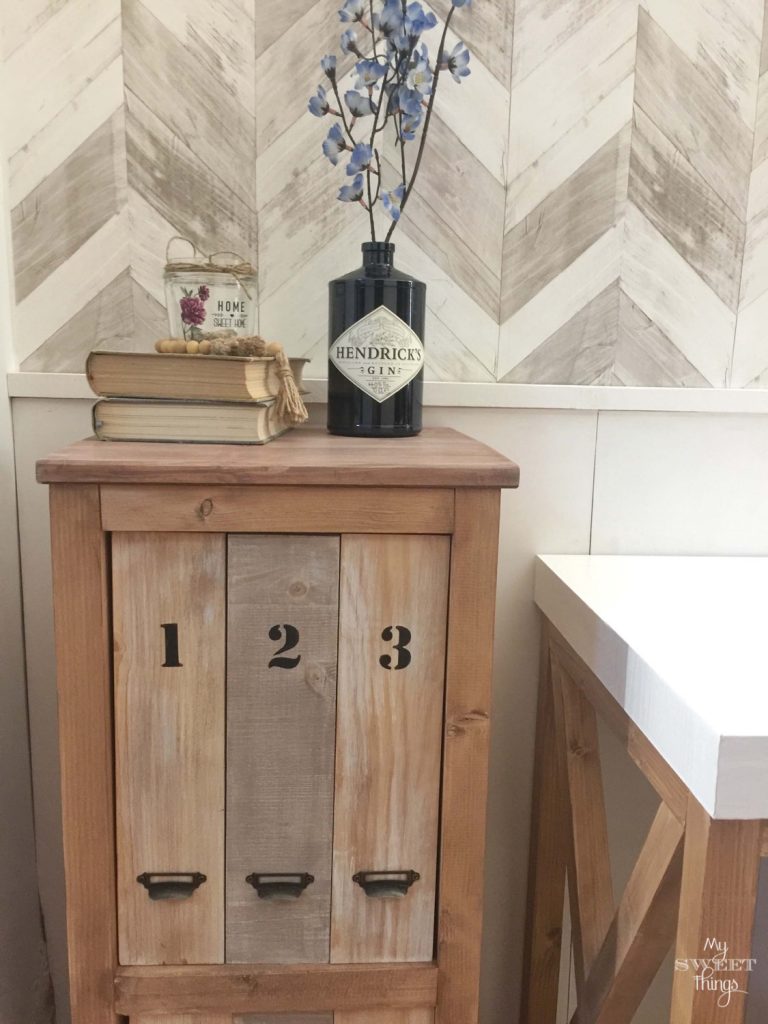
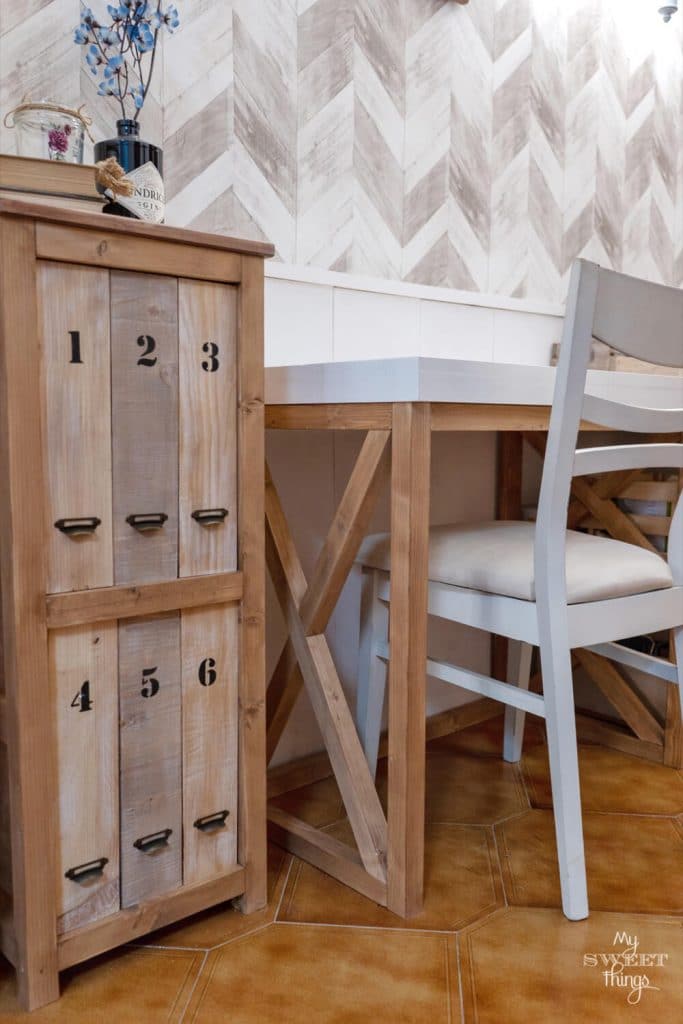
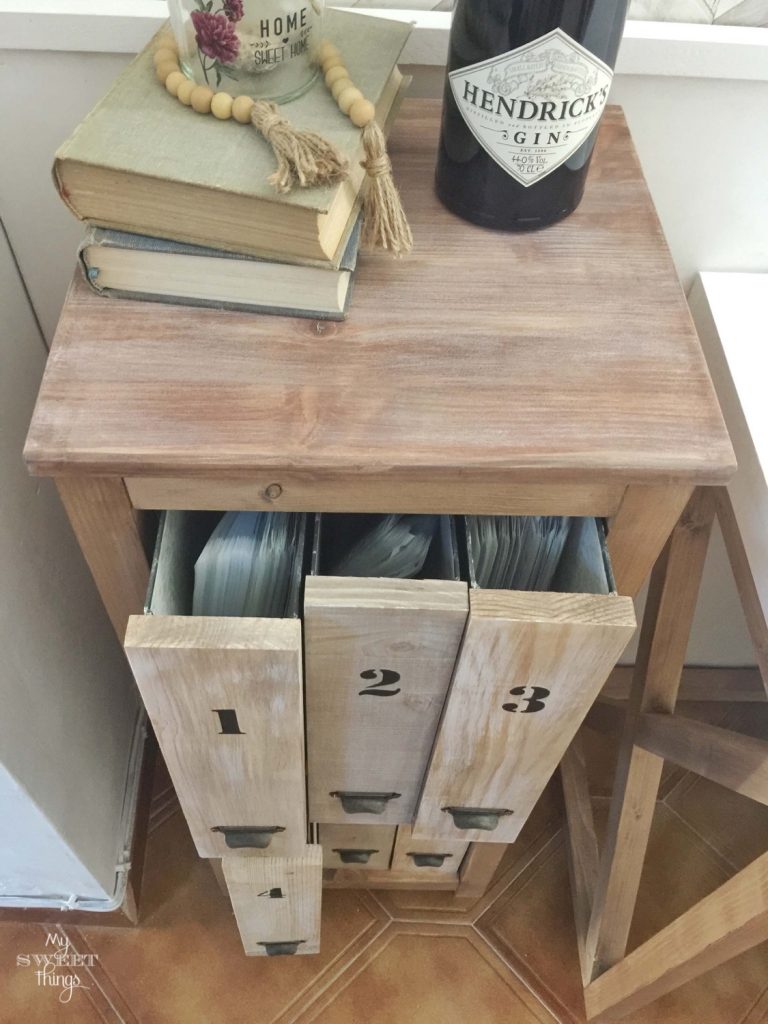
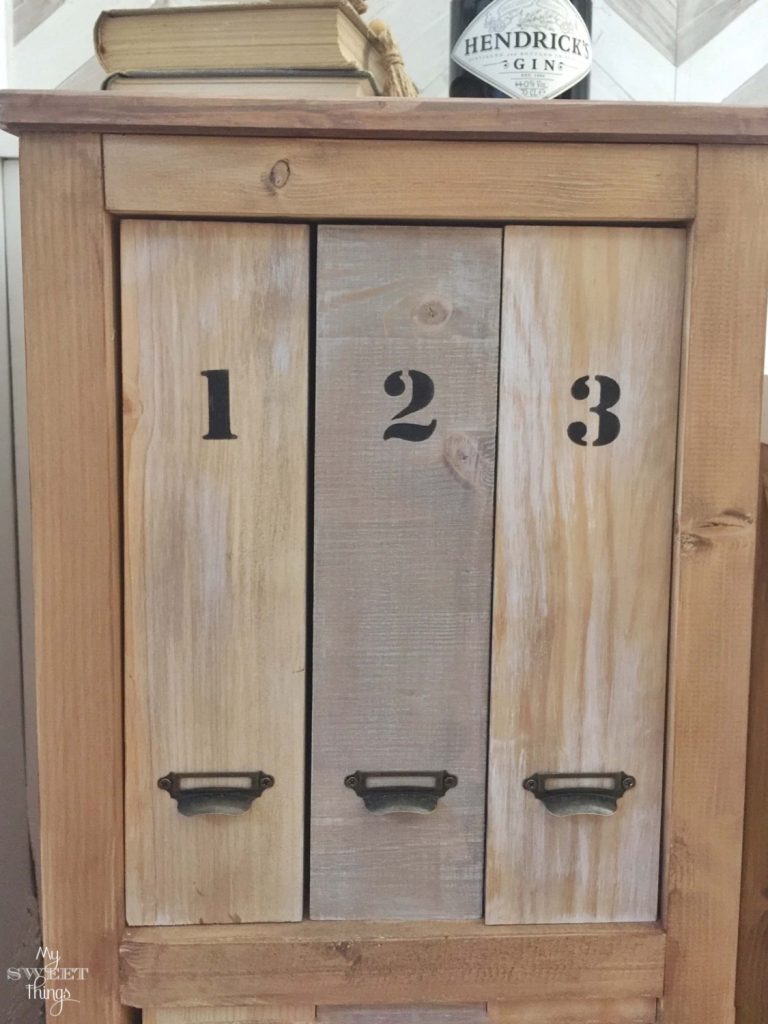
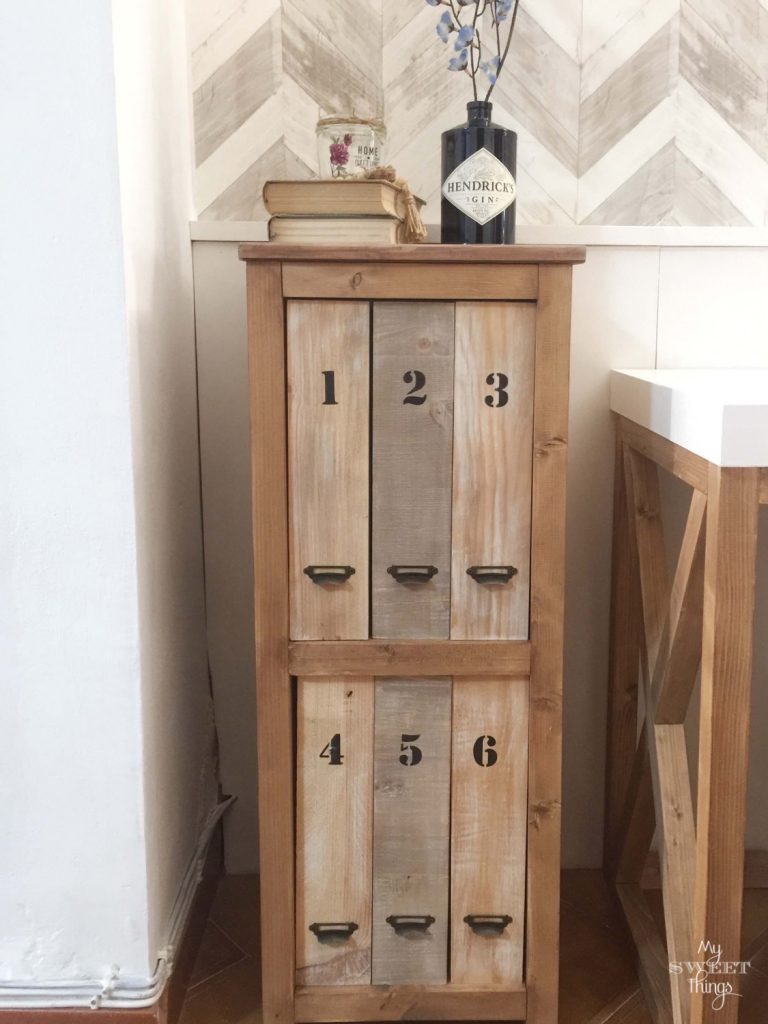
It was time to tackle the cardboard files. I used two screws to attach the wooden pieces as the front.
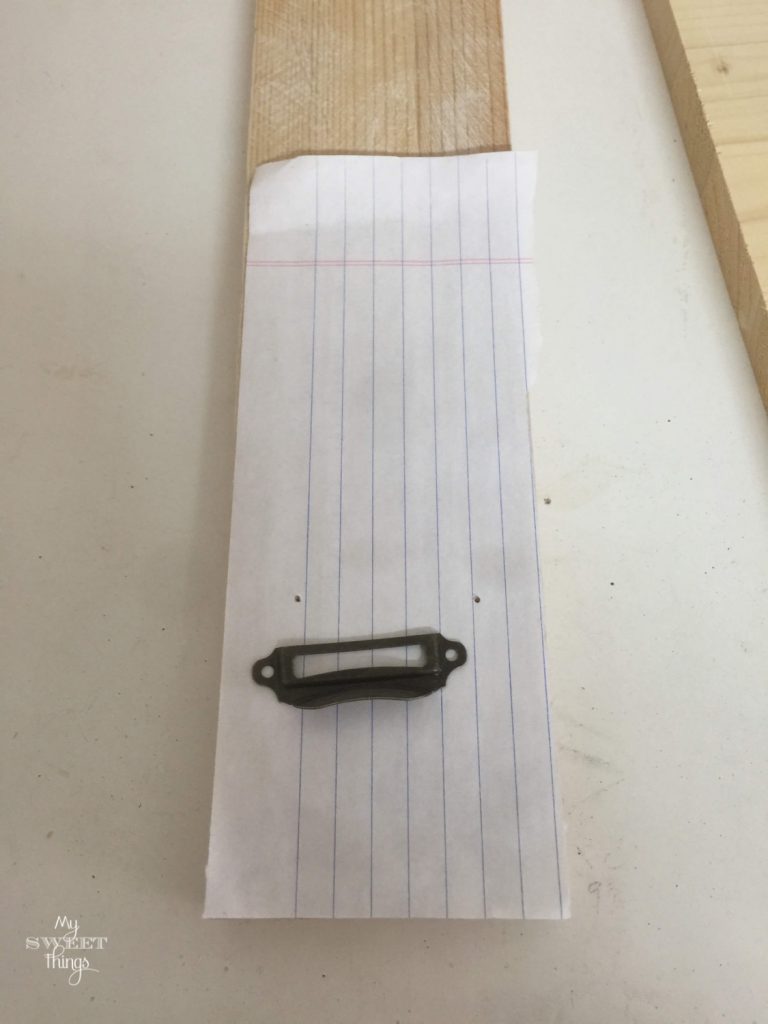
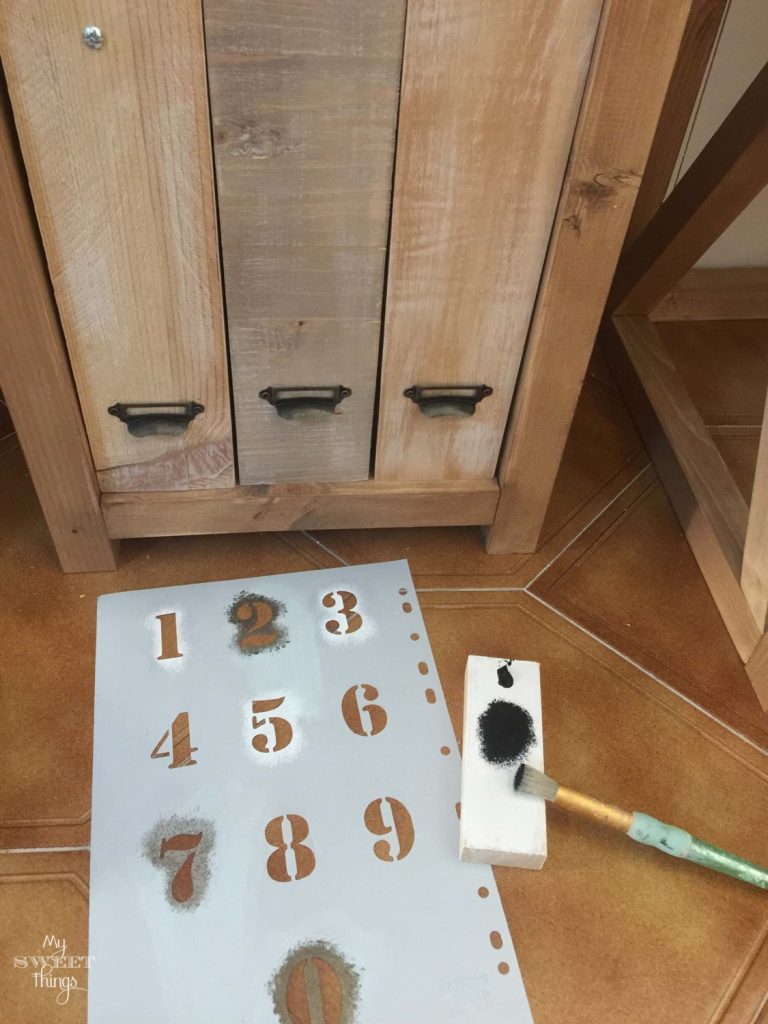
I wanted to add some interesting label pulls so I made a template to save time calculating where to screw.
I had five cardboard files and one magazine rack and did the same in all of them.
It was looking good but I love the industrial style so I decided I would add some industrial vibes to it using some stencils and black paint.
I made them using my Silhouette Cameo which works great for creating your own stencils.
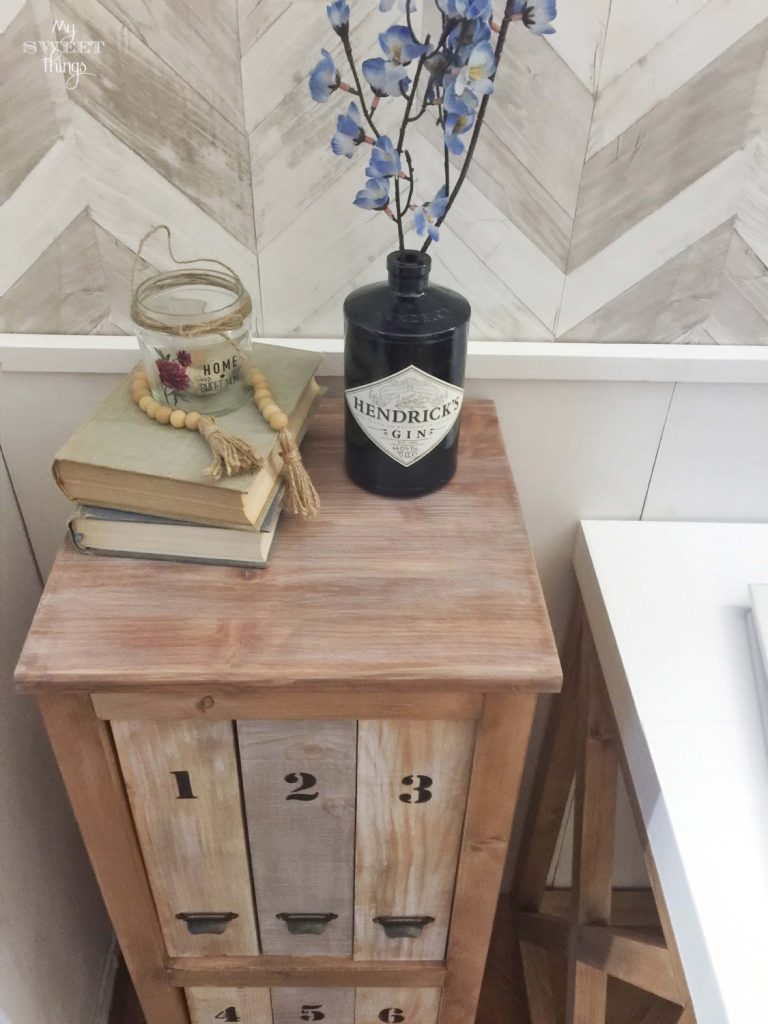
And here it is, ready and looking great for me!
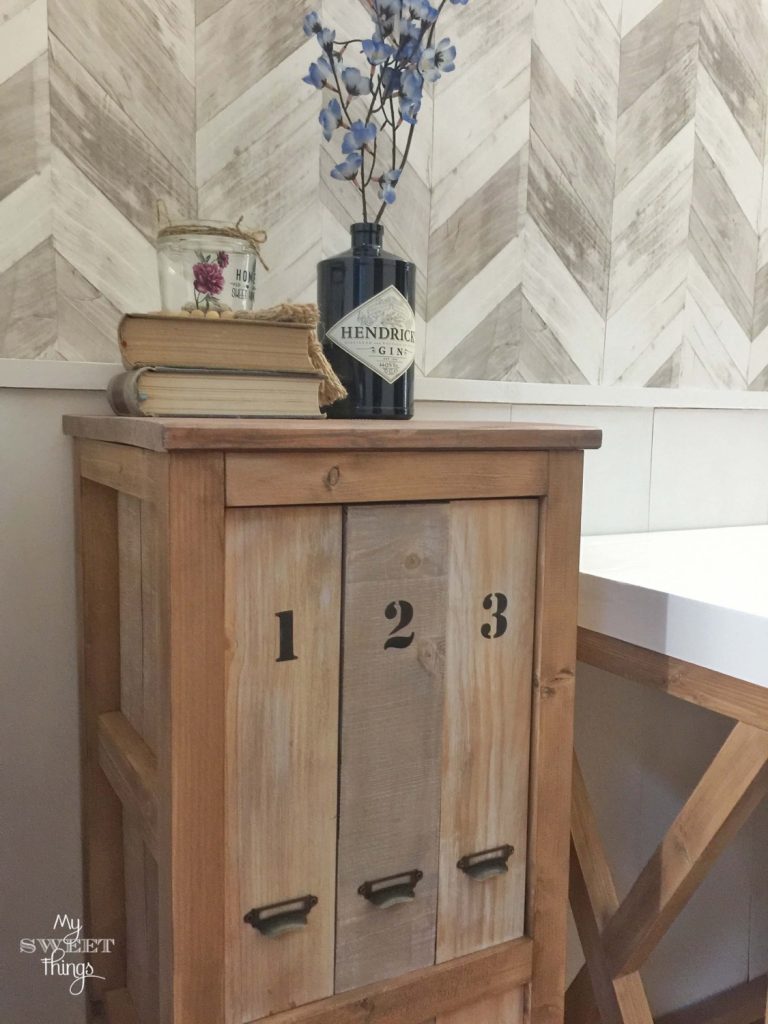
I love that I can keep my papers under control and at the same time hide that black eyesore…
Doesn’t look great? I love the contrast against the wall.
Now it’s a bright place that helps me to manage all the paper stuff a house and a company have.
I forgot to tell you. For the top, because it was too dark I weathered it a bit. You will find an easy tutorial on how to weather wood.
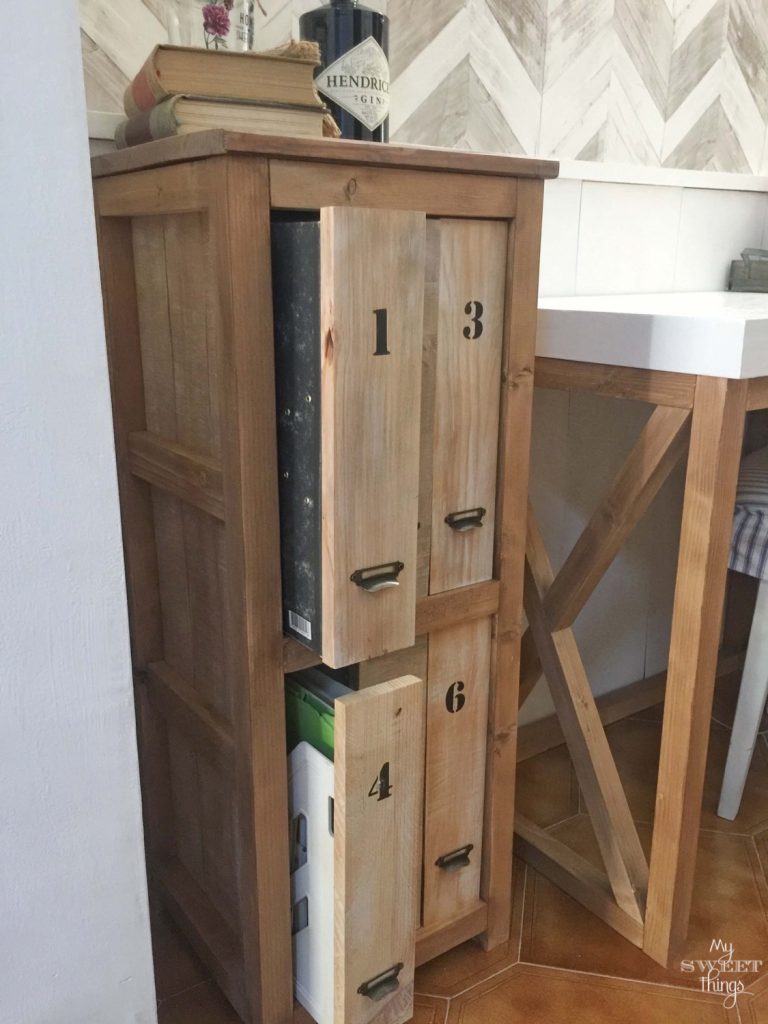
Another shot of it, shame pictures don’t do any justice.
Aren’t those label pulls just gorgeous?
Our DIY filing cabinet build gets so many compliments from friends and family. It was worth all the work.
I am proud I could come up with this idea and the plans were helpful, even they are not designed with fancy software.
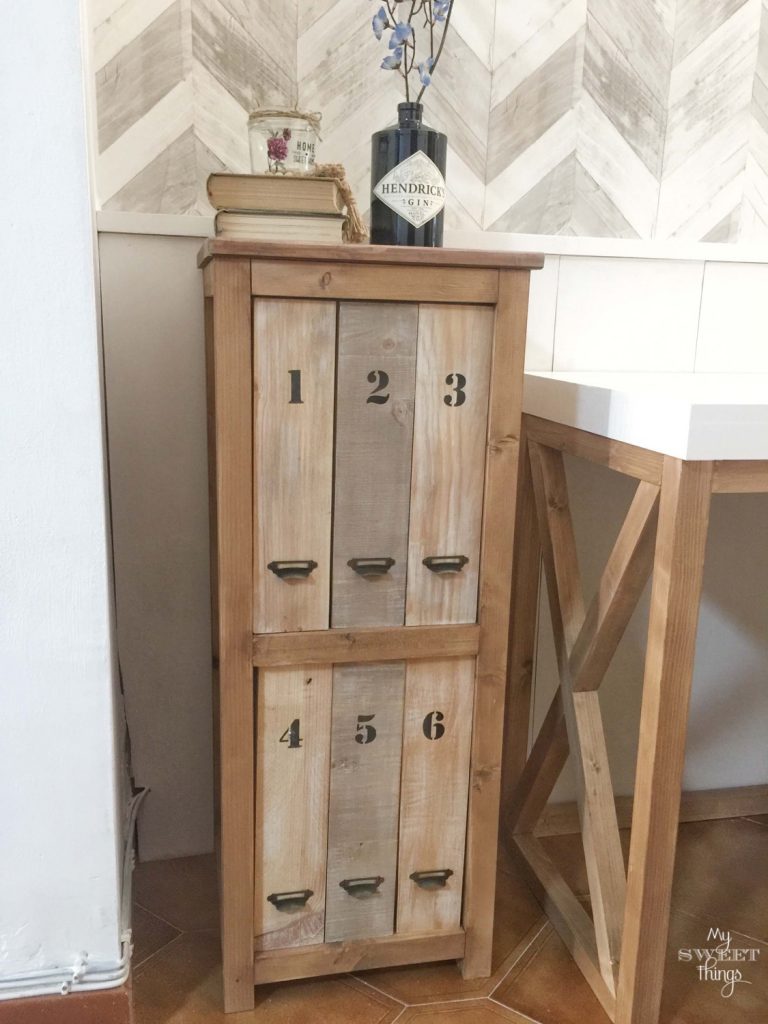
Last shot, pinky promise!
I hope you like my DIY filing cabinet build but don’t forget to go and check what the other talented ladies have come up with.
Thanks for stopping by,
Pili


Do you love DIY, recycling, home decor, furniture transformation and all kind of crafts? Then we have the same passion! I would love to share all my crazy ideas and projects with you so I would love if you SUBSCRIBE for my post e-mails.
I also share interesting content on Facebook and other social media, and I would love to hear from you! Not following me yet? Don’t be shy and stop by to say hello. Follow me on FACEBOOK, PINTEREST, INSTAGRAM, TWITTER, +GOOGLE.
Linking up to these parties
Any content on this website is created for inspiration purposes only. Creating with my suggested methods, products used and tools fail under your own risk. Please ensure you are following proper guidelines with anything used, and you receive professional guidance if you don’t know how to do something. For more details you can read my complete disclosure
Oh my goodness Pili, that’s just stunning and sooooooooooooo functional. I love what you did. Those filing boxes are always so ugly and I don’t think I’ve ever seen a better way to hide them. Love it!!!!
Hey Michelle!
Thank you so much for your compliments. Those filing boxes are for sure ugly, maybe there were in fashion when they came out but nowadays there’s no option, they must be hidden 😉
Take care
Hey Pili, I just landed on your this article. I have read the complete guide on DIY Filing Cabinet Build. I loved the way you have wrote a step by step guide to make a DIY filing cabinet unit. Thanks!!
Thanks for stopping by, Gladys!
Thank you so much for posting your DIY build. I love this design and going to try to re-create it for my home office. Thank you again for posting this. If mine turns out half as good as yours, I’ll consider a success.
James
Hi James
Thank you so much for your kind words. I would love to see your own version!
Privacy Overview