Hi guys!
Welcome to another month of the Thrift Store Challenge, so happy to have you here. Unless you are new to the blog you know what it is about… A group of ladies teamed up to show you what we’ve done with things we got from a thrift store, flea market, curbside, whatever is in need of a makeover.

The Rules:
- Upcycle an item(s) from a thrift store, resale store, or garage sale into a new piece of decor.
- There’s no monthly theme.
- There’s no budget to stick to.
Meet the Hosts
Angela | Simply Beautiful By Angela – Deborah | Salvage Sister & Mister – Angie | Flippin Fanchers – Denise | My Thrifty House –
Jenny | Cookies Coffee and Crafts – Lynne | My Family Thyme –
Meredith | Southbound Blog – Marie | The Inspiration Vault – Gail | Purple Hues and Me – Molly | Just a Little Creativity –
Pili | My Sweet Things – Amanda | Domestically Creative – Ali | Home Crafts By Ali – Carmen | Living Letter Home – Heather | Glitter On A Dime
Emy | Semigloss Design – Jeanie | Create and Babble – Marie | DIY Adulation –
Make sure you follow our board on Pinterest for more upcycled decor inspiration!
I don’t know about you but I get free stuff all the time, and by all the time I mean all.the.time.
I am a walking magnet, dumpsters are my best friends and I find cool stuff usually there so I don’t visit thrift stores unless I am looking for something special.
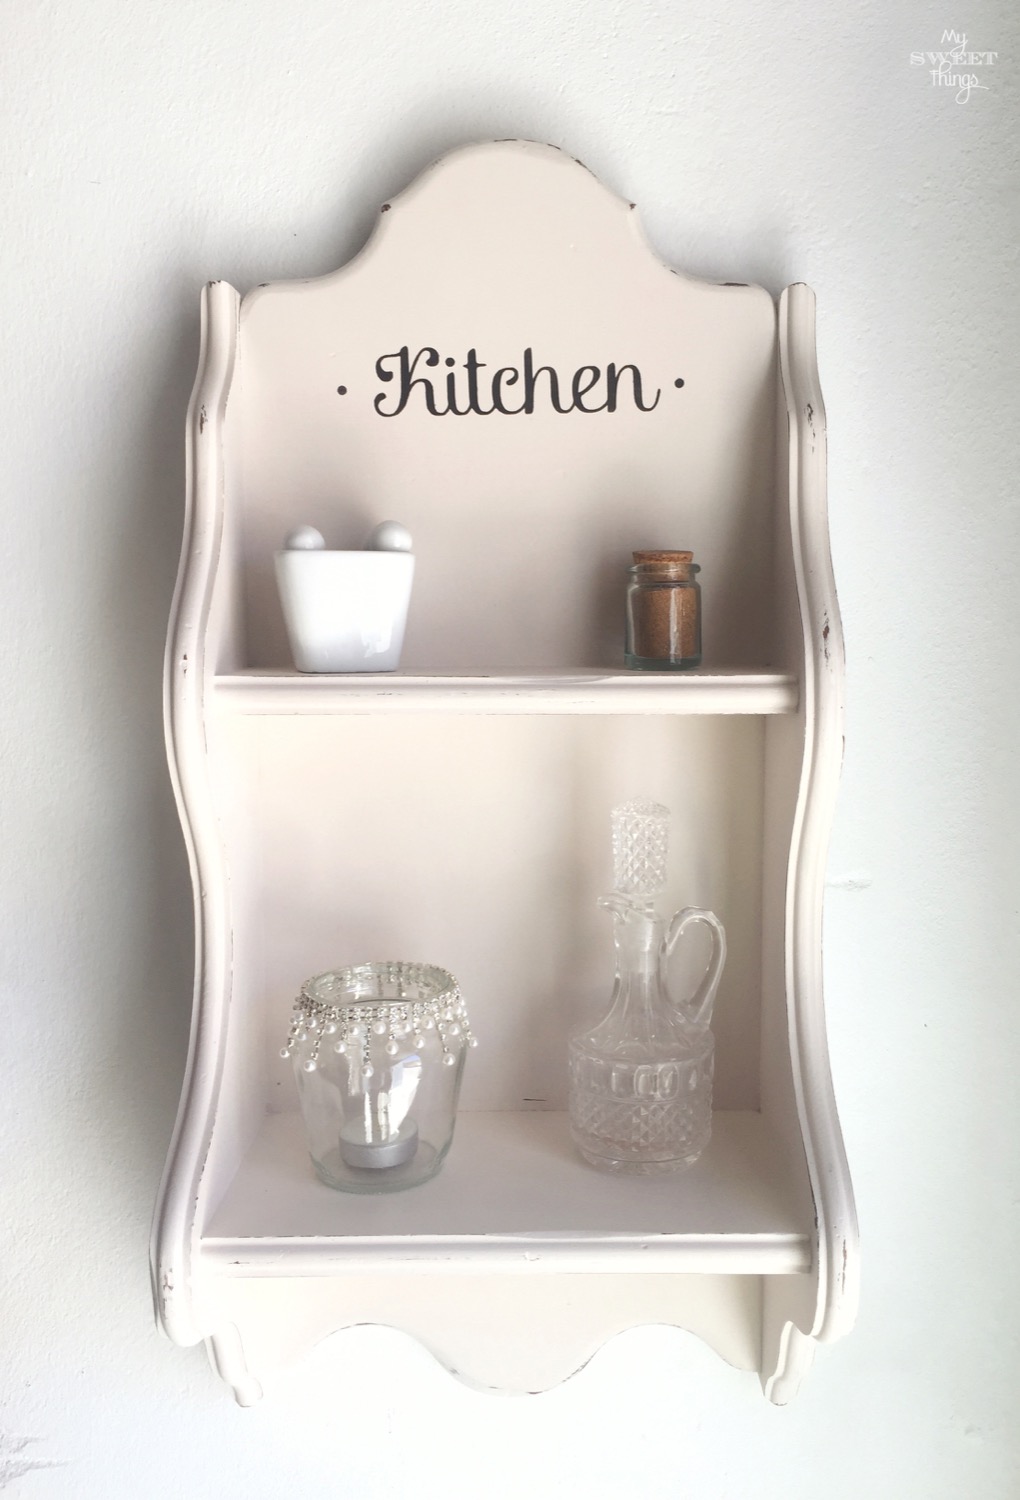
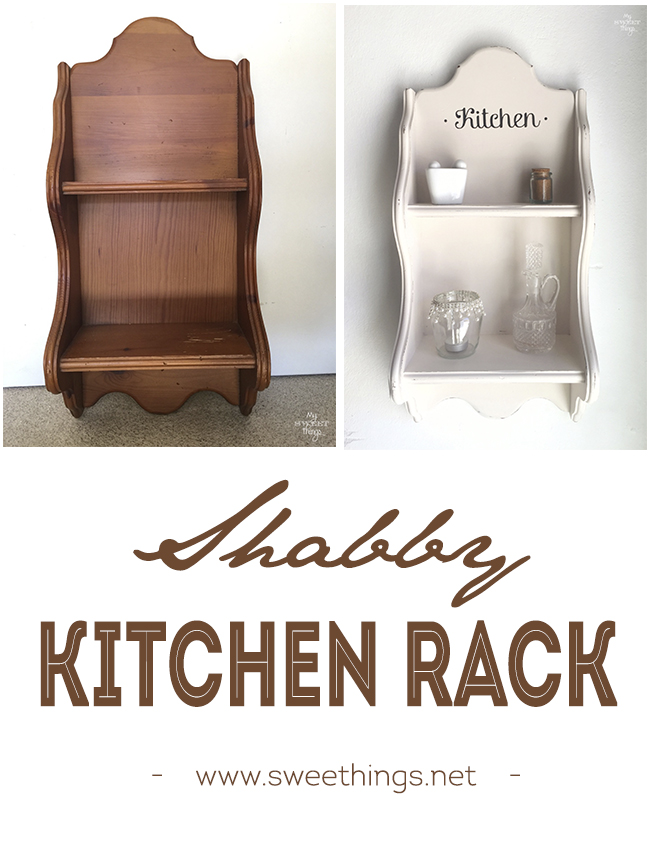
I also have so many nice friends that before throwing away something they ask me if I want it, like with this kitchen rack.
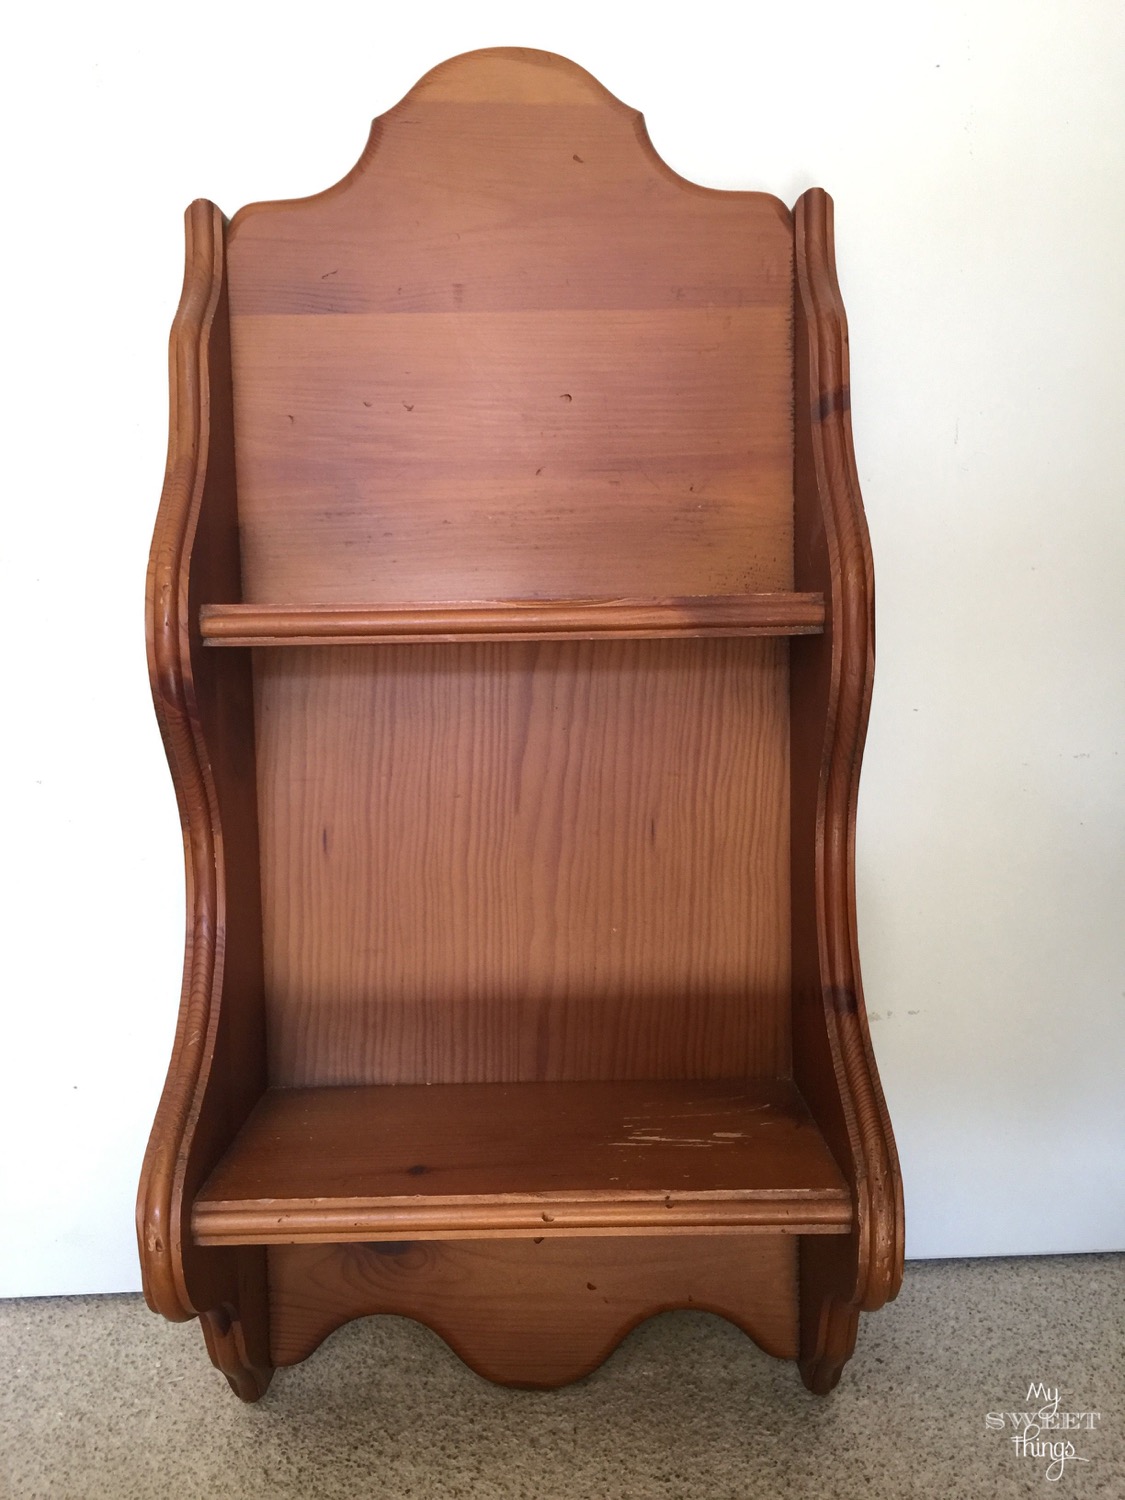
It was solid wood and it had a lovely shape, the only thing it would need would be some paint.
How to make a shabby kitchen rack
This is what I used to make this shabby kitchen rack, I will add some affiliate links for your convenience, you can read the full disclosure here.
· DIY Homemade Chalk Paint
· Kitchen rack
· Silhouette Cameo
· Matte Varnish
· Paint Brush
There is no science or advanced skills for this project. The first thing I did was to clean the thing very well and sand it slightly to help the paint stick better.
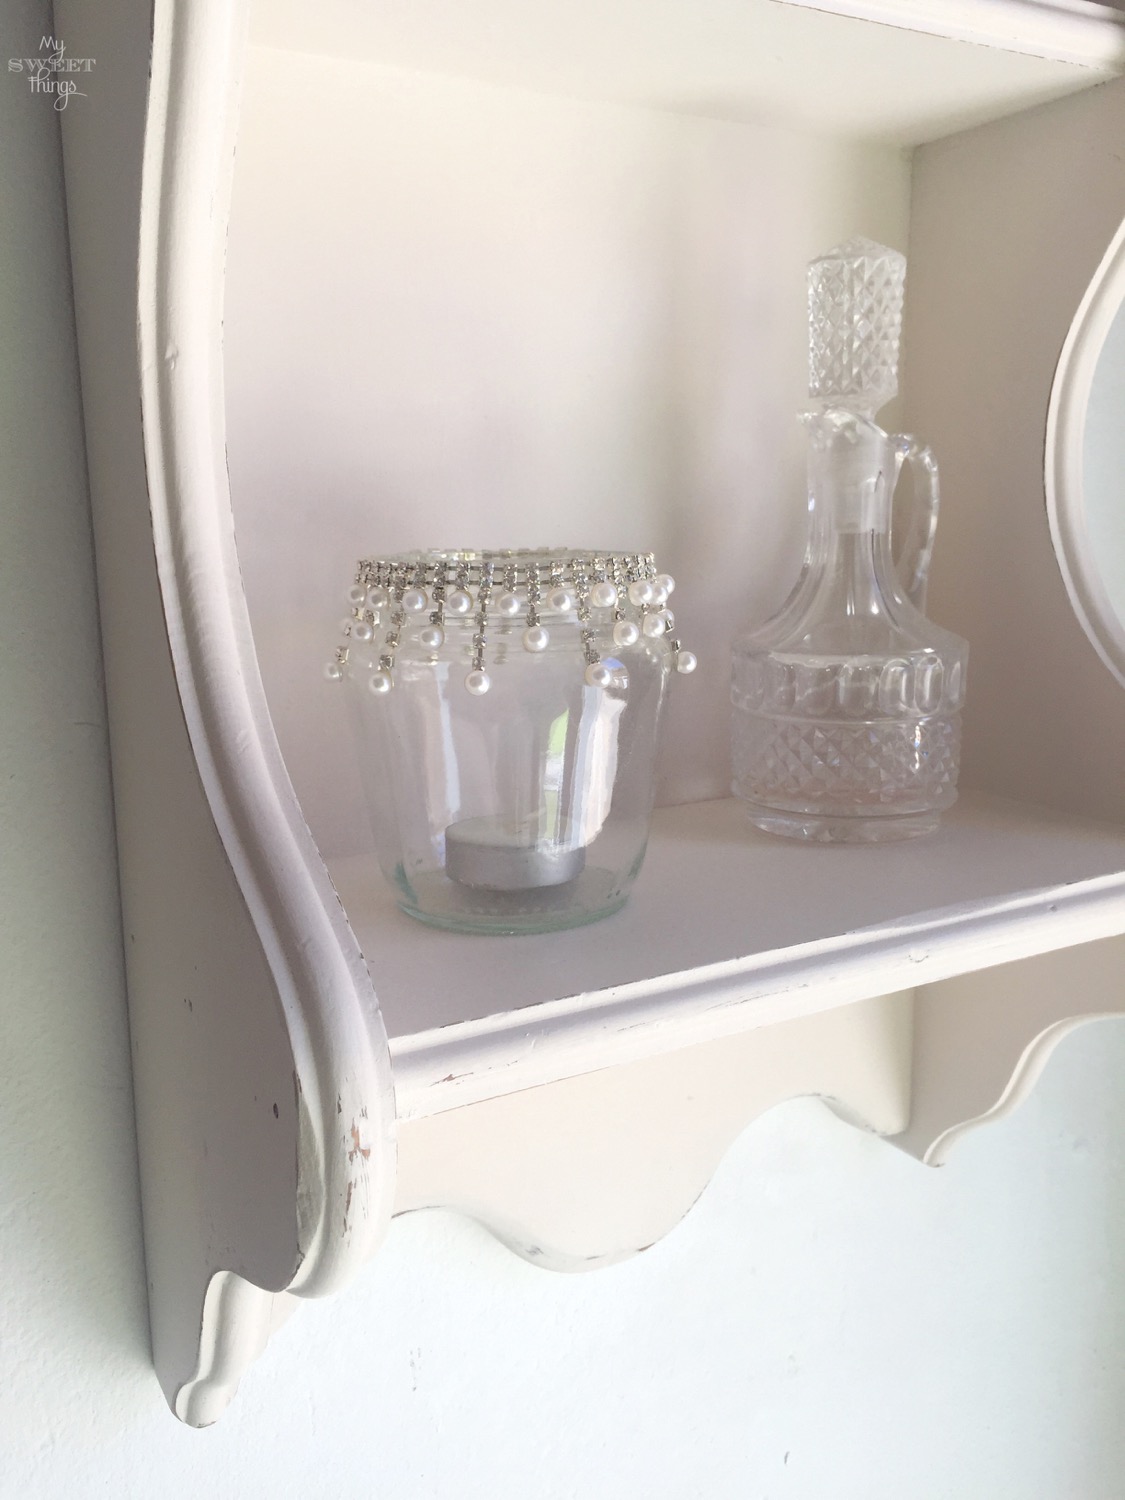
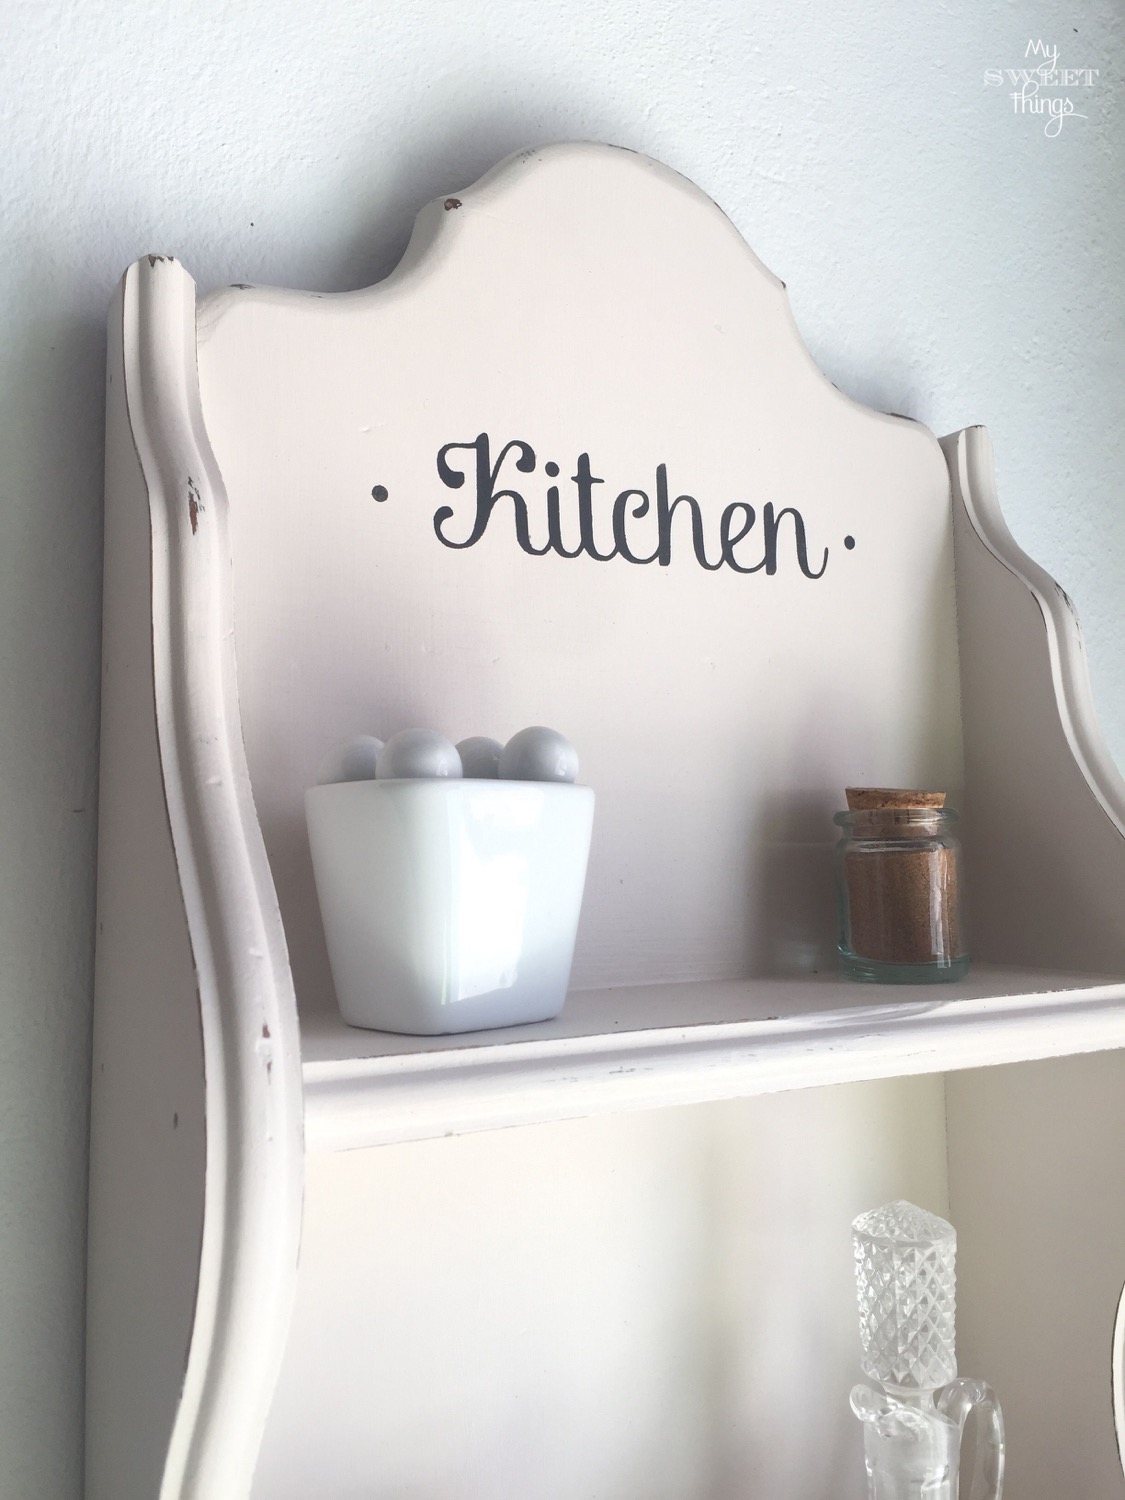
I chose an off-white color and gave it two coats. Once was dry I distressed the edges a bit. Remember I wanted a shabby kitchen rack.
Then I took laptod and designed the word “Kitchen” to make a stencil. I took my Silhouette Cameo and cut it.
I used painter’s tape to hold it in the middle and used a bit of black paint for the letters.
That easy.
Do you understand why I chose an off-white color? With white walls that color was perfect to have a little contrast.
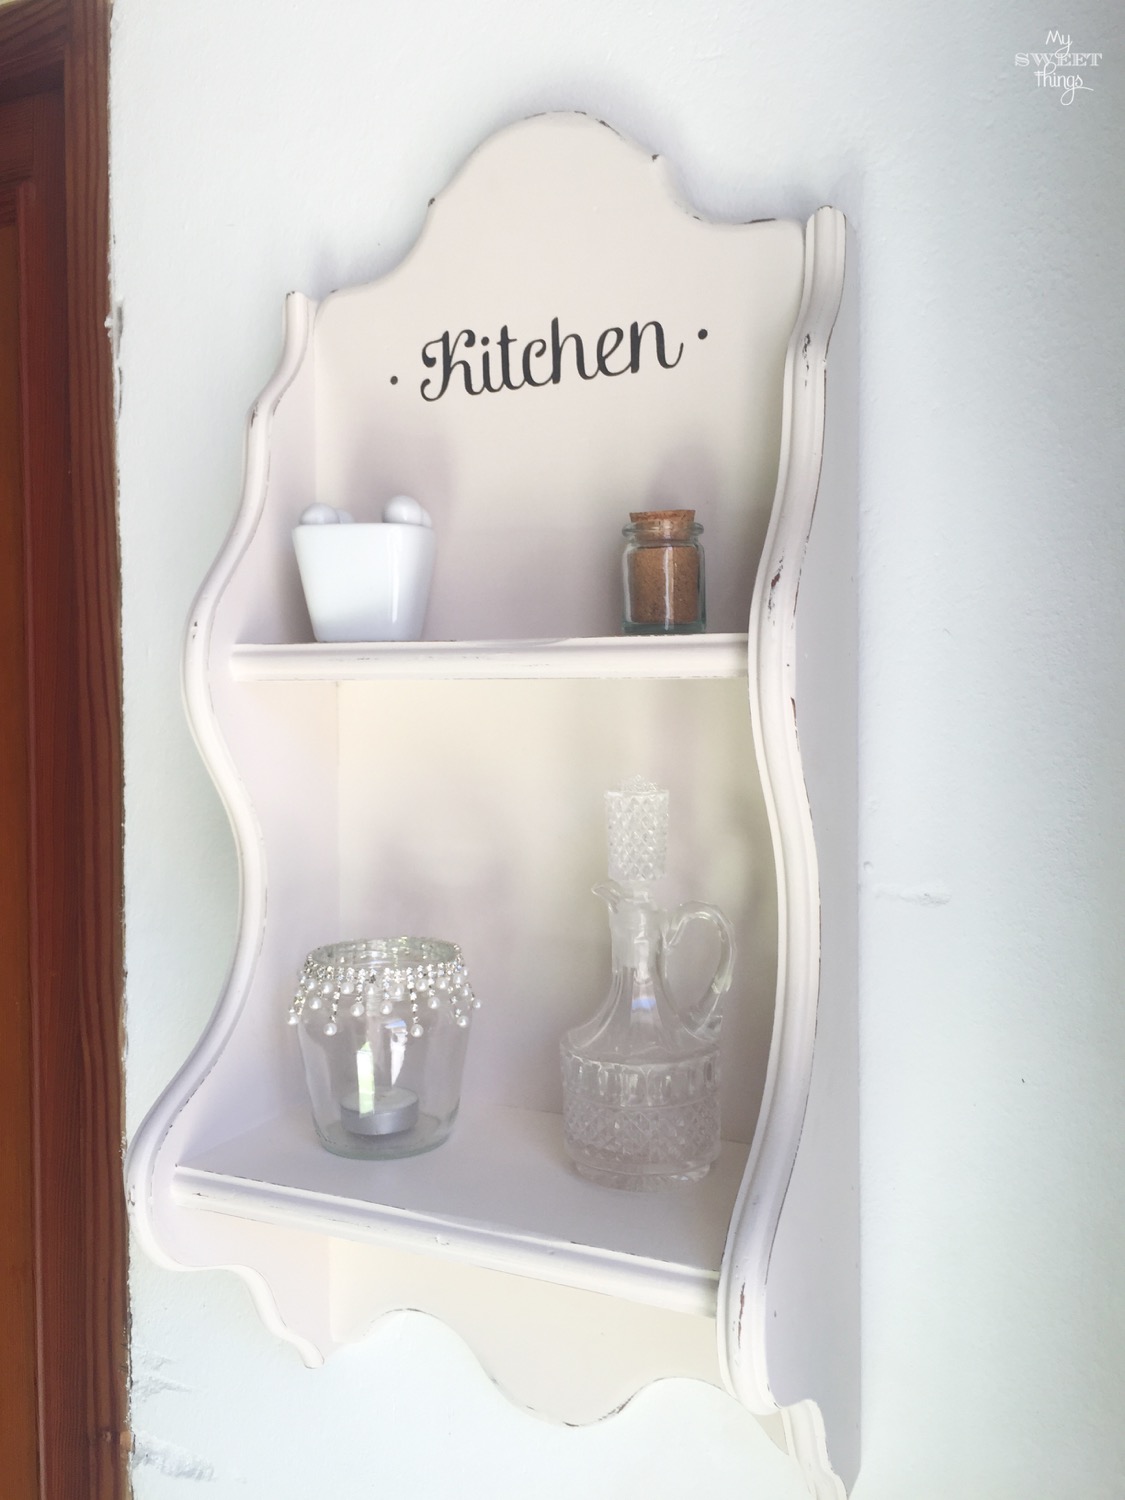
It’s not too big but it still can hold quite a few things.
If you liked that “Kitchen” stencil just click on it to download it for your own project, I’d love to see it! You can tag me on Facebook or Instagram.

I hope you liked my shabby kitchen rack as much as I do!
Thanks for stopping by and remember to share it if you liked it. Sharing is caring 😉
This turned out beautifully Pili! I love that off white color and the lettering adds the perfect touch!
Beautiful Pili! Love the stencil you used and as always your distressing is perfect!
Thank you so much, Amanda!!
Love how your shelf turned out!
Very cute! The black lettering really adds a nice touch to this project!
Such a pretty makeover Pili. I love that kitchen lettering.
That’s such a sweet little shelf Pili. Those curves and lines are so striking and the way you’ve distressed the edges really makes them pop. Pinned
Privacy Overview