Hey friends!
It’s time to bring you another Pinterest Challenge post as each third Tuesday of the month. In this challenge we are inspired by something we’ve seen on Pinterest and then we make our own version.
Maybe you remember my last post on how to paint a headboard with paint, it was a fun one!
Let’s meet this month’s Pinterest Challenge hosts!

My Pinterventures • Cookies Coffee and Crafts
Sew Crafty Crochet • Sum of their Stories • Eye Love Knots
This Autoimmune Life • Love My Little Cottage
Across the Boulevard • Suzerspace • My Sweet Things
Once Upon a Time & Happily Ever After
Purple Hues and Me • Decorate and More with Tip
Mom Home Guide • Our Unschooling Journey • Our Good Life
Intelligent Domestications • Craftify My Love
Life Beyond the Kitchen • K’s Olympic Nest • Teadoddles
Our Crafty Mom • My Family Thyme
15 Acre Homestead • Farm Girl Reformed
To join next month’s #pinterestchallenge, click here to sign-up ⇒ July Pinterest Challenge
Today I want to share with you a simple makeover.
We all know by now (at least I guess so) that we don’t need to spend a lot of money to decorate our home, or to blow our budget buying expensive furniture, and we don’t even need to have special skills to make beautiful things for the house.
I love transforming furniture, it’s the thing I love most.
Of course I enjoy a good challenge like this vintage bedroom set or this romantic bench out of a headboard and two chairs, but the power of paint is fascinating and you don’t really need superpowers or a super creative mind to change a piece of furniture of your own.
Let’s talk about this one. Not too fancy, right? A friend was getting rid of old furniture and she thought of me… I love when that happens!
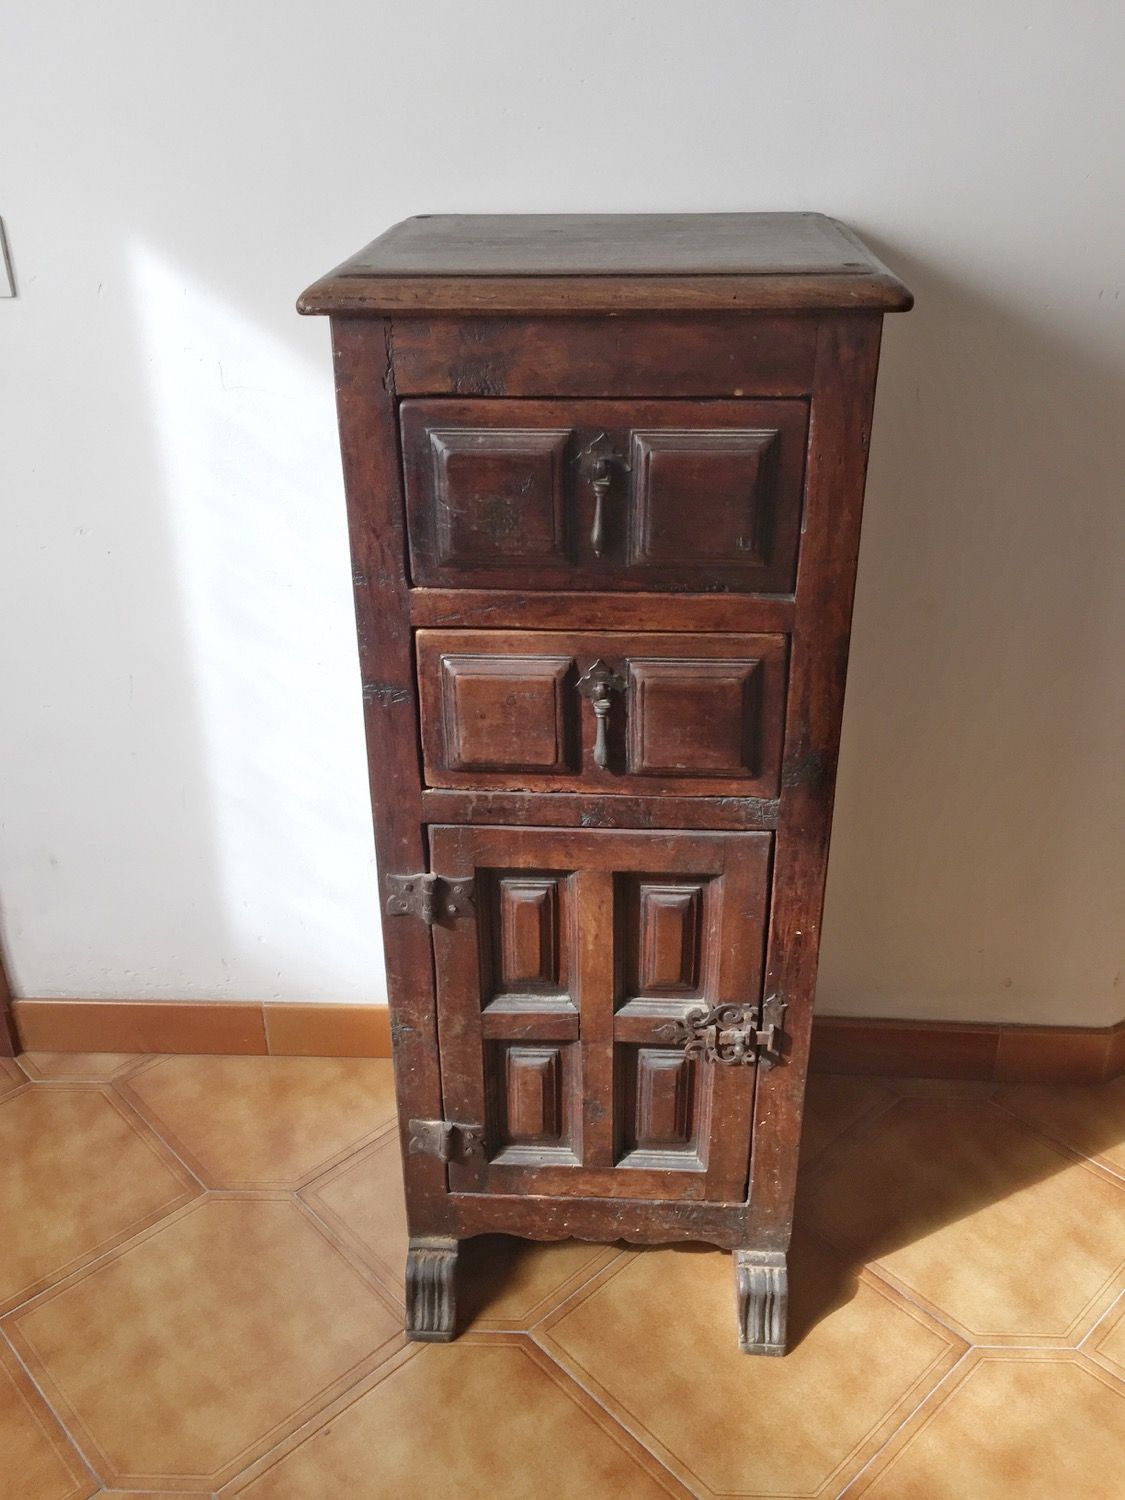
Sometimes simplicity is the key.
With all those details you can think, ‘oh, I could do some decoupage there on the raised parts’. Well, it’s an option, you can read this post if you need help on how to decoupage furniture.
Or you can say, ‘oh, the top is so smooth I could do a transfer on it’. Again, if you want to know how to make a transfer on wood then follow that link.
But you don’t need to use all those techniques every time you want to update some furniture. Paint itself will make a huge difference.
Also you will need few materials which means little money. I will list all the materials I used in case you want to try your own. You’ll find some affiliate links for your convenience and you can read full disclosure here..
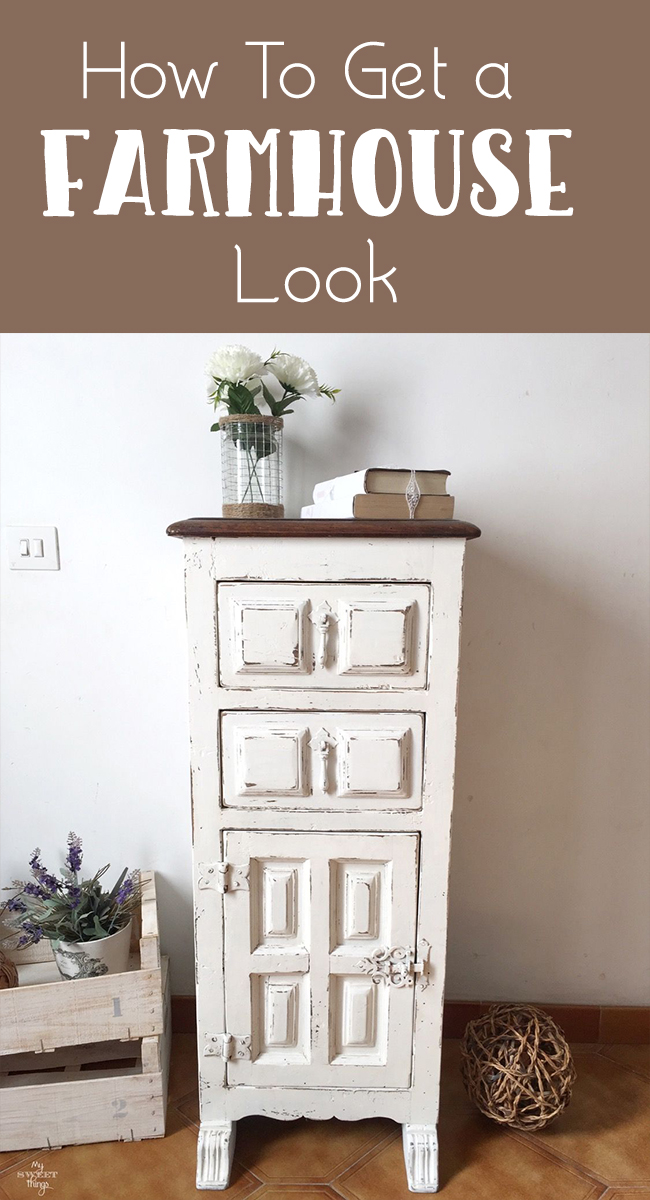
How to get a farmhouse style side table
- Piece of furniture
- Acrylic paint
- Plaster of Paris
- Paint brush
- Electric sander
The best thing about painting stuff is that you can make your own paint.
Well, by paint I mean DIY Chalky Paint. I have used my homemade chalk paint in most of my projects. The good thing about it is that you can make any color you like, the sky is the limit.
Also you don’t need to get crazy sanding the piece because this paint sticks to anything. Just make sure you clean the surface and you are ready to go. On a side note I’ll add that I like to sand the piece a little bit. It helps the paint to stick better.
This was the first coat. Don’t worry too much about how it looks right now, it will get better with another coat.
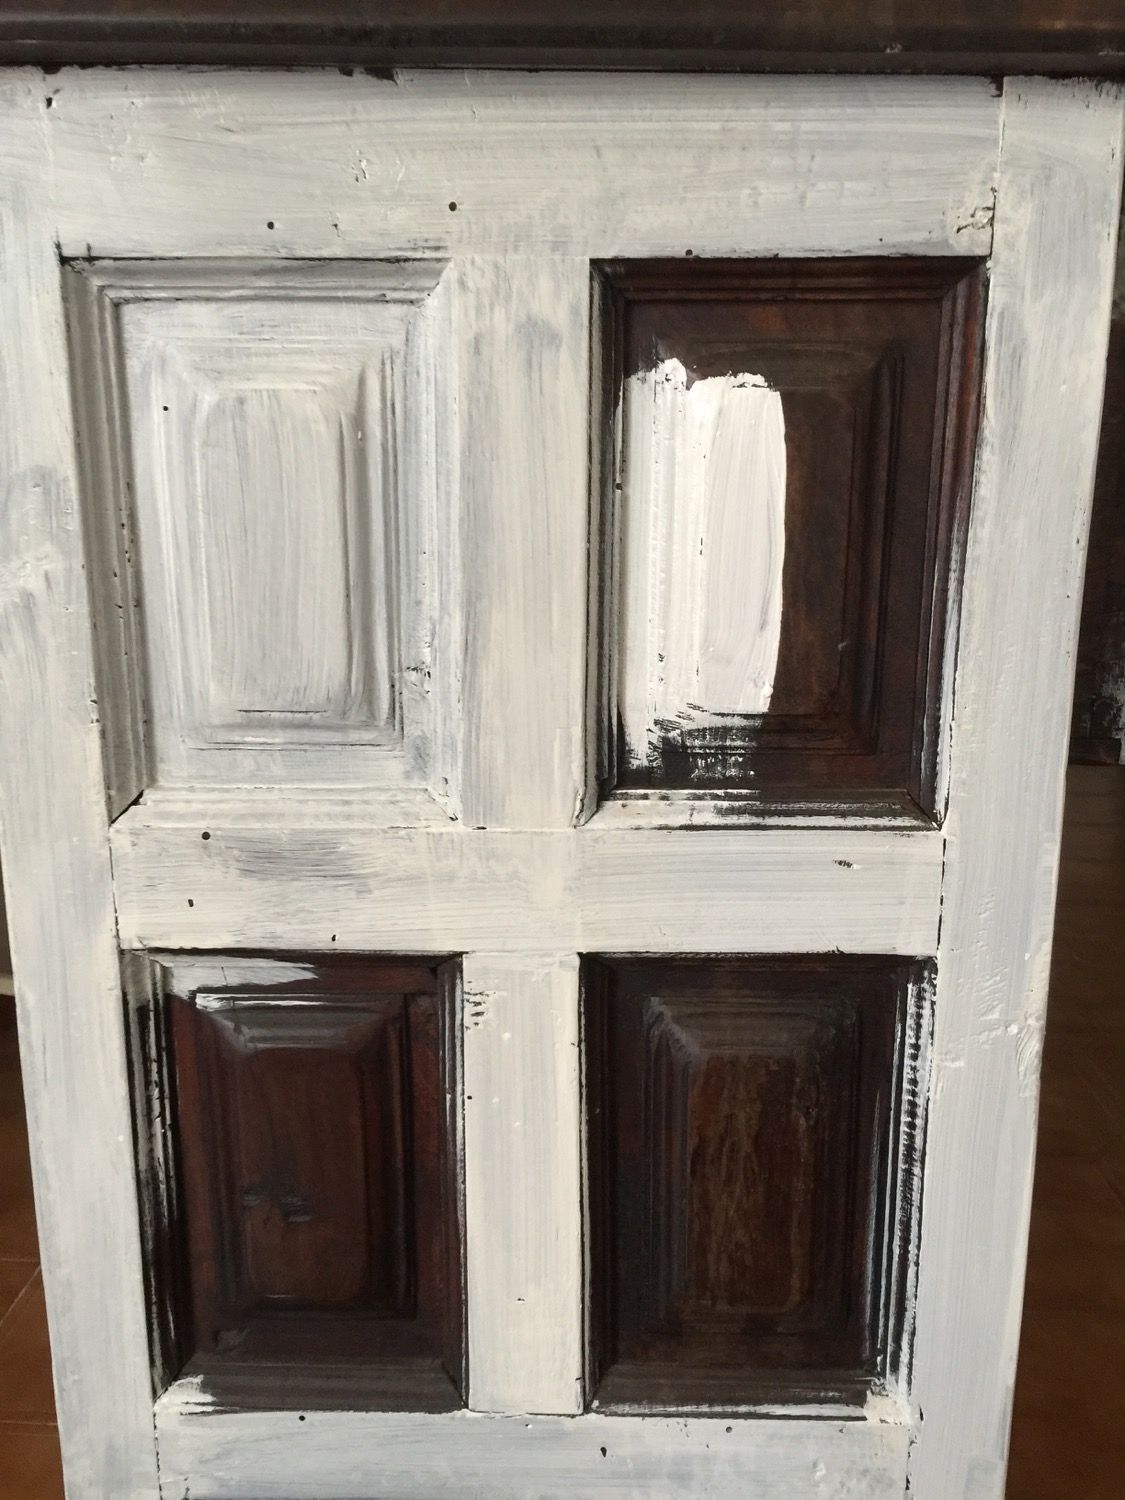
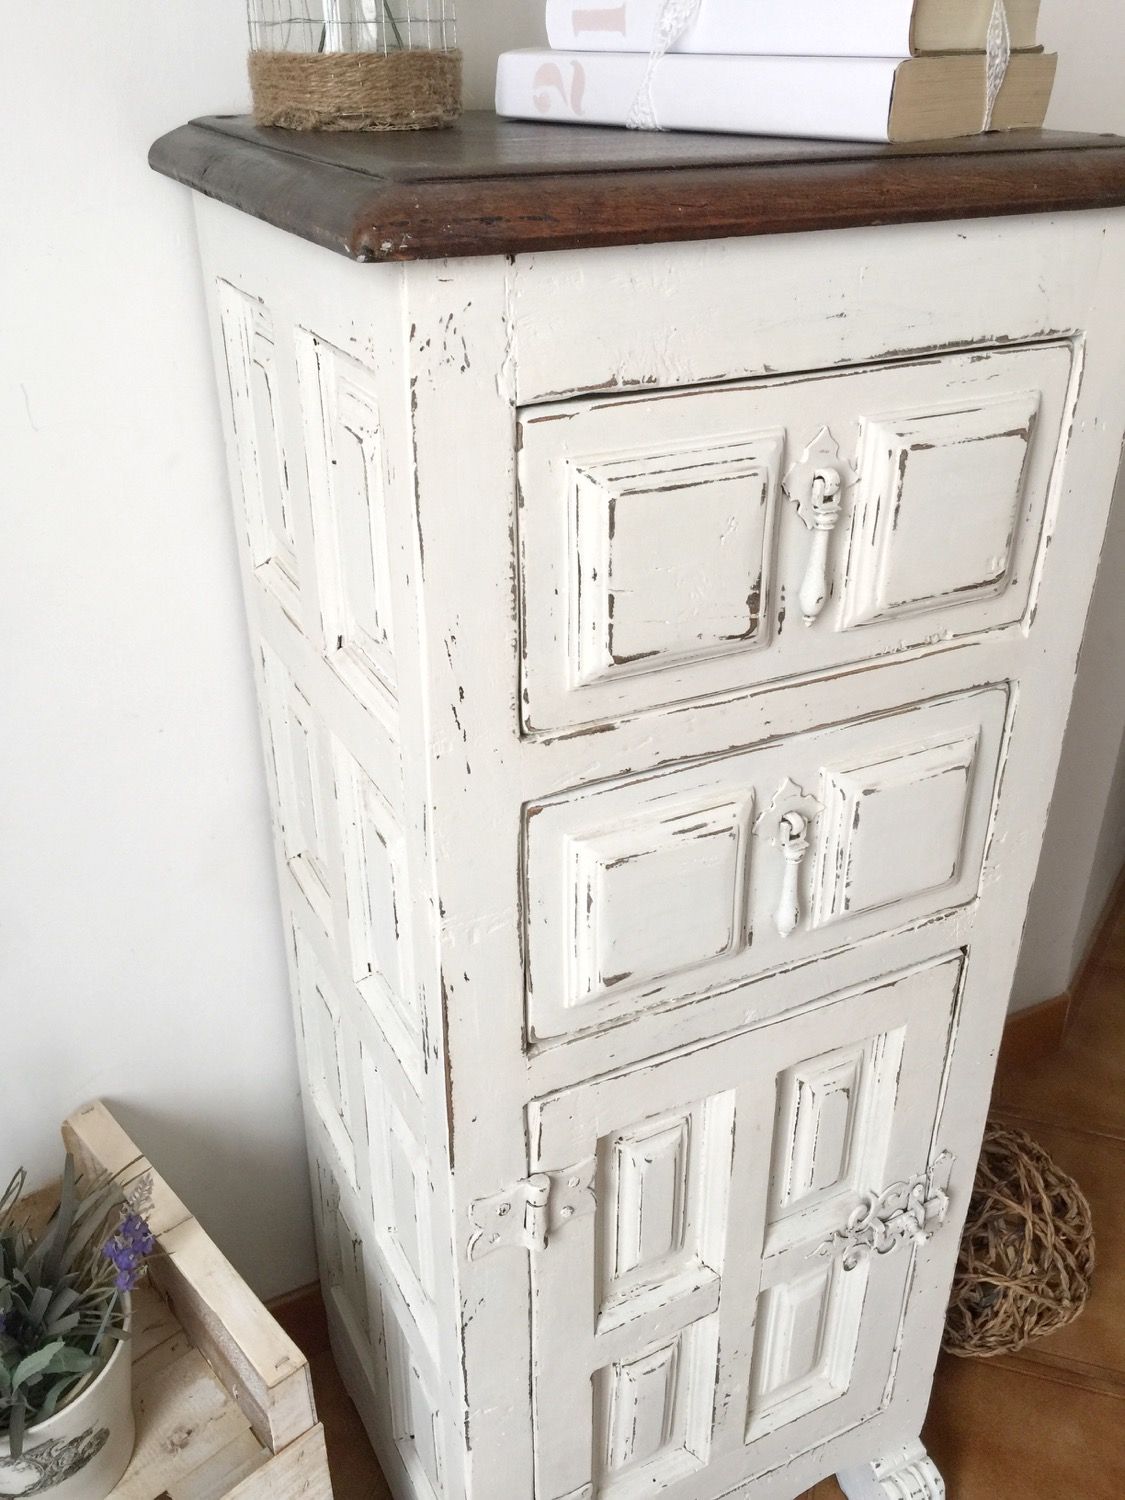
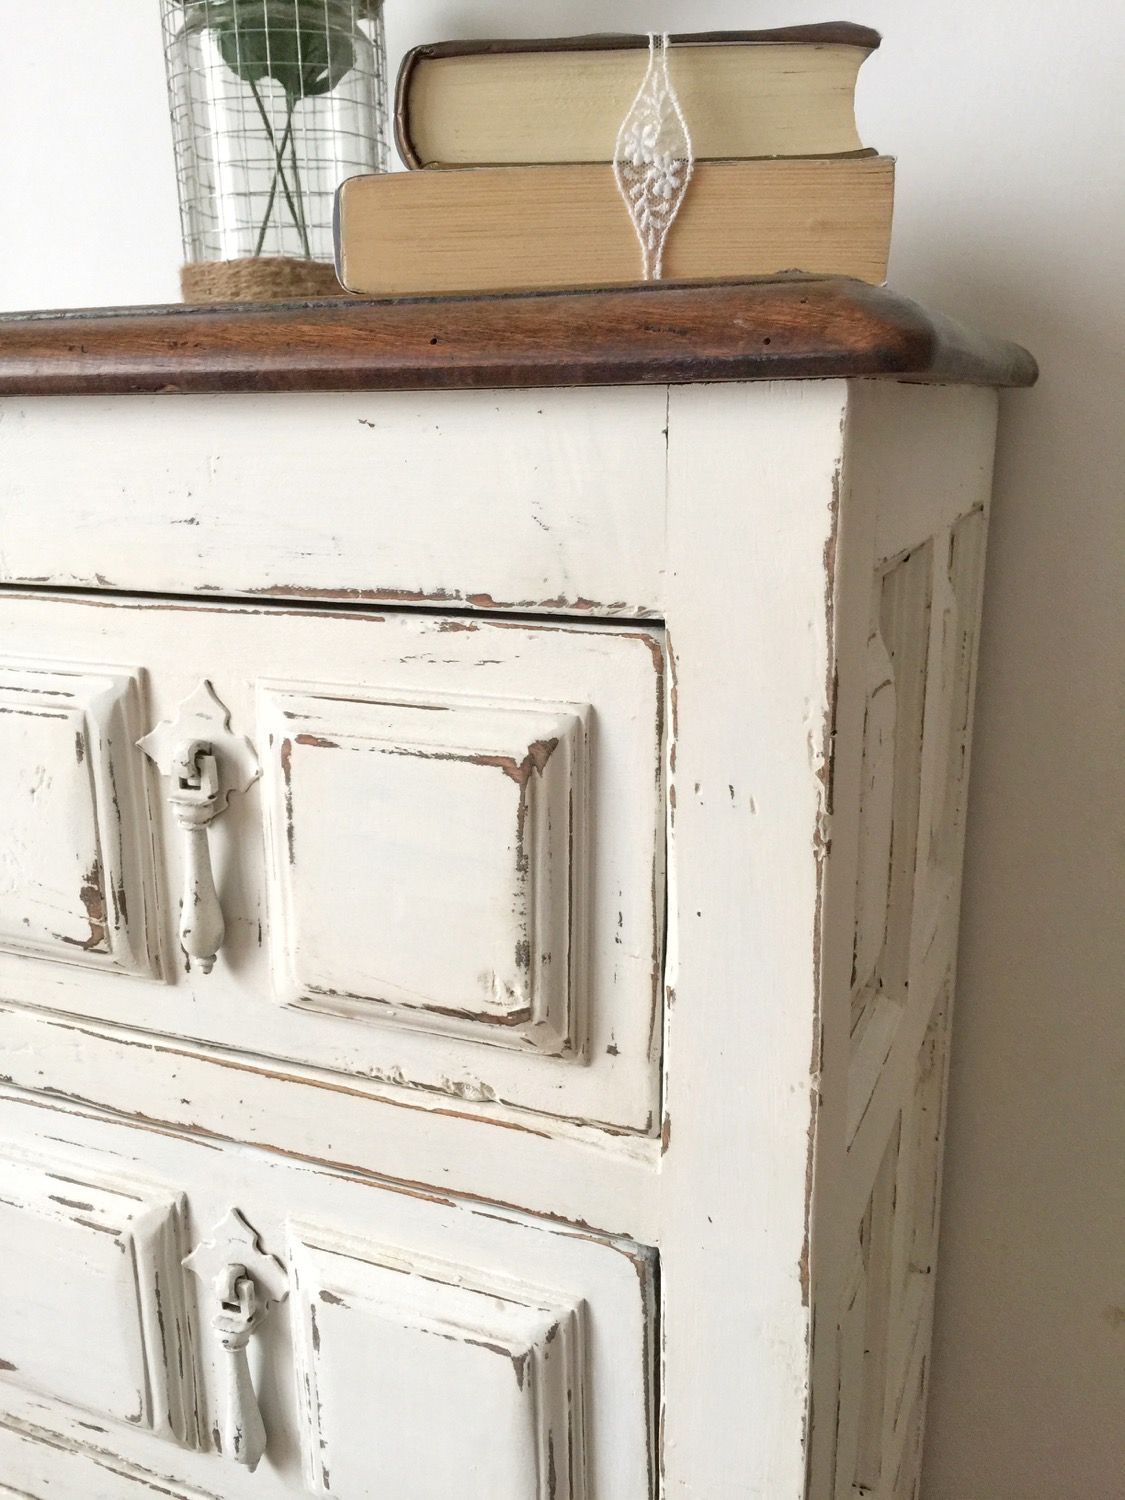
This is how it looked with a second coat. The wood was so dark that it required a third coat, sanding slightly with a sponge sander between coats.
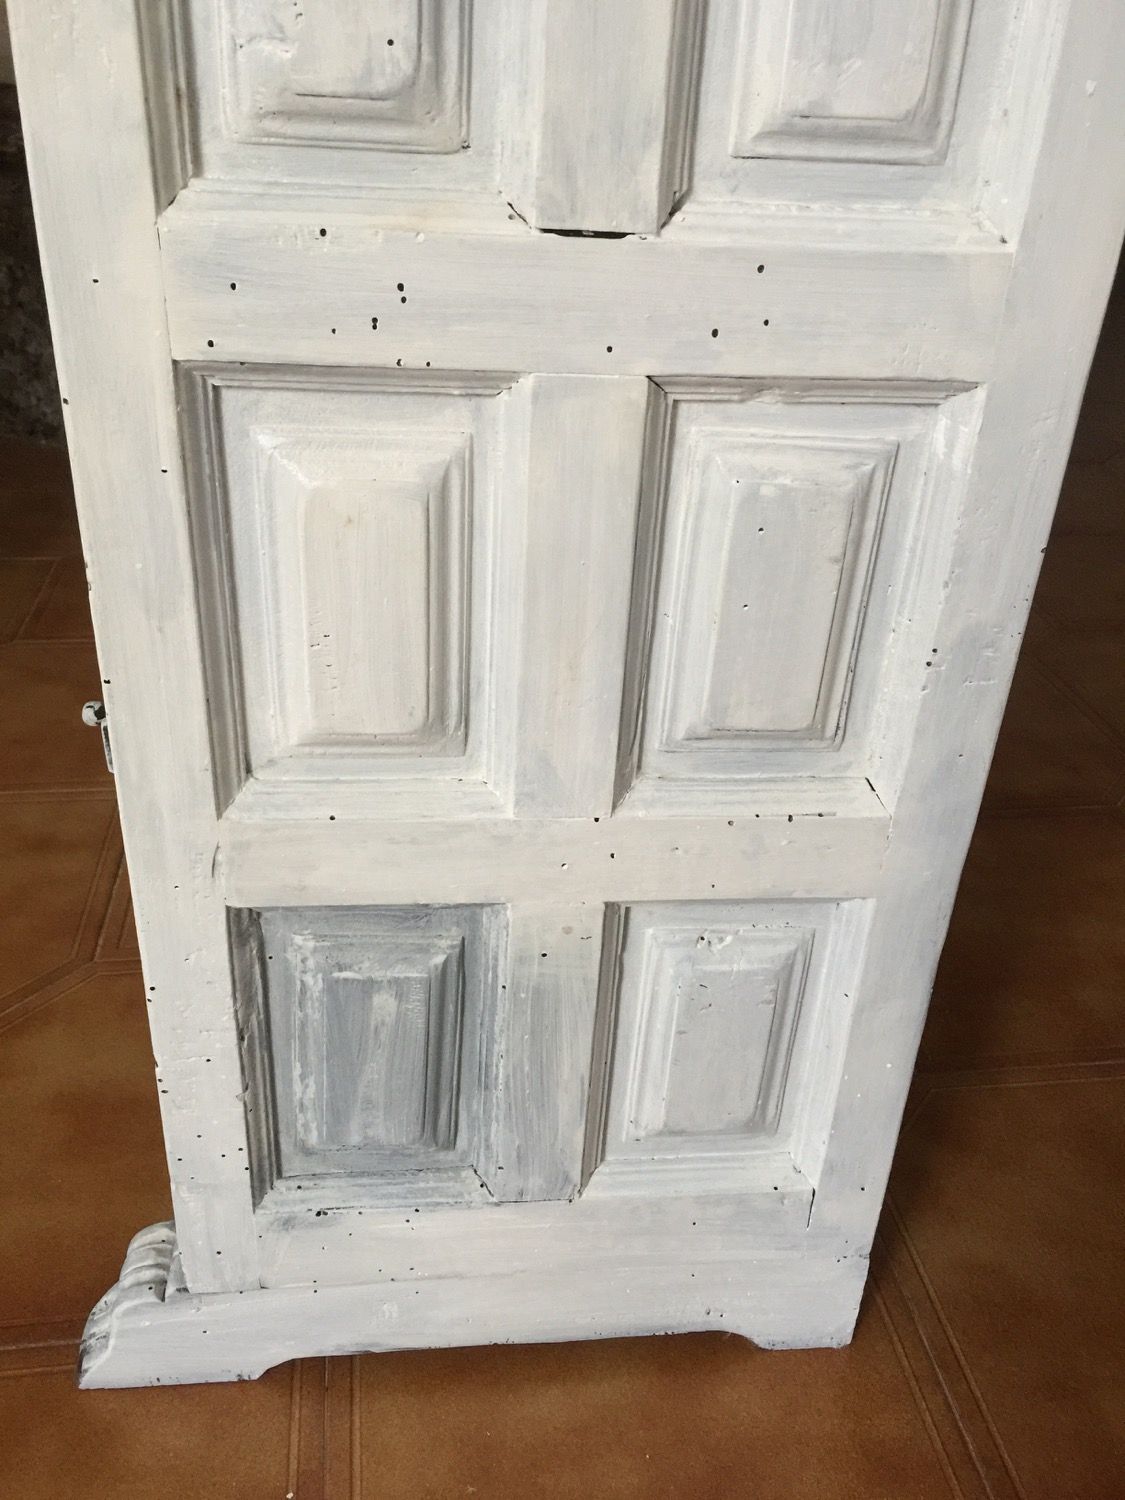
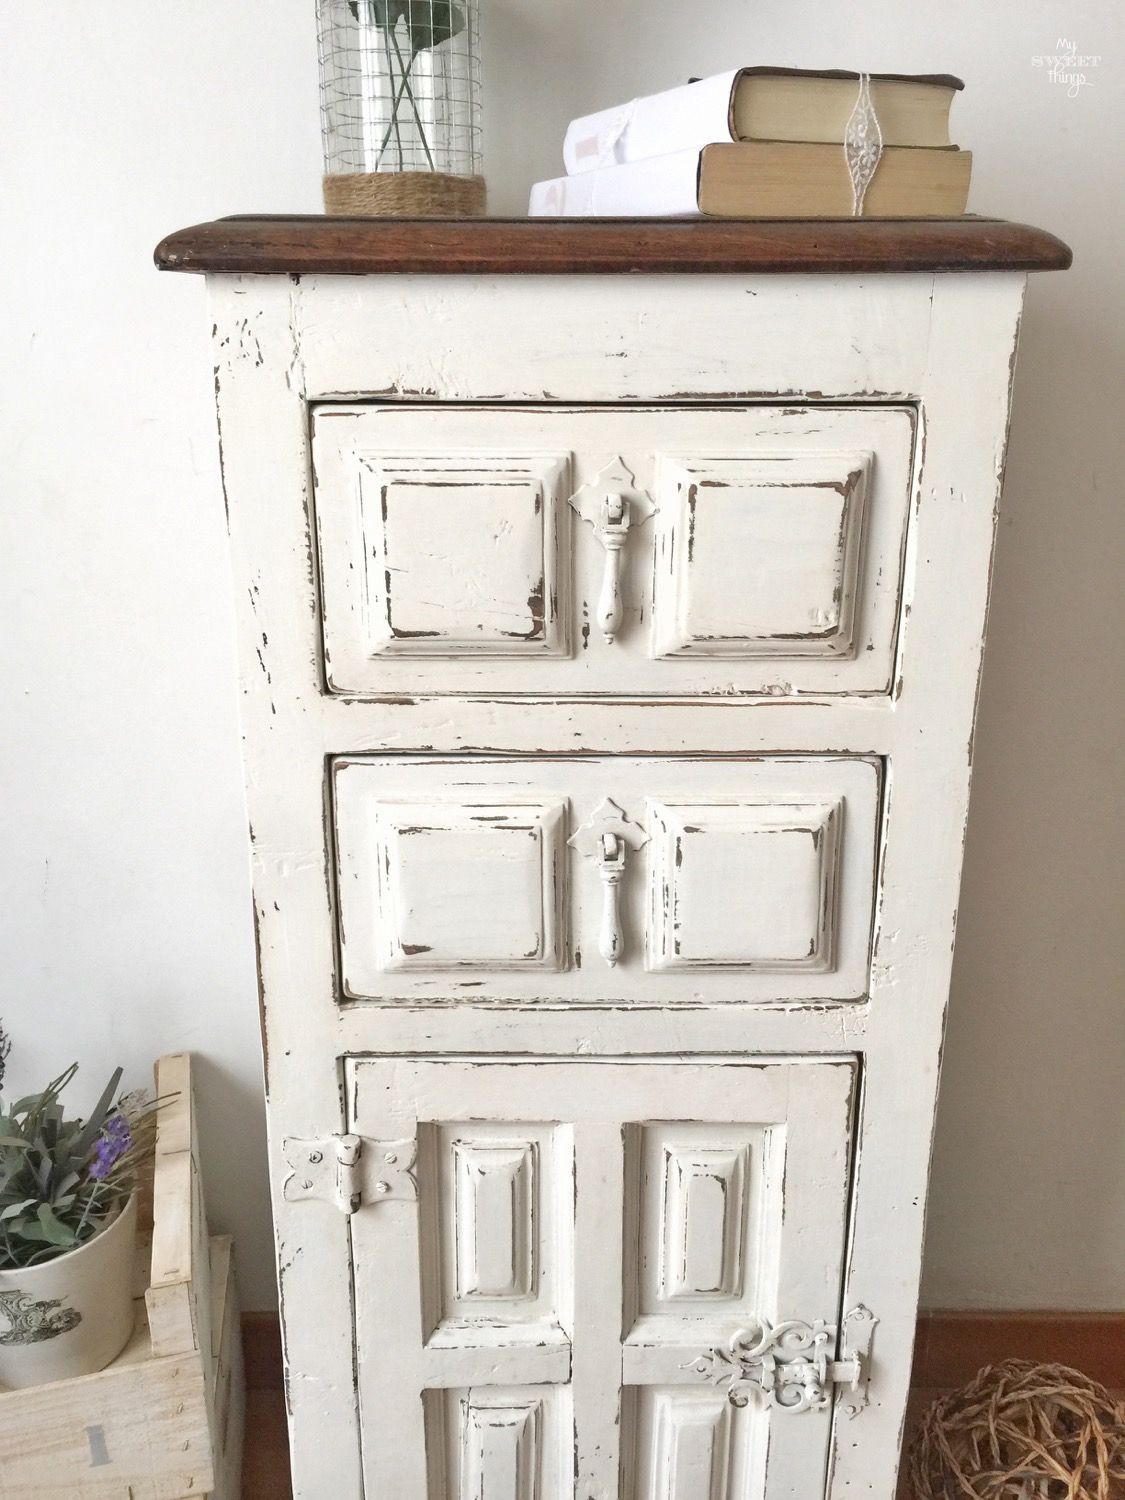
After the third layer of paint I let it dry and took my Ryobi electrical sander to distress the edges.
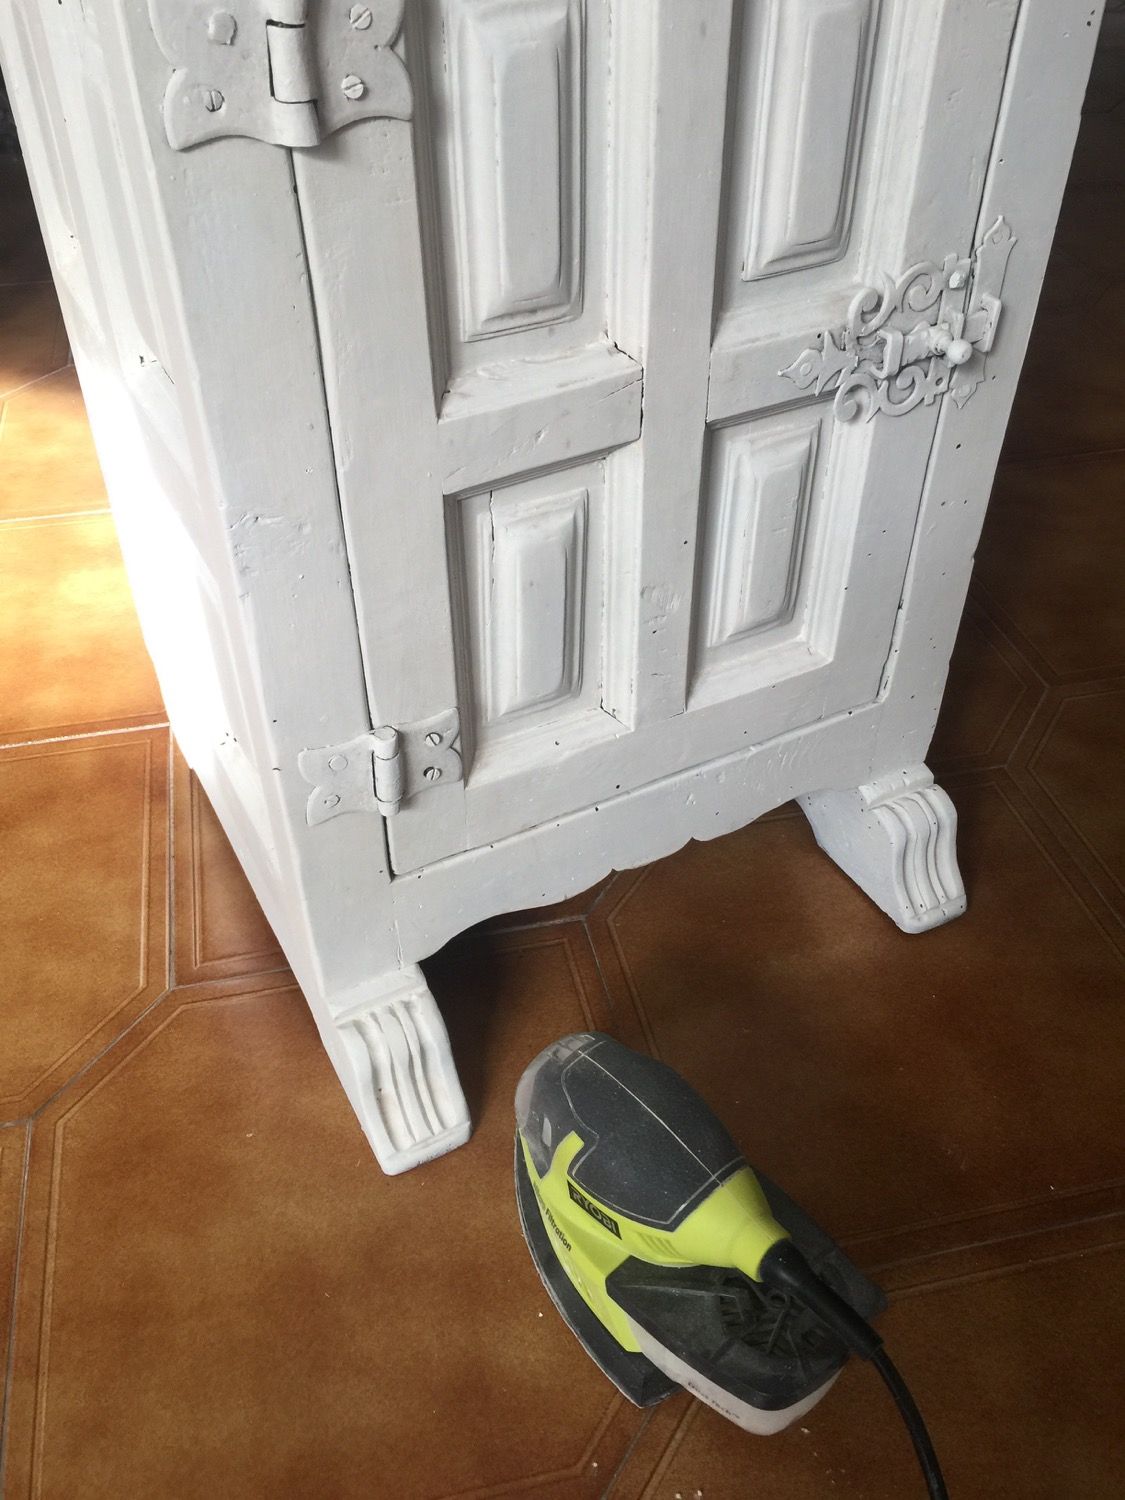
I told myself ‘be wild, baby’ and did a heavy distress on it.
You can distress by hand but it’s much harder. This machine is a life saver, it’s light-weighted but it does the job, I use it every day for lots of different projects.
It’s like placing the sander on it and let it do the work, it will sand the spots where it’s more likely the paint to chip by the action of time and use.
You can add some varnish or clear wax to protect it, but I loved the feel of it as it was so I skipped that step.
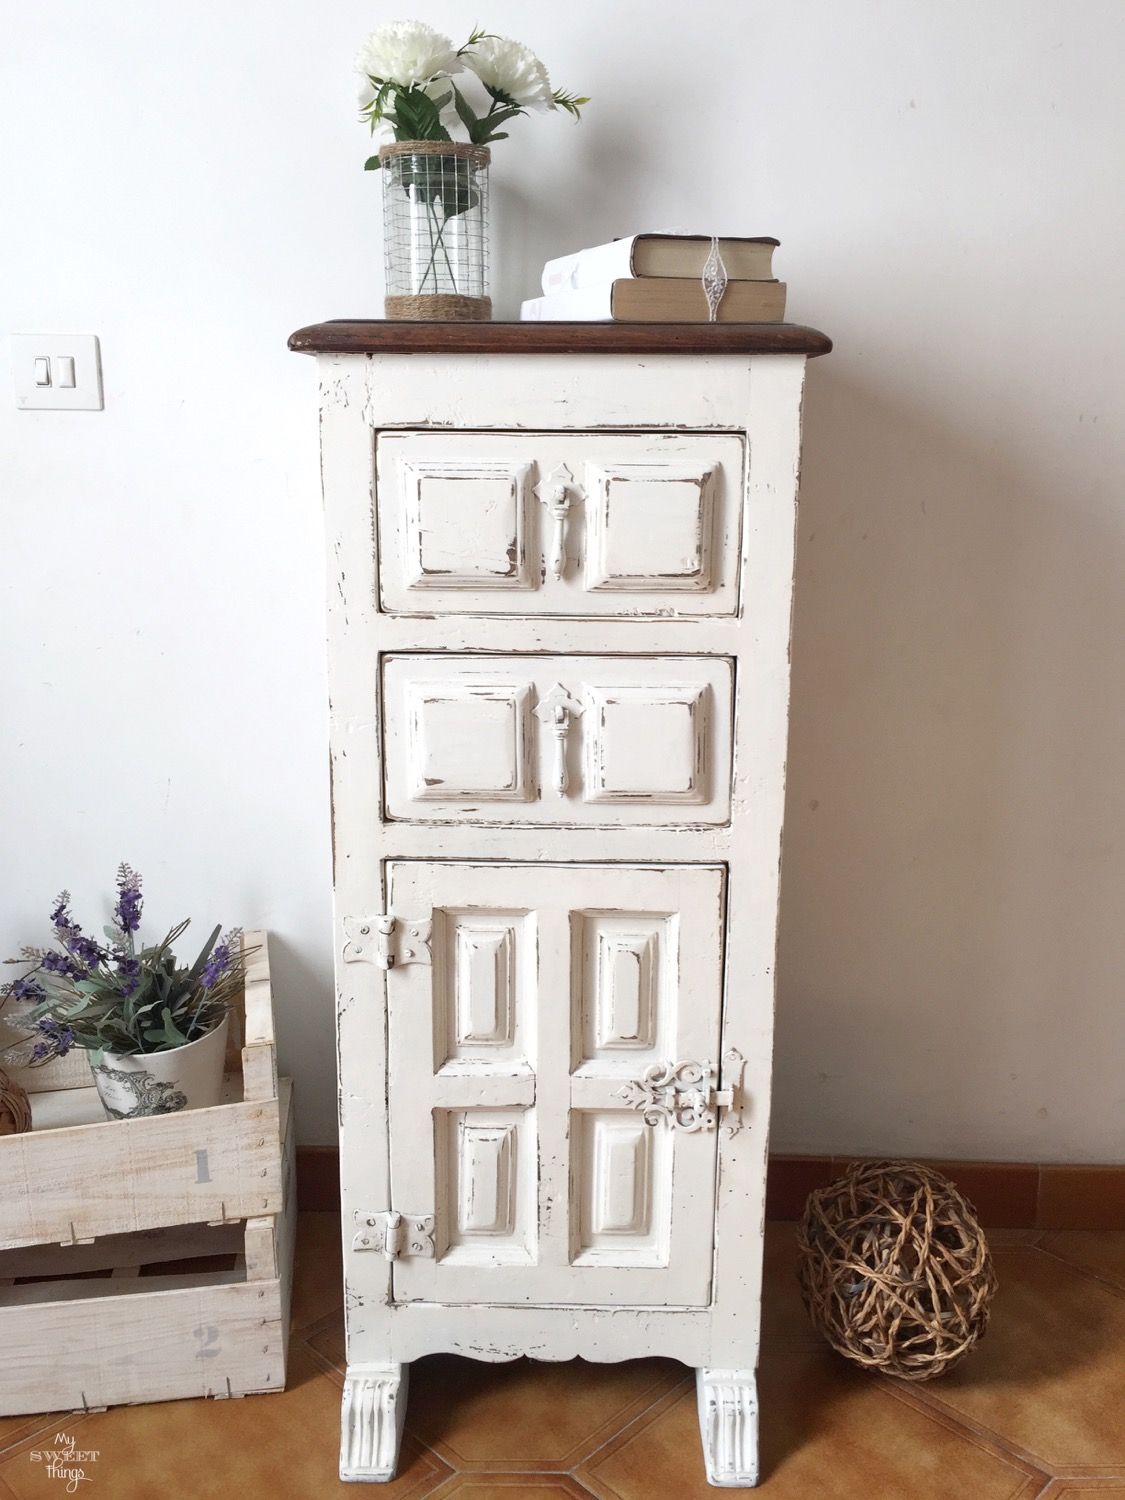
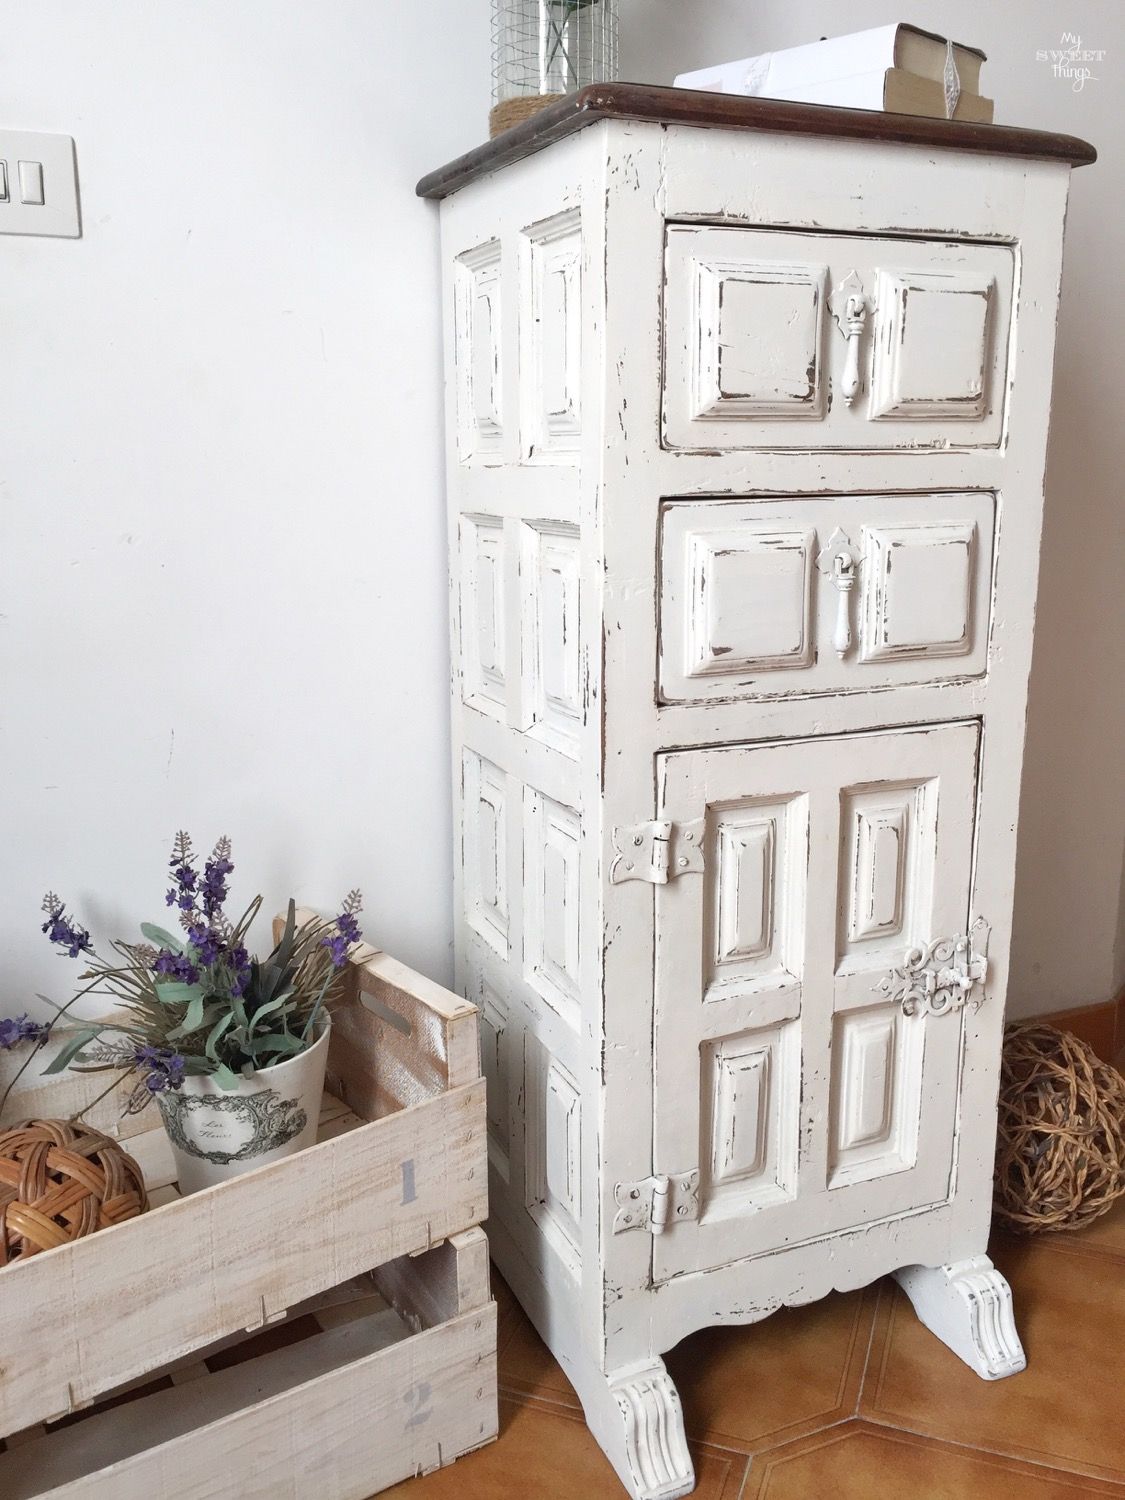
This is what I call a farmhouse style side table on the cheap.
I liked the contrast of the dark wood on top with the distressed body, kind of a farmhouse look.
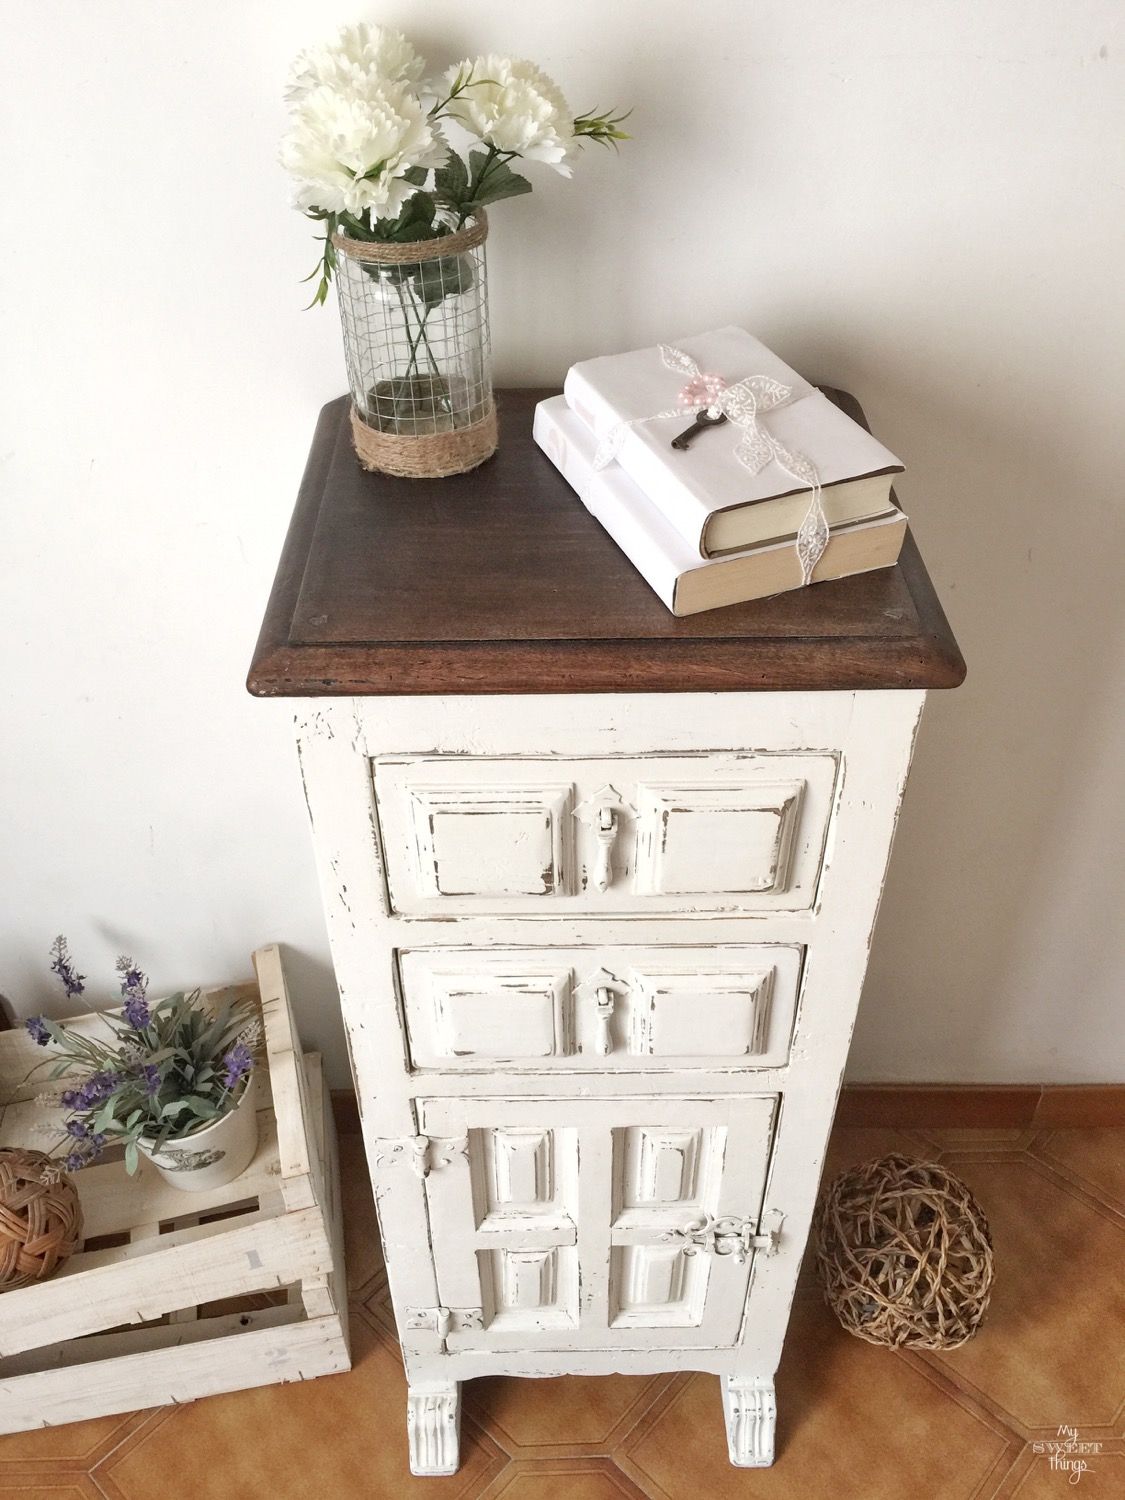
It only took me one morning to do it. Isn’t that cool? Just a few hours and you can have a totally different piece of furniture.
Distressing a piece of furniture make all the details pop. I am in love with this farmhouse style side table.
If you liked it remember to share it it others. Sharing is caring!
Now, let’s see what the other hosts have created ⇓⇓


Do you love DIY, recycling, home decor, furniture transformation and all kind of crafts? Then we have the same passion! I would love to share all my crazy ideas and projects with you so I would love if you SUBSCRIBE for my post e-mails.
I also share interesting content on Facebook and other social media, and I would love to hear from you! Not following me yet? Don’t be shy and stop by to say hello. Follow me on FACEBOOK, PINTEREST, INSTAGRAM, TWITTER, +GOOGLE.
Linking up to these parties
Any content on this website is created for inspiration purposes only. Creating with my suggested methods, products used and tools fail under your own risk. Please ensure you are following proper guidelines with anything used, and you receive professional guidance if you don’t know how to do something. For more details you can read my complete disclosure
Your cabinet turned out so pretty. Love what paint will do to a piece.
It’s beautiful! I also love the look of the dark wood against the white.
That is a really lovely showpiece now! I love the added distressing; it really gives it life. Pinned.
Wow! This looks amazing! I really like the white with the dark top. Love it!
Beautiful piece of furniture! I may have to try your homemade chalk paint for a few pieces I’d like to redo!
Great project! I love that type of storage furniture. The way you’ve painted it with the contrasting top looks fab!
Good call leaving the top. I also like the chippy look. DIY chalk paint for the win! Great makeover.
What a darling piece. You are so right about the distressing. And I like the contrast of the dark wood top and the white washed sides. Perfection.
Nice. I love how paint can breathe life into an old piece of furniture.
I love the way you distressed the table with a sander. You’re right- it will naturally hit the areas that would most likely be worn with time. Great job!
This is just lovely, I really like the dark wood top with the light paint.
I love this piece! You did a wonderful job painting it, and I love the wood top.
OMW Pili, it’s simply stunning now. Love, love, love how you kept the wooden top natural and the distressing you did to bring out the details.
I am using homemade chalk paint, too, and I am loving it for the same reasons as you. Cheap and you can whip up any colour you like. Your heavy distressing looks amazing! I really need to invest in a good and lightweight sander…I’m still doing mostly all my sanding by hand…phew. Pinning!
Privacy Overview